
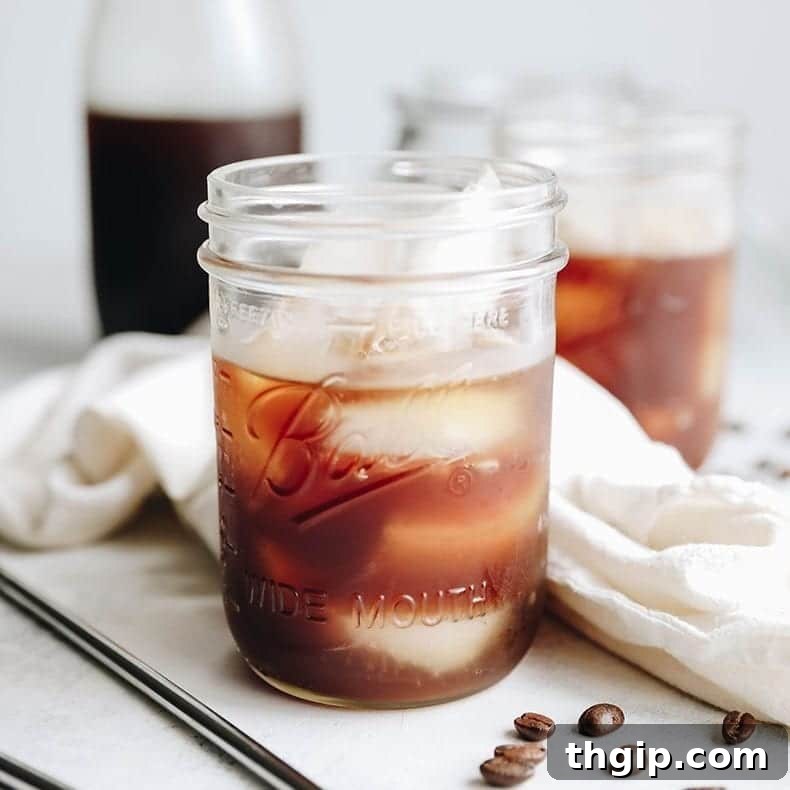
Unlock the secret to the best iced coffee you’ve ever tasted by making your own cold brew at home! This comprehensive, easy-to-follow guide for the ultimate cold brew coffee recipe provides the perfect coffee-to-water ratio and delivers an exceptionally smooth, rich flavor. Say goodbye to watery, bitter iced coffee and hello to the delicious, invigorating caffeine boost you crave, all from the comfort of your kitchen.

Table of Contents
- What is Cold Brew Coffee?
- Why Choose Cold Brew? Its Unique Benefits
- Essential Tools and Ingredients for Homemade Cold Brew
- How to Make Perfect Cold Brew Coffee: A Step-by-Step Guide
- Elevate Your Cold Brew: Delicious Add-Ins
- Homemade Cold Brew Coffee FAQs
- Sustainable Sipping: What to Do with Leftover Coffee Grounds
- Explore More Refreshing Drink Recipes
- Cold Brew Coffee Recipe Card
You might be wondering, “Another cold brew coffee post?” And to that, I say, “Yes, absolutely!” This article, originally published in 2014, has been meticulously updated and refined, reflecting years of dedicated experience. As an “OG” cold brew enthusiast, I’ve spent countless hours perfecting this craft, testing hundreds of batches, and achieving a truly superior result.
Given my extensive experience with cold brew coffee, I can confidently state that this is the BEST cold brew coffee recipe you’ll find online. I’ve refined this process through numerous trials to achieve ultimate flavor and smoothness. Forget expensive store-bought concentrates; with just a few simple tools and quality ingredients, you can effortlessly create your own outstanding cold brew concentrate at home, enjoying a taste that far surpasses commercial options.
What is Cold Brew Coffee?
At its core, cold brew coffee is exactly what its name implies: coffee that is brewed without heat. Unlike traditional hot coffee, which relies on hot water to rapidly extract flavor and caffeine, cold brew involves steeping coarse coffee grounds in cold or room-temperature water for an extended period, typically 12 to 24 hours. This slow, cool extraction process yields a coffee concentrate with a distinctly different chemical profile and flavor compared to its hot-brewed counterpart.
During this prolonged steeping, the cold water gently draws out the coffee’s desirable compounds – flavors, aromas, and caffeine – while leaving behind many of the bitter acids and oils that hot water tends to extract. The result is a highly concentrated liquid, often referred to as a concentrate, which is incredibly smooth, naturally sweet, and remarkably versatile.
Why Choose Cold Brew? Its Unique Benefits
Once you try homemade cold brew, you’ll understand why it has exploded in popularity. Beyond its refreshing chill, cold brew offers several significant advantages:
1. Significantly Less Acidic: One of the most compelling reasons to choose cold brew is its lower acidity. Hot water brewing releases more acidic compounds and oils from coffee beans. Cold water, however, extracts these elements much more slowly and selectively. This results in a coffee concentrate that is smoother, gentler on your stomach, and kinder to tooth enamel. If you experience heartburn or digestive discomfort from regular coffee, cold brew can be a game-changer.
2. Naturally Sweeter and Smoother Flavor Profile: Without the high acidity and bitterness often found in hot-brewed coffee, cold brew naturally possesses a sweeter, chocolatey, and caramel-like flavor. Its incredibly smooth finish requires less sugar and cream to balance, allowing the true notes of your chosen coffee beans to shine through. This makes it a delightful base for a wide range of beverages, from simple iced coffee to elaborate lattes.
3. Potent Concentrate for Customizable Strength: Cold brew produces a highly concentrated coffee liquid. This means it’s inherently strong, providing a robust flavor and a serious caffeine kick. The beauty of this concentrate is its versatility: you can dilute it to your preferred strength with water, milk, or ice, making it perfect for customizing your daily cup. Whether you need a gentle morning pick-me-up or a potent afternoon buzz, cold brew can deliver.
4. Unbeatable Convenience and Refreshment: Say goodbye to brewing hot coffee just to chill it for iced coffee, which often leads to diluted, watery results. Cold brew is made cold and enjoyed cold. Preparing a large batch means you have delicious coffee concentrate ready in your fridge for up to two weeks, saving you time and effort every morning. It’s the ultimate grab-and-go solution for hot summer days or any time you crave a perfectly refreshing coffee experience.
Essential Tools and Ingredients for Homemade Cold Brew
Making outstanding cold brew coffee doesn’t require any fancy, expensive equipment. You likely already have most of what you need in your kitchen. Here’s a detailed look at the simple items and quality ingredients that will help you craft the perfect cold brew concentrate:
- 1-2 Large Jars or Containers: Glass mason jars (32 oz or larger) are ideal due to their wide mouths, which make pouring and stirring easier. Any large pitcher or container with a lid will work, but ensure it’s non-reactive (glass or food-grade plastic) and large enough to accommodate your desired batch size.
- Fine Mesh Strainer & Filtration System: To achieve a clear, sediment-free cold brew, you’ll need an effective straining method. Options include:
- A nut milk bag: These are excellent for straining and can be reused.
- Several layers of cheesecloth: Layer 2-4 pieces for best results.
- A very fine mesh sieve: Combine with a paper coffee filter for extra clarity if desired.
- A French press: While useful for steeping, you may still need an additional strainer for finer sediment.
- Quality Coffee Beans: The type of coffee bean significantly impacts the final flavor.
- Quantity: You’ll need at least 1 cup of beans for a standard batch.
- Roast: Medium to dark roasts are commonly preferred for cold brew as they lend themselves well to the smooth, rich flavors. However, feel free to experiment with lighter roasts for brighter, fruitier notes.
- Freshness: Always use fresh, high-quality whole beans. Grinding them just before steeping maximizes flavor.
- Grind Size: This is CRUCIAL. The coffee must be coarsely ground, similar to cornmeal or sea salt. A coarse grind prevents over-extraction (which causes bitterness) and makes straining much easier, reducing sediment in your final product. If buying pre-ground, ask for a “French press grind.”
- Wooden Spoon: For thoroughly combining your coffee grounds and water. A long handle is helpful for deeper containers.
- Filtered Water: The quality of your water directly affects the taste of your cold brew. Tap water can contain chlorine or other impurities that impart off-flavors. Using filtered water ensures a clean, pure coffee taste. You’ll need about 5 cups of water to maintain the perfect 1:5 coffee-to-water ratio – a fantastic starting point for ultimate flavor extraction.
How to Make Perfect Cold Brew Coffee: A Step-by-Step Guide
Creating your own delicious cold brew concentrate is surprisingly simple. Follow these steps for a consistently perfect batch:
STEP 1: SELECT AND GRIND YOUR BEANS
Measure out 1 cup of your preferred whole coffee beans. If you have a coffee grinder, grind them coarsely at home. The consistency should resemble coarse cornmeal – not too fine, as this can lead to over-extraction and muddy straining. If purchasing from a coffee shop, specifically request a “French press grind” to ensure the ideal coarseness for cold brewing. This large particle size is essential for a clean, smooth brew and easy straining.
STEP 2: STEEP THE COFFEE IN WATER
In a large jar or jug, combine your freshly ground coarse coffee with 5 cups of filtered water. Stir thoroughly with a wooden spoon to ensure all the coffee grounds are fully saturated. This initial mixing is crucial for even extraction. Once combined, cover the container tightly to prevent any off-flavors from seeping in. Place it in the refrigerator and let it steep for at least 12 hours. For a stronger, bolder concentrate, you can extend the steeping time up to 24 hours. Patience is key here; the longer steep time at a cold temperature is what develops cold brew’s signature smoothness.
STEP 3: STRAIN FOR CLARITY
After the desired steeping time (minimum 12 hours), remove your jar from the refrigerator. Give it a gentle stir before carefully straining the coffee concentrate. Place your chosen straining tool—a fine mesh sieve lined with two layers of cheesecloth, or a dedicated nut milk bag—over a large bowl or a second clean jug. Slowly pour the coffee-and-grounds mixture through the strainer. Avoid squeezing the grounds, as this can force fine sediment and bitter flavors into your concentrate. Allow it to drip naturally until all the liquid has passed through. For an even clearer brew, you can strain it a second time.
STEP 4: SERVE OVER ICE
Now for the best part – enjoying your perfectly brewed cold brew! Fill a glass with several ice cubes. Because cold brew is a concentrate, it’s best served over ice, and you can even make coffee ice cubes (see FAQs) to prevent any dilution. Pour your freshly strained cold brew concentrate over the ice. Remember, this is a strong concentrate, so you’ll likely want to dilute it before drinking.
STEP 5: CUSTOMIZE WITH YOUR FAVORITE ADD-INS
This is where you can truly make your cold brew your own! Since cold brew concentrate is very strong, it’s typically diluted. Start by adding an equal amount of water or milk (dairy or non-dairy). Then, incorporate any other ingredients such as milk, cream, sugar, simple syrups, or the delicious add-ins listed below. Experiment with ratios and flavors until you find your perfect blend. Your homemade cold brew is now ready to enjoy!
Elevate Your Cold Brew: Delicious Add-Ins
Cold brew coffee is a powerful concentrate, often much stronger than regular coffee, offering a rich canvas for customization. While I often enjoy mine with just a splash of milk, the possibilities for enhancing its flavor are endless. Here are some fantastic suggestions to transform your cold brew:
- Homemade Almond Milk: A timeless classic that adds a creamy, nutty richness without overpowering the coffee’s natural flavor.
- Homemade Oat Milk: If you haven’t tried oat milk in your coffee, now’s your chance! Its natural sweetness and velvety texture complement cold brew beautifully. Plus, it’s incredibly easy to make.
- Vanilla or Caramel Simple Syrup: Easily make your own simple syrups to infuse sweet, classic flavors.
- Spices: A dash of cinnamon, nutmeg, or a pinch of cardamom can add warmth and complexity.
- Chocolate Syrup: For a decadent mocha cold brew, a swirl of chocolate syrup is always a good idea.
- Add a splash of cold brew to this Iced Golden Milk Latte: Combining the robust coffee flavor with the spiced, soothing notes of turmeric creates a unique and invigorating drink.
- Spice things up a notch with this Iced Horchata Latte: The creamy, spiced rice milk blend pairs unexpectedly well with cold brew for an exotic twist.
- Try this lavender simple syrup for a floral-infused cold brew: A delicate and fragrant addition that elevates your coffee experience.
- Add your cold brew to this Pumpkin Cream Cold Brew Recipe: A seasonal favorite that turns your cold brew into a cozy, spiced indulgence.
Homemade Cold Brew Coffee FAQs
Absolutely! This cold brew recipe is highly scalable. If you have a large enough glass container (like a gallon jar or food-grade bucket), you can easily double, triple, or even quadruple the recipe, maintaining the 1:5 coffee-to-water ratio. Keep in mind that for larger batches, you might need several vessels for straining, or a larger nut milk bag, but the process remains the same. Batch brewing is a great way to ensure you always have a ready supply of concentrate.
Once brewed and strained, your cold brew concentrate can be stored in an airtight container in the refrigerator for up to 1 to 2 weeks. The lack of heat in the brewing process means it has a longer shelf life than regular hot coffee. Always ensure it’s kept chilled and covered to maintain its freshness and flavor. You’ll find it incredibly convenient to have a batch ready for a quick coffee whenever you need it.
The beauty of cold brew is its versatility, allowing you to experiment with different beans. I typically use a high-quality dark roast coffee from a local coffee shop or roaster, as it often produces a rich, chocolatey, and low-acid concentrate. However, you can use whatever roast you prefer! Medium roasts can yield a balanced, smooth brew, while lighter roasts might offer brighter, fruitier notes. Remember that darker roasts generally have slightly less caffeine than light or medium roasts due to longer roasting times, which burn off some caffeine. The most important factor is using fresh, coarsely ground beans.
Yes, a French press is an excellent tool for making cold brew coffee! It simplifies the steeping process by having a built-in filter. To adapt this recipe for a standard 34-ounce French press, you will likely need to quarter the recipe. Mix about 1/2 cup of coarsely ground coffee (again, aim for French press size) with 2.5 cups of filtered water directly in the French press. Let it soak in the fridge for at least 12-24 hours. After steeping, slowly push down the French press plunger, then pour the liquid over ice. Depending on the fineness of your grind, you may still wish to strain your cold brew concentrate through an additional fine mesh strainer or cheesecloth for a completely sediment-free result.
Absolutely, and it’s a brilliant idea! If you want to really amp up your caffeine kick and prevent your iced coffee from getting watered down, simply make a batch of this cold brew coffee concentrate and freeze it into ice cubes using an ice cube tray. When you serve your cold brew, use these coffee ice cubes instead of regular water ice cubes. As they melt, they’ll simply add more coffee flavor and caffeine, keeping your drink robust and delicious until the very last sip.
Sustainable Sipping: What to Do with Leftover Coffee Grounds
Don’t let those spent coffee grounds go to waste after making your delicious cold brew! They are surprisingly versatile and can be repurposed in many beneficial ways around your home and garden. Here are a few creative and eco-friendly ideas:
- DIY Vanilla Latte Soap: Repurpose coffee grounds into a luxurious exfoliating soap. Coffee grounds act as a natural abrasive, perfect for sloughing off dead skin cells, while the caffeine can help tighten and brighten the skin. Try making this DIY Vanilla Latte Soap for a wonderfully scented and exfoliating experience.
- Invigorating Coffee Face and Body Scrub: Skip the expensive spa treatments and create your own natural scrub. Combine coffee grounds with a bit of coconut oil or olive oil and a touch of sugar for a fantastic, all-natural exfoliator. The antioxidants in coffee are also great for your skin. DIY this coffee, face and body scrub to leave your skin feeling smooth and revitalized.
- Enrich Your Garden: Coffee grounds are a fantastic addition to your garden soil. They’re rich in nitrogen, which is essential for plant growth, and can improve soil structure and drainage. Sprinkle them directly onto the soil or add them to your compost pile. However, remember to only add them to acid-loving plants like azaleas, rhododendrons, roses, and blueberries, as they can slightly lower soil pH.
- Natural Odor Eliminator: Coffee grounds are excellent at absorbing unpleasant odors. Place a small bowl of dried grounds in your refrigerator, freezer, or even a stinky shoe to neutralize unwanted smells.
- Gentle Abrasive Cleaner: Their slightly abrasive texture makes coffee grounds perfect for scrubbing stubborn grime off pots and pans, without scratching surfaces. Just mix with a little dish soap.
Explore More Refreshing Drink Recipes:
- How to Make Oat Milk Lattes: Learn to craft your own creamy, dairy-free lattes.
- Healthy Hot Chocolate: A guilt-free indulgence for chocolate lovers.
- Matcha Turmeric Latte: A vibrant, health-boosting drink combining two powerful superfoods.
- Cold Brew Iced Tea: Discover the smooth, non-bitter secret to perfect iced tea.
- Turmeric Latte Recipe: A comforting, anti-inflammatory golden milk classic.
Print Recipe
Cold Brew Coffee Recipe

4.9 from 9 reviews
Start cold-brewing your own coffee for the best iced coffee ever! This easy step-by-step for cold brew coffee recipe has the perfect coffee to water ratio and ultimate flavor to give you the delicious caffeine boost you need.
- Author: Davida Lederle
- Prep Time: 2 minutes
- Cook Time: 0 minutes
- Total Time: 12 hours
- Yield: 5 cups
- Category: Drinks
- Method: Soak
- Diet: Vegan
Ingredients
- 1 cup good quality ground coffee beans, ground coarsely (French press grind recommended)
- 5 cups filtered water
- Ice cubes (optional: freeze leftover coffee in an ice cube tray)
- Optional add-ins: milk (dairy or non-dairy), sugar, simple syrups, spices
- Supplies: large jug or jar (at least 6-cup capacity), fine-mesh strainer (or cheesecloth or a nut-milk bag), wooden spoon
Instructions
- In a large jar or jug, combine the coarsely ground coffee and filtered water. Stir well to ensure all grounds are saturated.
- Cover the container tightly and let it steep in the refrigerator for at least 12 hours, or up to 24 hours for a stronger concentrate.
- After steeping, remove from the refrigerator and give it a final stir with a wooden spoon.
- Strain the coffee concentrate. Place two layers of cheesecloth over a large bowl or jug, or use a nut-milk bag, then slowly pour the coffee mixture through. Do not squeeze the grounds.
- Fill a glass with several ice cubes (coffee ice cubes work great!). Pour approximately 1 cup of the cold brew concentrate over the ice.
- Dilute the concentrate to your taste. Add in milk (dairy or non-dairy), sugar, simple syrups, or any other mix-ins of your choice. Stir and enjoy!
- Store any remaining cold brew concentrate in an airtight container in the refrigerator for up to 1-2 weeks.