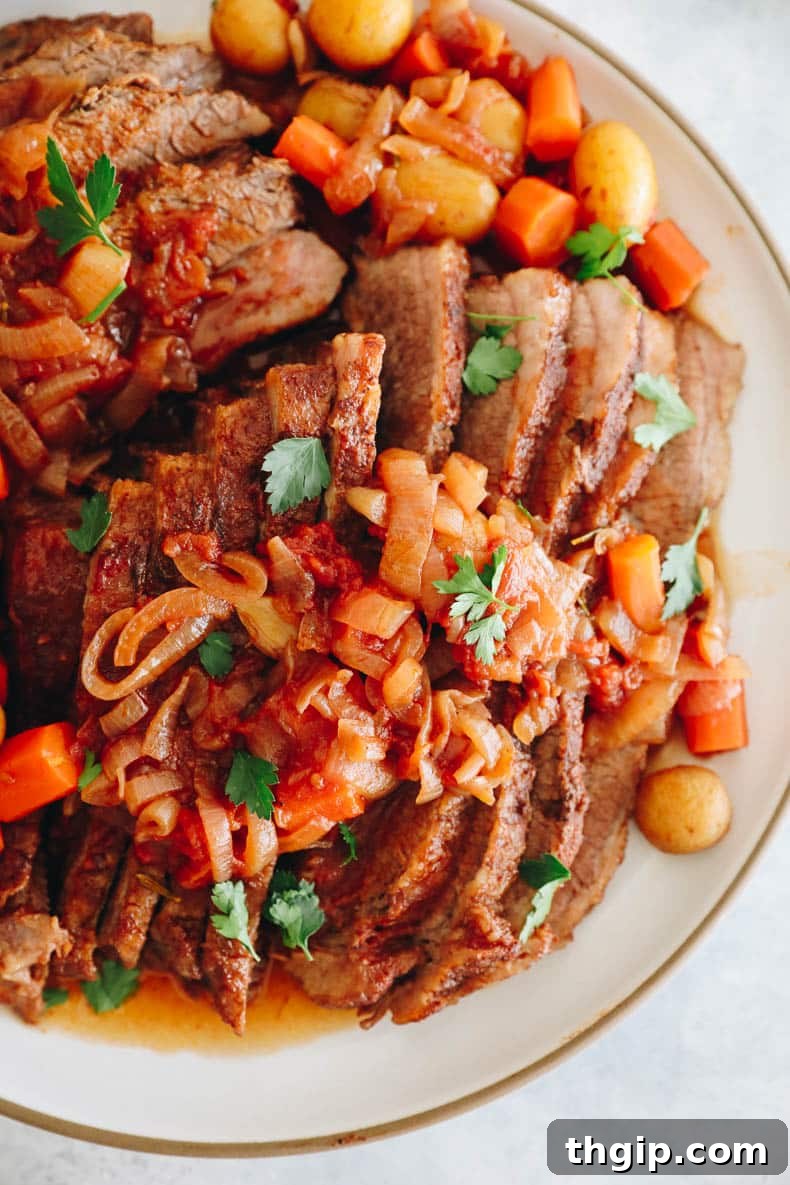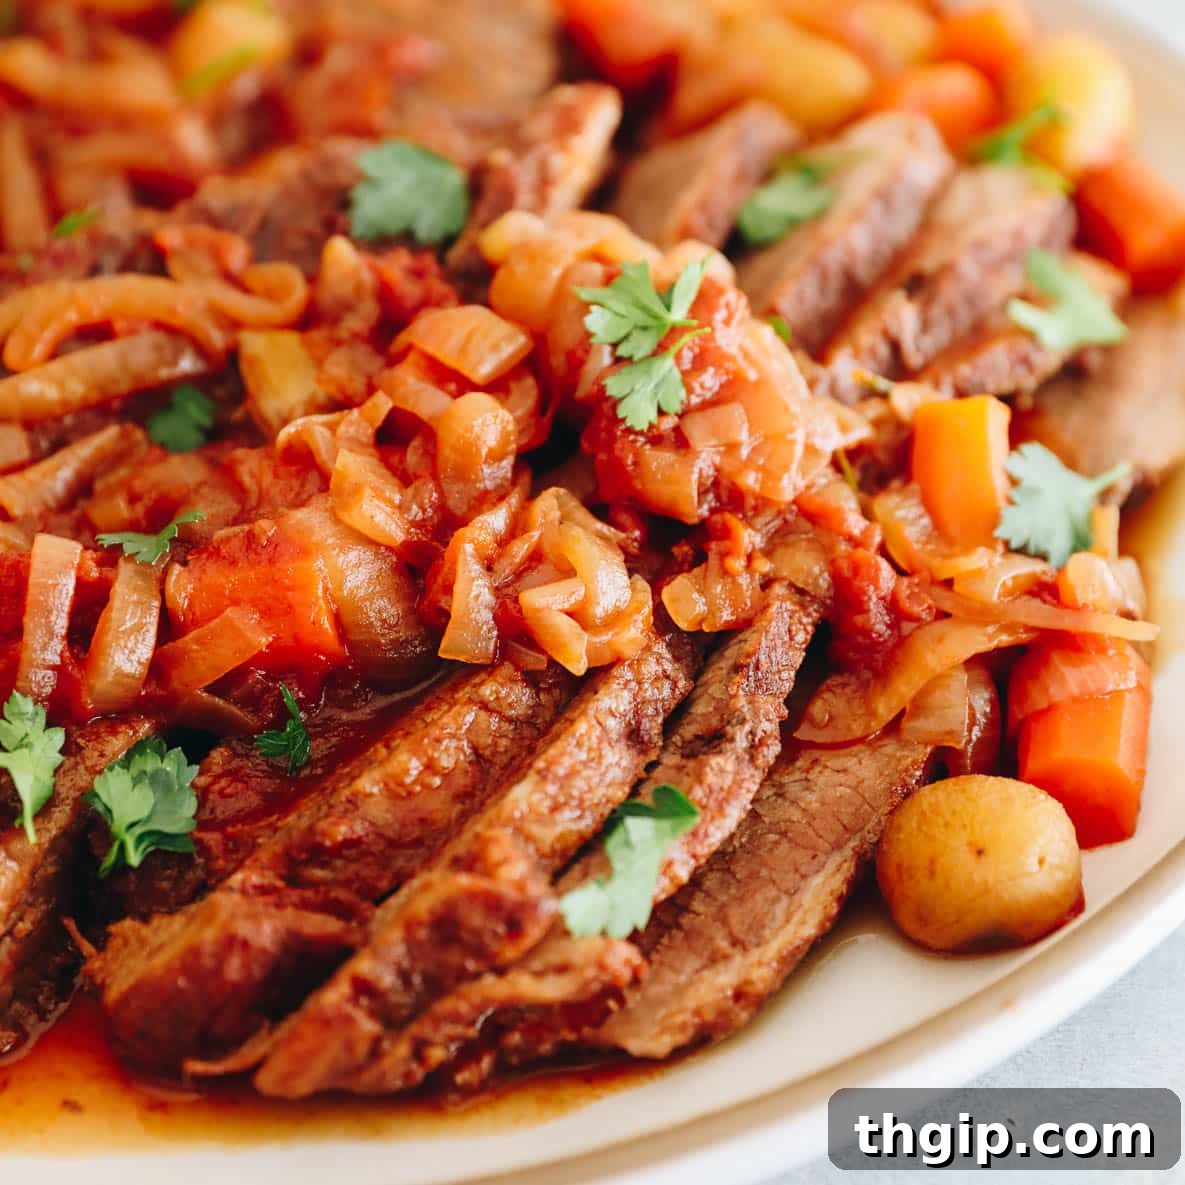
This classic Jewish brisket recipe is a culinary masterpiece, perfect for any special celebration, be it Passover, Rosh Hashanah, or a festive Shabbat dinner. Renowned for its unparalleled tenderness, exquisite sweetness, and succulent juiciness, this brisket is slow-cooked to perfection in a rich, caramelized onion and tomato sauce. Every bite promises a melt-in-your-mouth experience that will delight everyone at your table. If you’re seeking a reliable, go-to oven-braised brisket recipe that consistently delivers spectacular results, you’ve found your new favorite!
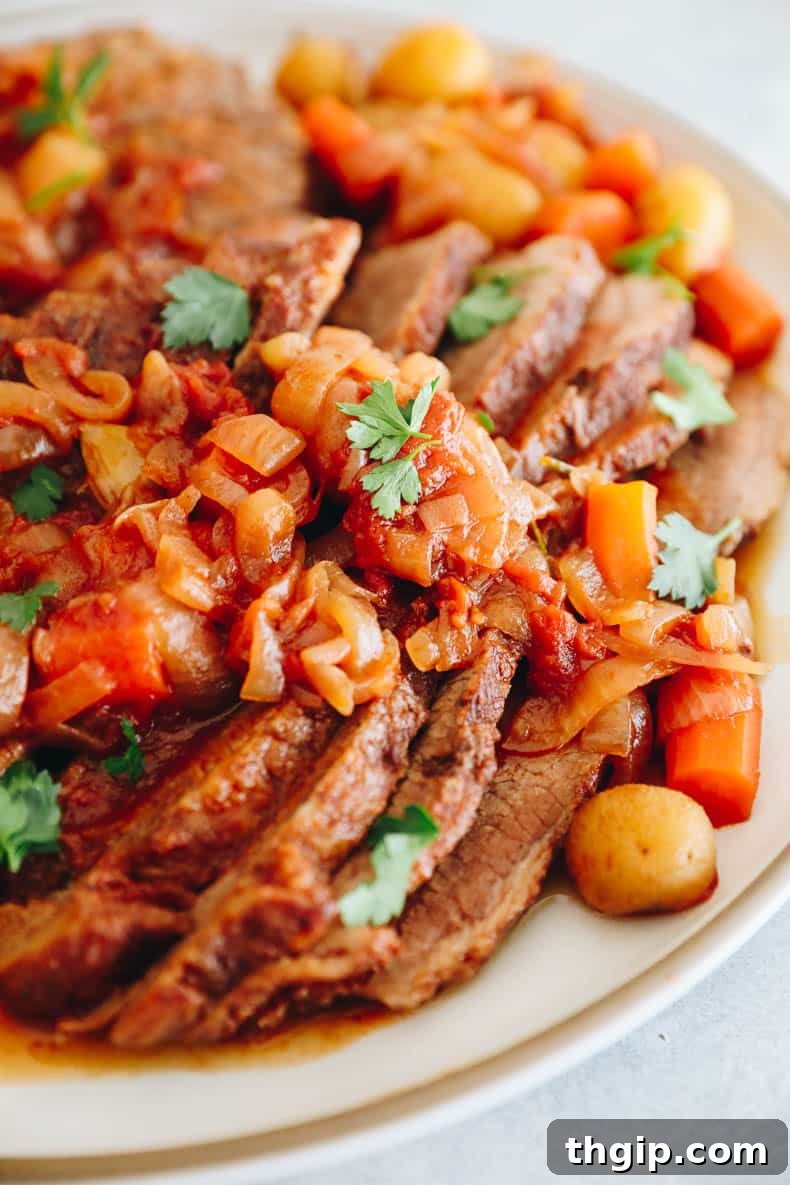
Table of Contents
- Expert Tips for the Perfect Oven Brisket
- What Exactly is Brisket?
- Essential Ingredients for Brisket Perfection
- Choosing the Best Brisket Cut
- Step-by-Step: How to Make Oven-Roasted Brisket
- Brisket FAQs: Your Questions Answered
- Storage & Freezing Instructions
- More Beloved Jewish Recipes You’ll Love:
- Full Brisket Recipe Card
Expert Tips for Achieving the Perfect Oven Brisket
Achieving a truly phenomenal brisket is less about secret ingredients and more about meticulous technique. Follow these proven tips to ensure your oven-braised brisket is consistently tender, flavorful, and unforgettable:
Dry brine your brisket for maximum flavor. While not strictly mandatory, a good dry brine with kosher salt works wonders. It draws moisture out, then reabsorbs it, ensuring a more flavorful and incredibly tender meat. Aim for at least 12 hours, or even up to 24 hours, for the best results.
Bring brisket to room temperature before cooking. After brining in the fridge, remove your brisket about an hour before you plan to sear it. This crucial step allows the meat to cook more evenly from edge to center, preventing a cold core from slowing down the cooking process.
Consider slicing your brisket in half if needed. If you’re using a standard Dutch oven or a cooking vessel that’s too small for your entire brisket, don’t hesitate to cut it in half. This makes searing much more manageable and ensures both pieces fit comfortably in the pot for even braising.
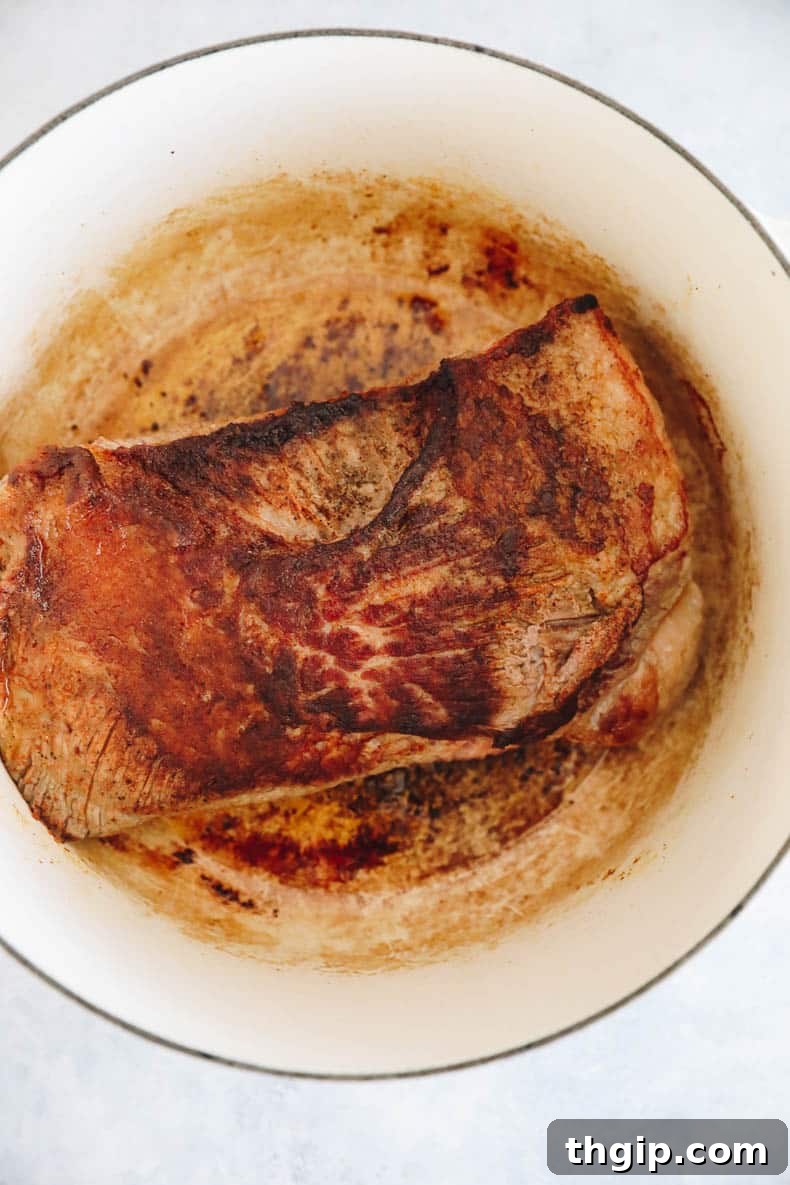
Sear your brisket thoroughly. This step is non-negotiable! Searing the brisket on all sides creates a beautiful, crusty layer (the Maillard reaction) that locks in moisture and develops incredible depth of flavor. This golden crust contributes significantly to the final taste and texture of your slow-cooked brisket.
Always cook low and slow. Patience is a virtue when it comes to brisket. Resist the urge to rush the cooking process. Brisket, being a tough cut, requires prolonged, gentle heat to break down its connective tissues into succulent gelatin. You’ll know your brisket is ready when a meat thermometer reads between 195-205 degrees F (90-96°C) and it’s fork-tender, meaning a fork twists easily in the meat.
Rest and get saucy before serving. Once cooked, remove the brisket from the oven and let it rest, covered, for at least 20-30 minutes before slicing. This allows the juices to redistribute throughout the meat, ensuring every slice is incredibly moist. Then, slice against the grain (this is paramount for tenderness!) and place the slices back into the rich, savory sauce. This final “saucy” step ensures each piece is coated in the delicious caramelized onion and tomato gravy, making it the most delicious brisket you’ve ever had!
Lately, I’ve found myself increasingly drawn to celebrating my Jewish heritage through the comforting tradition of cooking. In times when the Jewish community faces challenges, leaning into moments of “Jewish joy” feels profoundly meaningful. For me, that joy is often found in the kitchen, a place where many Jews intuitively understand that food equals love. This quest led me back to my Bubby’s cherished brisket recipe. While hers famously included a generous amount of ketchup and, if I recall correctly, a splash of Coca-Cola, my version is a refined homage – a delicious modern take that captures the essence of her love without veering too far from tradition. It’s been a journey of weeks, perfecting this oven-braised brisket. The result is a testament to the power of slow cooking and simple, yet robust, ingredients. While I dream of adapting this recipe for the slow cooker and Instant Pot someday (after I’ve recovered from eating what feels like 20 lbs of brisket in recent weeks!), for now, savor this perfect rendition, especially if you’re preparing for Passover or any occasion that calls for a truly spectacular centerpiece dish.
What Exactly is Brisket? Understanding This Remarkable Cut
Brisket is a quintessential cut of beef derived from the lower chest or breast of the cow. It’s characterized by its inherent toughness, packed with muscle fibers and a significant amount of connective tissue. This composition makes it unsuitable for quick cooking methods. However, it’s precisely this challenging nature that makes brisket so extraordinary when prepared correctly.
The magic happens through slow cooking techniques, such as braising (as in this recipe), smoking (popular in Texas-style BBQ), or slow roasting. When subjected to low, sustained heat over several hours, the tough collagen in the connective tissue gradually breaks down and transforms into gelatin. This metamorphosis is what renders brisket incredibly tender, moist, and deeply flavorful. The gelatin enriches the meat, creating a succulent texture that practically melts in your mouth.
Brisket is a remarkably versatile cut, central to various culinary traditions. Beyond the braised Jewish brisket recipe you’re exploring today, it’s the star of legendary barbecue dishes, the foundation for corned beef, and the heart of pastrami. Its ability to absorb flavors and transform into something truly magnificent under the right conditions makes it a beloved choice for hearty, comforting meals.
Essential Ingredients for Brisket Perfection
Crafting this incredible Jewish brisket requires a thoughtful selection of ingredients, each playing a crucial role in building its signature sweet, savory, and rich flavor profile:
- Beef Brisket: The undisputed star. You’ll need a 5-6 lb cut. Refer to our detailed note below on choosing between point and flat cuts. You might need to slice it in half for easier searing and fitting into your cooking vessel.
- Kosher Salt & Black Pepper: Fundamental for dry brining the brisket, seasoning the meat, and enhancing its natural flavors.
- Paprika: I personally love using smoked paprika for an extra layer of smoky depth, but sweet paprika works wonderfully to add a mild, earthy sweetness and a beautiful color.
- Sweet Onions (2 large): Sliced generously, these are the foundation of our sauce. Their natural sugars caramelize beautifully, providing a rich, sweet base. Yellow onions can be substituted, but sweet onions contribute a more nuanced flavor.
- Fresh Garlic (10 cloves): Peeled and kept whole, these cloves are nestled into the brisket, infusing it with aromatic pungency as it slow cooks. Freshly chopped garlic is incomparable.
- Olive Oil (2 tbsp): Used for searing the brisket and caramelizing the onions, adding a smooth, rich fat for flavor development.
- Tomato Paste (6 oz can): This concentrated powerhouse adds deep umami, a touch of acidity, and helps to thicken the luxurious sauce.
- Diced or Crushed Tomatoes (14.5 oz can): Either diced or crushed tomatoes will work to form the robust, tangy, and sweet body of the brisket sauce.
- Pure Maple Syrup (1/4 cup): Provides a natural sweetness that balances the savory notes and caramelizes beautifully. Brown sugar or a similar sweetener can be used as an alternative.
- Beef Stock (2 cups): The primary liquid for braising, ensuring a rich, meaty flavor throughout the sauce. While any stock will work, beef stock is our top recommendation for depth.
- Red Wine (1 cup): A dry red wine (like Merlot, Cabernet Sauvignon, or Pinot Noir) adds complexity, acidity, and another layer of depth to the sauce. Don’t worry about using an expensive bottle; any red wine you have on hand, even a leftover from dinner, will be perfect.
- Carrots (4, peeled & chopped): Cut into even sizes, these add a gentle sweetness, earthy flavor, and vibrant color to the finished dish.
- Baby Potatoes (1 lb): I opt for whole baby potatoes for ease and their delightful texture, but you can certainly chop larger yellow potatoes if preferred. They absorb the incredible flavors of the sauce.
- Fresh Herbs (1/4 cup): A generous mix of fresh thyme, rosemary, and sage infuses the brisket with aromatic, herbaceous notes. Feel free to use your favorite combination, or whatever fresh herbs are available.
Choosing the Best Brisket Cut: Point vs. Flat
When selecting your beef brisket, you’ll typically encounter two main cuts: the point cut and the flat cut (also known as the “first cut” or “lean”). Both can yield delicious results for this recipe, but they have distinct characteristics:
- Flat Cut (First Cut): This is the leaner, flatter, and more rectangular portion of the brisket. It has a nice, even thickness, making it ideal for slicing uniformly. While it’s less fatty, it can be prone to drying out if not cooked properly.
- Point Cut (Second Cut): This cut is thicker, more irregular in shape, and contains a higher concentration of fat and connective tissue, often including a significant fat cap. This abundance of fat makes the point cut inherently juicier and more flavorful, resulting in an exceptionally tender and moist brisket when slow-cooked.
My personal preference for this recipe leans towards the point cut due to its superior marbling and fat content, which contributes to an incredibly moist and flavorful final product. However, the flat cut brisket also works wonderfully, especially if you prefer a leaner result. Whichever you choose, ensure there’s still a decent fat cap (about 1/4 inch) left on the meat, as it renders down during cooking and self-bastes the brisket, adding richness and preventing dryness.
Step-by-Step: How to Make Oven-Roasted Brisket
Follow these detailed instructions to create a truly unforgettable, tender, and flavorful oven-roasted brisket:
STEP 1: DRY BRINE YOUR BRISKET
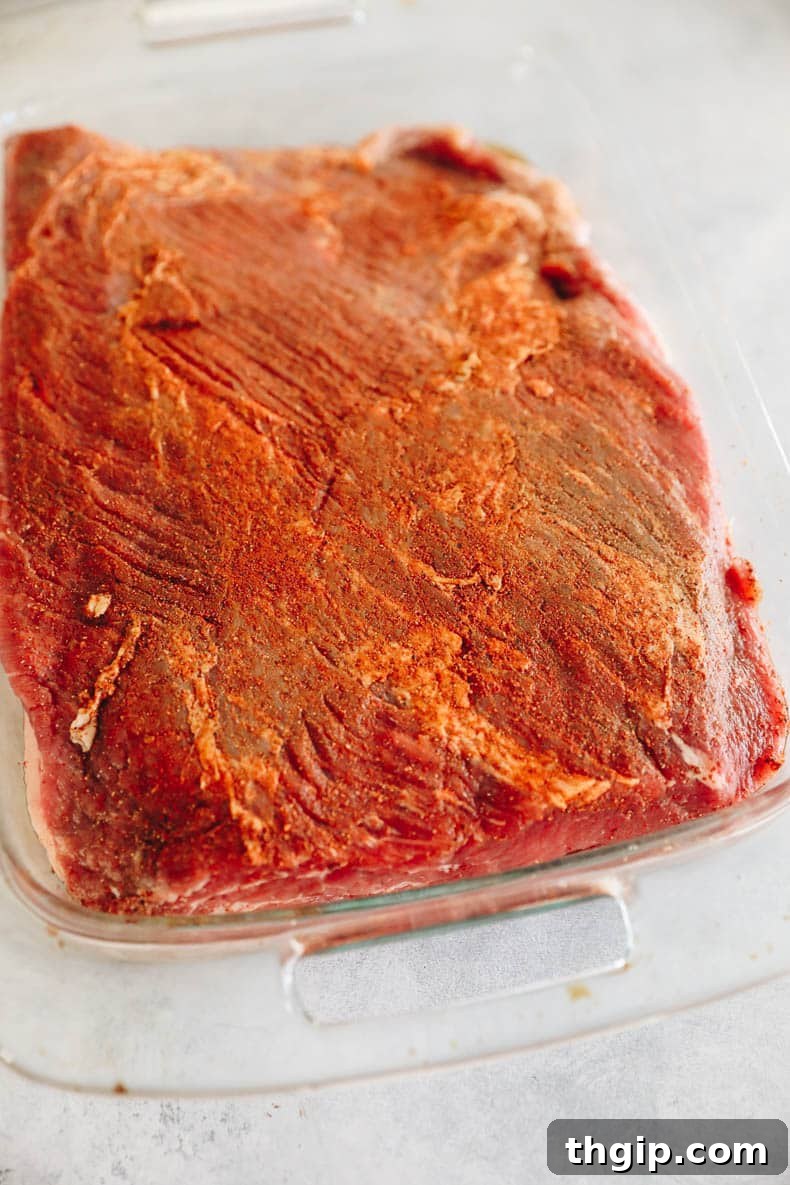
Place your chosen beef brisket on a large baking sheet. Generously season it on all sides with kosher salt, freshly ground black pepper, and paprika. Use your hands to thoroughly rub the seasonings into the meat, ensuring it’s completely coated. Cover the baking sheet tightly with plastic wrap and transfer it to the refrigerator. Allow the brisket to dry brine overnight, or for a minimum of 12 hours, and up to 24 hours. This essential step deeply seasons the meat and contributes significantly to its tenderness. Approximately one hour before you plan to begin cooking, remove the brisket from the fridge to allow it to come to room temperature, promoting more even cooking.
STEP 2: SEAR THE BRISKET
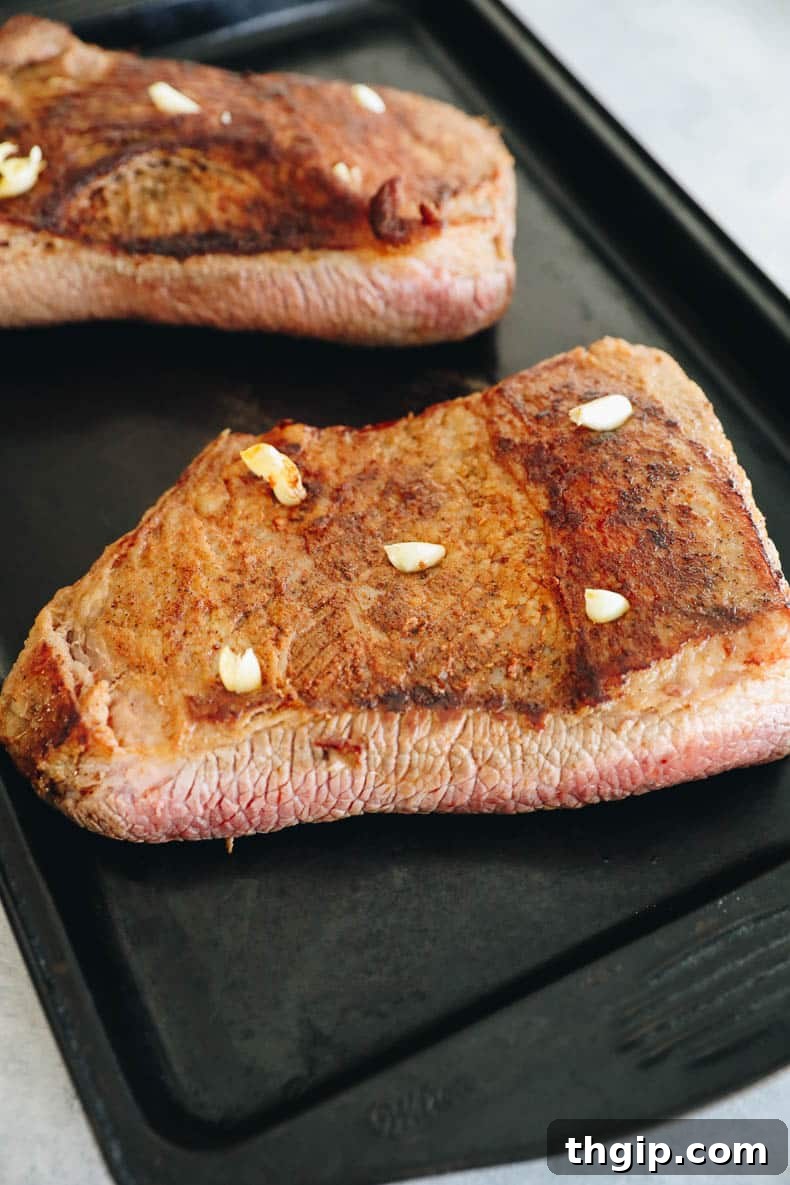
Preheat your oven to 325 degrees F (160°C). If your Dutch oven or heavy-bottomed cooking vessel is not large enough to comfortably hold the entire brisket, slice the brisket in half across the grain. Add 1 tablespoon of olive oil to your Dutch oven and place it over medium-high heat. Once the oil is shimmering, carefully add the brisket (or one half, if sliced) fat-side down. Sear on each side for 3-5 minutes, or until a beautiful, deep golden-brown crust forms. This searing process is crucial for developing rich flavor. Repeat with the second piece of brisket if you sliced it. Once seared, make about 10 small, shallow cuts across the top of the brisket and gently nestle the peeled whole garlic cloves into these cuts. Don’t worry if some fall out during cooking; they’ll still infuse flavor into the sauce.
STEP 3: CARAMELIZE ONIONS & BUILD THE SAUCE
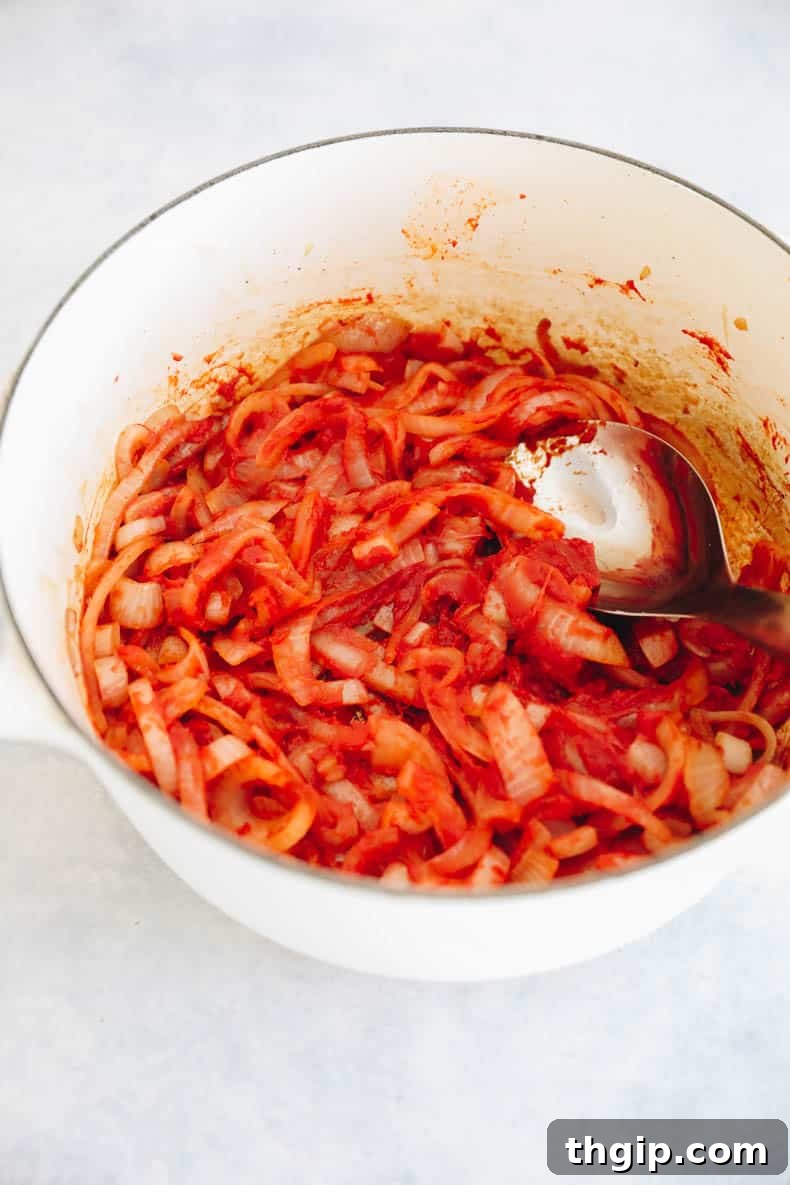
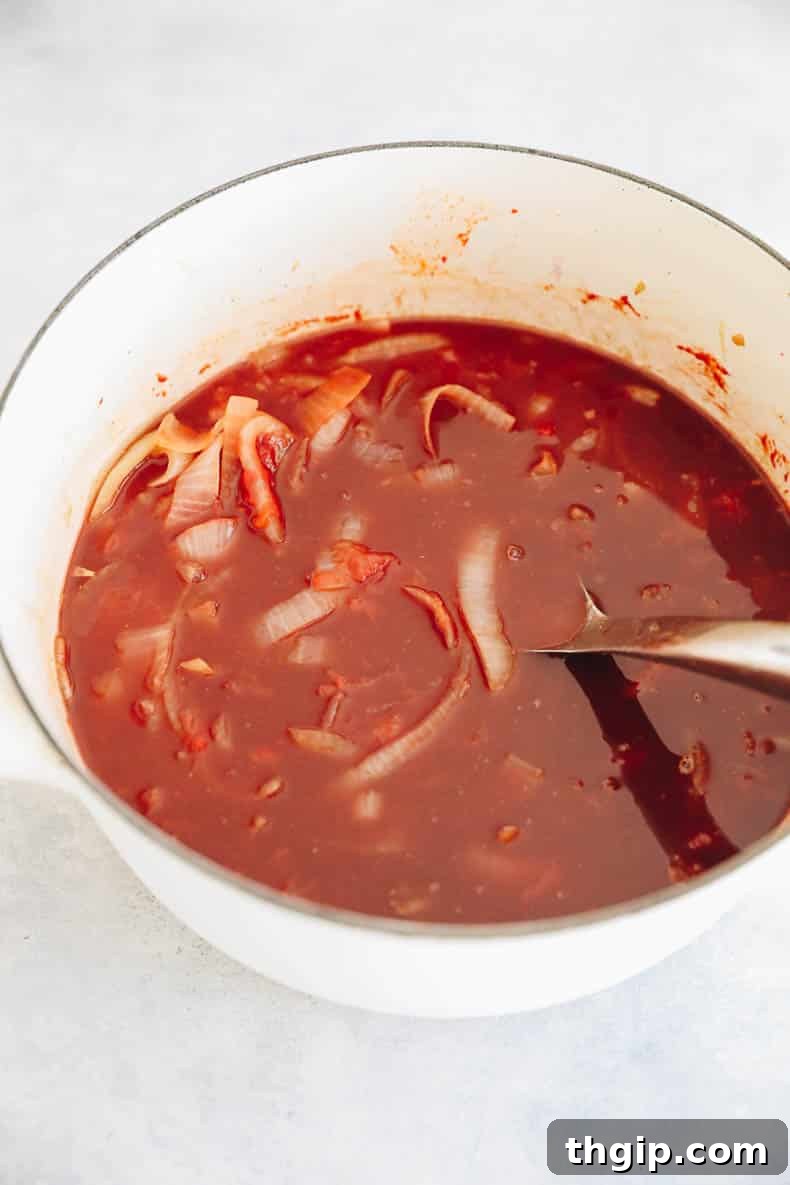
Remove the seared brisket from the Dutch oven and set it aside. Add the remaining 1 tablespoon of olive oil to the same Dutch oven and reduce the heat to medium-low. Add your sliced sweet onions and stir frequently. Cook for 7-10 minutes, or until the onions soften significantly and begin to caramelize, turning golden and sweet. In the last minute of cooking the onions, stir in the entire can of tomato paste, cooking it for about 60 seconds to deepen its flavor. Be sure to scrape the bottom of the pan to loosen any flavorful cooked bits (fond) from the searing process – this is a treasure trove of flavor! If necessary, add a splash of beef stock to deglaze the pan thoroughly. Once the onions and tomato paste are fragrant, stir in the diced or crushed tomatoes, pure maple syrup, the remaining beef stock, and the red wine. Bring the sauce to a gentle simmer, stirring to combine all ingredients.
STEP 4: SLOW COOK THE BRISKET
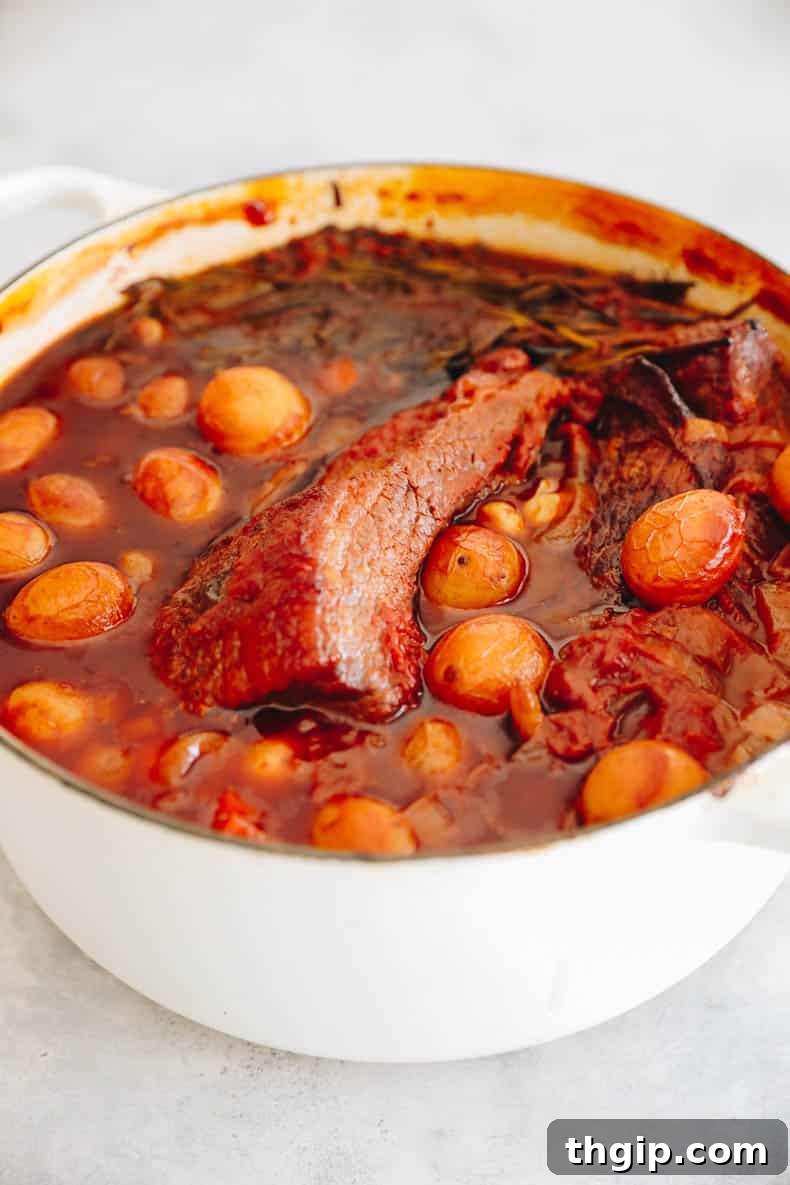
Carefully nestle your seared brisket (or both halves) into the simmering sauce in the Dutch oven, ensuring it is well covered by the liquid. Arrange the chopped carrots and baby potatoes around and on top of the brisket. Add in your bundle of fresh herbs (thyme, rosemary, sage). It might be a tight fit initially, but don’t worry, the vegetables will soften and cook down over time. Cover the Dutch oven tightly with its lid and transfer it to the preheated oven. Cook the brisket for 3 to 3.5 hours. To determine doneness, use a reliable meat thermometer: your brisket is ready when its internal temperature reaches 195-205 degrees F (90-96°C) and it feels fork-tender, meaning very little resistance when pierced.
STEP 5: REST & SLICE FOR SERVING
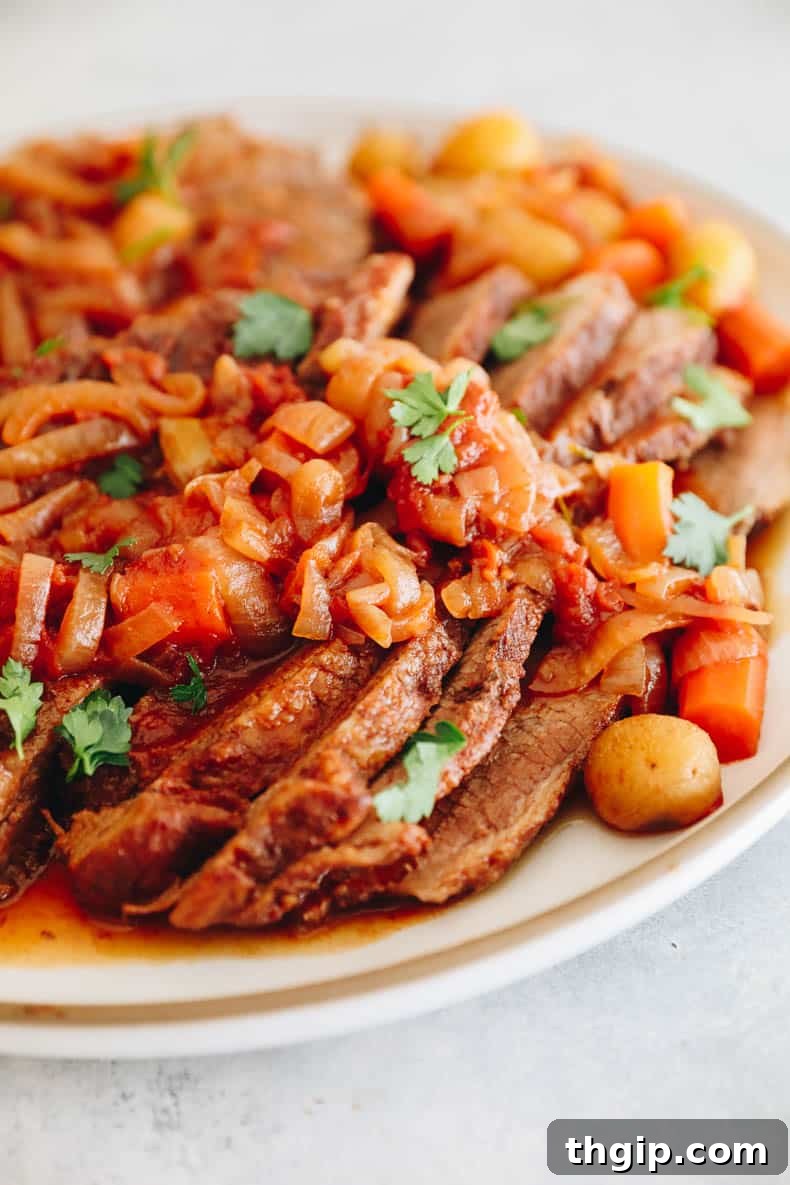
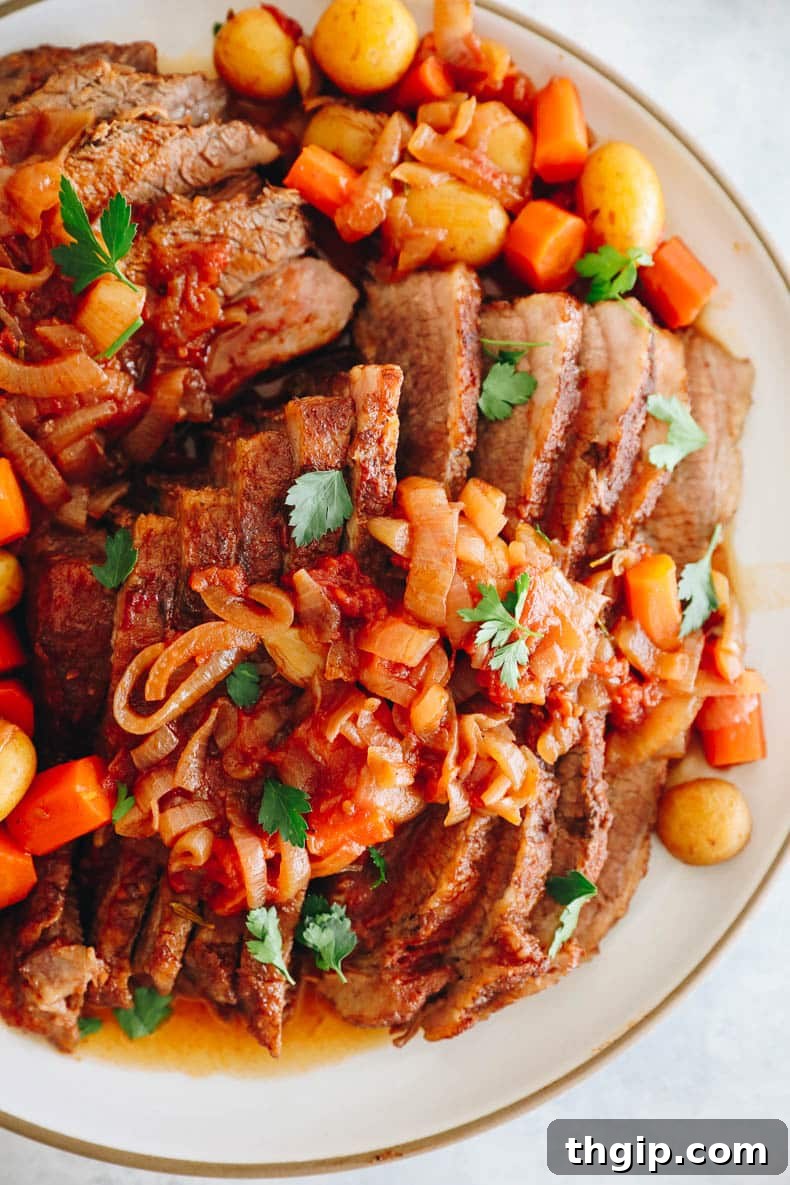
Once cooked, remove the Dutch oven from the oven. Carefully take the brisket out of the sauce and place it on a cutting board. Tent it loosely with foil and allow it to rest for at least 20 minutes (up to 30 minutes for larger briskets). This resting period is critical for the juices to redistribute, ensuring a moist and tender result. While the brisket rests, remove the fresh herb sprigs from the sauce and discard them. Once rested, slice the brisket against the grain into desired thickness. This is essential for tenderness. Return the sliced brisket pieces back into the warm, rich sauce, or pour a generous amount of sauce directly over the slices on a serving platter. Serve immediately with the perfectly cooked carrots and potatoes, ensuring plenty of that delectable sauce accompanies every portion!
Brisket FAQs: Your Most Common Questions Answered
No, dry brining is an optional step, but one I strongly recommend. It significantly enhances the flavor and tenderness of the brisket, allowing the salt to penetrate deep into the meat. If you’re short on time, you can skip it, but for the best results, plan for an overnight brine.
Absolutely! This recipe scales beautifully. Just ensure you have a large enough cooking vessel, such as a very large Dutch oven or a sturdy aluminum roasting pan. If using an aluminum pan, cover it tightly with multiple layers of aluminum foil to create a seal, mimicking the effect of a Dutch oven lid and ensuring the brisket braises effectively.
No Dutch oven? No problem! As mentioned, you can use a large, heavy-bottomed roasting pan or any oven-safe dish. The key is to ensure it can be tightly covered to trap moisture for the braising process. Use heavy-duty aluminum foil, sealing it securely around the edges of the pan to prevent steam from escaping.
Yes, this recipe is adaptable for a slow cooker. You’ll still want to perform the initial searing of the brisket and caramelizing of the onions on the stovetop to build maximum flavor. Afterward, transfer everything into your slow cooker. Cook on low for 6-8 hours or until the brisket is fork-tender and reaches the desired internal temperature.
Slicing against the grain is the most critical step for tender brisket. Look closely at the cooked meat to identify the direction of the muscle fibers. You want to slice perpendicular to these fibers. A large, sharp serrated knife (like a bread knife) works wonders for a clean cut. Many cooks find it helpful to observe the grain before cooking and even take a quick picture for reference!
I recommend leaving a thin layer, about 1/4 inch, of the fat cap on your brisket. This fat renders down beautifully during the long cooking process, infusing the meat with incredible moisture and rich flavor. It will also protect the brisket from drying out, leaving you with tender, flavorful slices without being overly “blubbery” on top.
Your brisket is perfectly cooked when it is “fork-tender” – meaning a fork or skewer can easily pierce the meat with little resistance and twist out smoothly. More precisely, use a reliable meat thermometer. The internal temperature should register between 195-205 degrees F (90-96°C). Don’t pull it out too early, or it will be tough!
Since the recipe already includes carrots and potatoes, you have a fantastic start! To round out the meal, consider serving a fresh green salad with a light vinaigrette to cut through the richness, or some simple roasted green beans. For a more traditional Jewish meal, challah bread for dipping in the sauce is always a winner. You can also add kugel, mashed potatoes (if not using baby potatoes in the braise), or even a fluffy couscous.
Yes, and it’s often even better! Brisket is an ideal make-ahead dish. Preparing it a day or two in advance allows the flavors to deepen and meld. After cooking and resting, let it cool completely, then refrigerate it in its sauce. When reheating, the fat layer on top will have solidified, making it easy to skim off any excess if desired. Gently reheat in the oven (covered) or on the stovetop over low heat until warmed through.
Storage & Freezing Instructions
This Jewish brisket recipe yields delicious leftovers that are often even better the next day! Proper storage ensures its incredible flavor and tenderness are preserved.
- Refrigeration: Store any leftover brisket and its sauce in an airtight container in the refrigerator for up to 5 days. For reheating, gently warm leftovers in the oven (covered with foil to prevent drying), on the stove top over low heat, or carefully in the microwave until heated through.
- Freezing: Cooked brisket freezes exceptionally well. For best results, allow the brisket and sauce to cool completely. Transfer it to a large aluminum baking dish or freezer-safe container. Ensure the brisket is submerged in as much sauce as possible to maintain moisture. Cover it tightly with a lid, heavy-duty aluminum foil, and/or plastic wrap to prevent freezer burn. It can be stored in the freezer for up to 3-4 months. When ready to enjoy, allow it to thaw overnight in the refrigerator before reheating gently in the oven until piping hot.
More Beloved Jewish Recipes You’ll Love:
- Traditional Charoset Recipe
- The Best Healthy Baked Latkes
- Hearty Slow Cooker Chicken Soup
- Classic Shakshuka + Vibrant Green Shakshuka
- Sweet Orange Cheese Blintzes
Print Recipe
Classic Jewish Brisket Recipe

4 from 1 review
This quintessential Jewish brisket recipe promises a truly celebratory meal, perfect for holidays like Passover or Rosh Hashanah. It’s painstakingly slow-cooked to achieve an unmatched tenderness, infused with sweet and juicy flavors from a rich caramelized onion and tomato sauce. This oven-braised brisket is a guaranteed hit, delighting every guest with its comforting and profound taste.
- Author: Davida Lederle
- Prep Time: 12 hours (includes brining)
- Cook Time: 3 hours
- Total Time: 15 hours
- Yield: 10 servings
- Category: Dinner
- Method: Braise, Oven Cook
- Diet: Gluten Free
Ingredients
- 5–6 lb beef brisket
- 1 tbsp kosher salt
- 1 tsp black pepper
- 1 tsp smoked or sweet paprika
- 10 garlic cloves, peeled & kept whole
- 2 tbsp olive oil
- 2 large sweet onions, sliced
- 6 oz tomato paste (1 standard can)
- 14.5 oz can diced or crushed tomatoes
- 1/4 cup pure maple syrup
- 2 cups beef stock
- 1 cup red wine
- 4 carrots, peeled & chopped
- 1 lb baby potatoes
- 1/4 cup fresh herbs (e.g., thyme, bay leaf, sage, rosemary)
Instructions
- Place your brisket on a baking sheet and top with kosher salt, black pepper, and paprika. Use your hands to ensure the brisket is well coated on all sides. Cover tightly and store in the fridge overnight (12-24 hours).
- Remove the brisket from the fridge 1 hour before cooking to bring it to room temperature.
- Preheat your oven to 325 degrees F (160°C).
- If your Dutch oven or cooking vessel is too small for your brisket, slice it in half.
- Add 1 tbsp of olive oil to your Dutch oven and, over medium-high heat, sear the brisket on each side until it’s beautifully golden brown (3-5 minutes per side). Repeat with the other piece if you sliced it in half. Remove the seared brisket and set aside.
- Make 10 small, shallow cuts into the brisket and nestle the peeled whole garlic cloves into these cuts.
- Add the remaining 1 tbsp of olive oil to your Dutch oven and lower the heat to medium-low. Stir in your sliced sweet onions. Cook for 7-10 minutes, or until they have softened and begun to caramelize. Stir in the tomato paste during the last minute of cooking the onions. Be sure to scrape the bottom of the pan to remove any flavorful cooked bits (fond); you can add a splash of beef stock to deglaze, if required.
- Add in the diced or crushed tomatoes, maple syrup, the remaining beef stock, and red wine to the Dutch oven. Stir to combine and bring to a gentle simmer.
- Nestle your brisket back into the sauce, ensuring it is well covered by the liquid.
- Top the brisket and sauce with the chopped carrots and baby potatoes.
- Add in your fresh herbs. It will be a tight squeeze, but don’t worry – they will cook down over time and infuse the dish with flavor.
- Cover the Dutch oven tightly and cook your brisket in the preheated oven for 3-3.5 hours. Use a meat thermometer to test your brisket; it’s done when the internal temperature reaches 195-205 degrees F (90-96°C) and is fork-tender.
- Remove your brisket from the sauce and allow it to rest, tented with foil, for 20-30 minutes on a cutting board. Remove and discard the fresh herb sprigs from the sauce.
- Slice the brisket against the grain (crucial for tenderness) and then return the sliced pieces to the sauce in the Dutch oven, or arrange on a platter and pour the sauce generously over them.
- Serve immediately with the cooked carrots and potatoes, ensuring plenty of that delicious, rich sauce!