
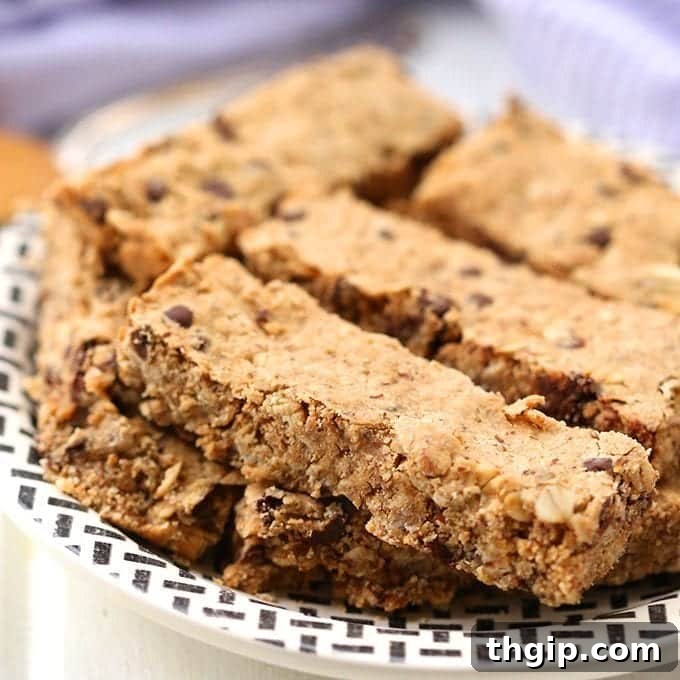
Homemade Peanut Butter Granola Bars: Your Ultimate Healthy Snack Solution
In our fast-paced lives, finding time for healthy eating can be a challenge. We’re constantly on the go, making it easy to reach for less-than-ideal snacks. But what if you could effortlessly whip up a batch of wholesome, delicious, and energy-boosting treats right in your own kitchen? Enter the humble yet mighty Peanut Butter Granola Bar! These delightful bars are designed for your busy lifestyle, offering a perfect blend of flavor, nutrition, and convenience. Not only are they incredibly simple to make with just a handful of pantry staples, but they are also naturally gluten-free and vegan, catering to various dietary needs without compromising on taste or satisfaction. Get ready to transform your snacking habits with a recipe that’s as easy as it is rewarding!
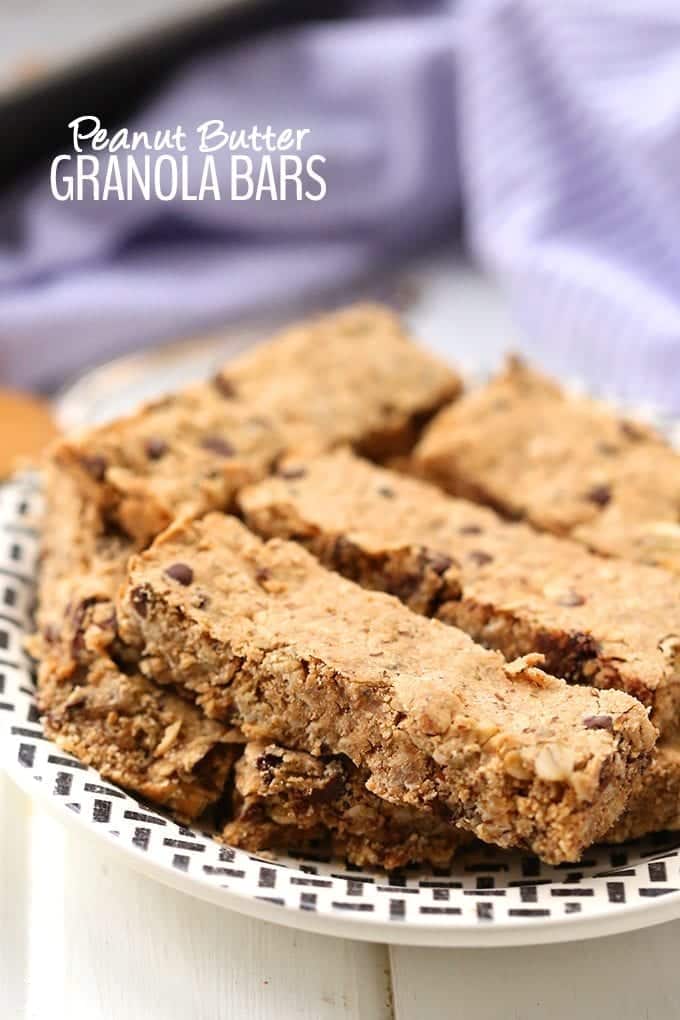
Why Choose Homemade Granola Bars Over Store-Bought?
The allure of store-bought granola bars often lies in their convenience. However, a quick glance at their ingredient list can reveal hidden sugars, artificial flavors, and preservatives that detract from their perceived health benefits. Opting to make your own peanut butter granola bars provides numerous advantages:
- Ingredient Control: You have complete power over what goes into your bars. Say goodbye to mysterious additives and unwanted sugars. You can choose organic ingredients, specific types of nuts or seeds, and adjust sweetness to your preference.
- Cost-Effective: Buying individual granola bars can quickly add up. Making a batch at home is significantly more economical, allowing you to enjoy healthy snacks without breaking the bank.
- Customization: Dietary restrictions or personal preferences? No problem! This recipe is a fantastic canvas for customization. Easily swap out nut butters, add different mix-ins, or adjust the flavor profile to suit your mood.
- Freshness and Flavor: There’s nothing quite like the taste of freshly baked goods. Homemade granola bars offer a superior taste and texture, far surpassing their often dry and bland store-bought counterparts.
- Meal Prep Efficiency: Preparing a batch of these bars takes minimal effort and time, making them an ideal component of your weekly meal prep. You’ll have grab-and-go snacks ready for school, work, or post-workout fuel.
- Nutritional Boost: Packed with whole grains, healthy fats, and fiber, these bars provide sustained energy, help keep you full, and contribute to overall well-being.
This recipe is designed to be your quick and easy secret weapon against unhealthy snacking. With just a few staple ingredients, you’ll be able to create a nutritious and delicious snack that keeps you energized throughout the week. Most of the items you need are probably already in your pantry!
Essential Ingredients for Your Perfect Peanut Butter Granola Bars
The beauty of these granola bars lies in their simplicity, requiring only a handful of key ingredients that come together to create a harmonious blend of flavors and textures. Let’s dive deeper into each component and why it’s essential for achieving the perfect bar.
- Oat Flour: The Binder and Base
Oat flour is crucial for providing structure and binding these no-bake bars together, giving them a delightful chewiness. It also contributes to the overall whole-grain goodness. You can easily make your own by grinding rolled oats in a food processor until a fine flour forms. This method is not only cost-effective but also ensures freshness. Alternatively, you can purchase pre-ground oat flour from health food stores or online. For those with gluten sensitivities or celiac disease, ensure you opt for certified gluten-free oat flour and rolled oats to prevent cross-contamination.
- Rolled Oats: For Texture and Fiber
Rolled oats (also known as old-fashioned oats) are key to achieving the classic granola bar texture. They provide a satisfying chew and robust heartiness that quick oats might not. Nutritionally, rolled oats are a powerhouse, loaded with soluble fiber, which aids in digestion, helps regulate blood sugar, and promotes heart health. As with oat flour, always choose certified gluten-free rolled oats if you require a gluten-free diet.
- Sea Salt: The Flavor Enhancer
A small pinch of sea salt might seem insignificant, but it plays a vital role in elevating the flavor profile of these bars. It doesn’t just add a salty note; it acts as a natural flavor enhancer, balancing the sweetness of the maple syrup and intensifying the rich, nutty taste of the peanut butter. Don’t skip this ingredient!
- Ground Flaxseed: A Vegan Powerhouse Binder
Ground flaxseed is a star ingredient in vegan baking, acting as a superb binder that helps hold these granola bars together without the need for eggs. When mixed with liquid, ground flaxseed forms a gel-like consistency, mimicking the binding properties of an egg. Beyond its functional role, flaxseed is an incredible source of omega-3 fatty acids, fiber, and lignans, offering a significant nutritional boost to your snack. It contributes to satiety and supports digestive health.
- Natural Peanut Butter: Creamy Goodness and Protein
The heart and soul of these bars is natural peanut butter. For the best results, use a smooth, natural variety where the only ingredient listed is peanuts (and perhaps a little salt). Avoid peanut butters with added sugars, hydrogenated oils, or excessive emulsifiers, as these can alter the consistency and nutritional value of your bars. Natural peanut butter provides healthy fats and a good dose of protein, making these bars wonderfully satisfying and energy-dense. If you have a peanut allergy, feel free to substitute with almond butter, cashew butter, or for a nut-free option, sunflower seed butter.
- Pure Maple Syrup: Our Natural Sweetener
Pure maple syrup is the ideal natural sweetener for these granola bars. It offers a rich, distinctive flavor that complements the peanut butter beautifully, and its sticky consistency also aids in binding the ingredients. Unlike refined sugars, maple syrup contains antioxidants and essential minerals. Ensure you use *pure* maple syrup, not pancake syrup, which is often high in corn syrup. You can also use agave nectar as a vegan alternative, or if not strictly vegan, raw honey.
- Water: The Consistency Adjuster
Water is added incrementally to achieve the perfect batter consistency. The goal is a mixture that is sticky enough to hold together firmly but not overly wet or crumbly. Adding water as needed allows you to fine-tune the texture of your bars, ensuring they are perfectly moist and cohesive.
- Optional: Chocolate Chips and Beyond for Flavor Fun!
While optional, chocolate chips are a fantastic addition that creates a classic and irresistible peanut butter and chocolate flavor combination. I highly recommend using Enjoy Life dairy-free chocolate chips to keep the bars vegan. But don’t stop there! This is where you can truly personalize your granola bars. Consider adding:
- Dried Fruits: Chopped cranberries, raisins, dried cherries, or apricots for extra chewiness and natural sweetness.
- Nuts: Chopped almonds, walnuts, or pecans for added crunch and healthy fats (if not avoiding nuts).
- Seeds: Chia seeds, pumpkin seeds, or sunflower seeds for extra nutrition and texture.
- Coconut: Shredded unsweetened coconut for a tropical twist.
- Spices: A pinch of cinnamon or nutmeg can add a warm, comforting aroma and flavor.
Step-by-Step Guide: Crafting Your Delicious Peanut Butter Granola Bars
Making these granola bars is incredibly straightforward, requiring minimal equipment and effort. Follow these simple steps to create a batch of wholesome snacks that will be the envy of your friends and family.
- Prepare Your Oven and Pan: Begin by preheating your oven to 350°F (175°C). Next, line an 8×8 inch baking pan with parchment paper, ensuring it overhangs the sides. This creates “handles” that will make it incredibly easy to lift the baked bars out of the pan later. Alternatively, you can lightly grease the pan with coconut oil or a non-stick spray.
- Combine Dry Ingredients: In a large mixing bowl, combine the oat flour, rolled oats, sea salt, and ground flaxseed. Use a whisk or a spoon to thoroughly mix these ingredients. Proper mixing ensures that the binding agents and flavors are evenly distributed throughout the bars, preventing crumbly sections.
- Incorporate Wet Ingredients: Pour the natural peanut butter and pure maple syrup directly over the dry ingredients in the bowl. Using a sturdy spoon or spatula, stir everything together until well combined. The mixture should start to come together and become sticky.
- Adjust Consistency with Water: At this point, assess the consistency of your batter. It should be sticky enough to hold its shape when pressed but not overly wet or greasy. If the mixture seems too dry or crumbly, add water one tablespoon at a time, mixing well after each addition, until you reach the desired consistency. The video demonstration (below) can provide helpful visual tips for achieving the perfect texture.
- Fold in Optional Mix-ins: If you’re using chocolate chips or any other optional add-ins like dried fruit or nuts, gently fold them into the batter until they are evenly distributed. Avoid overmixing once these are added.
- Press into the Pan: Transfer the batter to your prepared 8×8 inch baking pan. This is where a little technique comes in handy: lightly dampen your hands with water. This prevents the sticky batter from adhering to your hands and makes it much easier to press it firmly and evenly into the pan. The key to firm, non-crumbly bars is to pack the batter in as tightly as possible. Use the back of your wet hands or a flat spatula to ensure the top surface is as flat and uniform as possible.
- Bake to Perfection: Place the baking pan in the preheated oven and bake for 18-20 minutes, or until the edges appear lightly golden brown. The center might still feel slightly soft, but it will firm up as it cools. Over-baking can lead to dry and hard bars, so keep a close eye on them.
- Cool Completely: This step is CRUCIAL for the structure of your granola bars. Remove the pan from the oven and let the bars cool completely in the pan for at least 20 minutes before attempting to remove them. Cooling allows the ingredients to set and firm up, preventing them from crumbling when cut. For even cleaner cuts, you can even chill them in the refrigerator for an additional 30 minutes after they’ve cooled to room temperature.
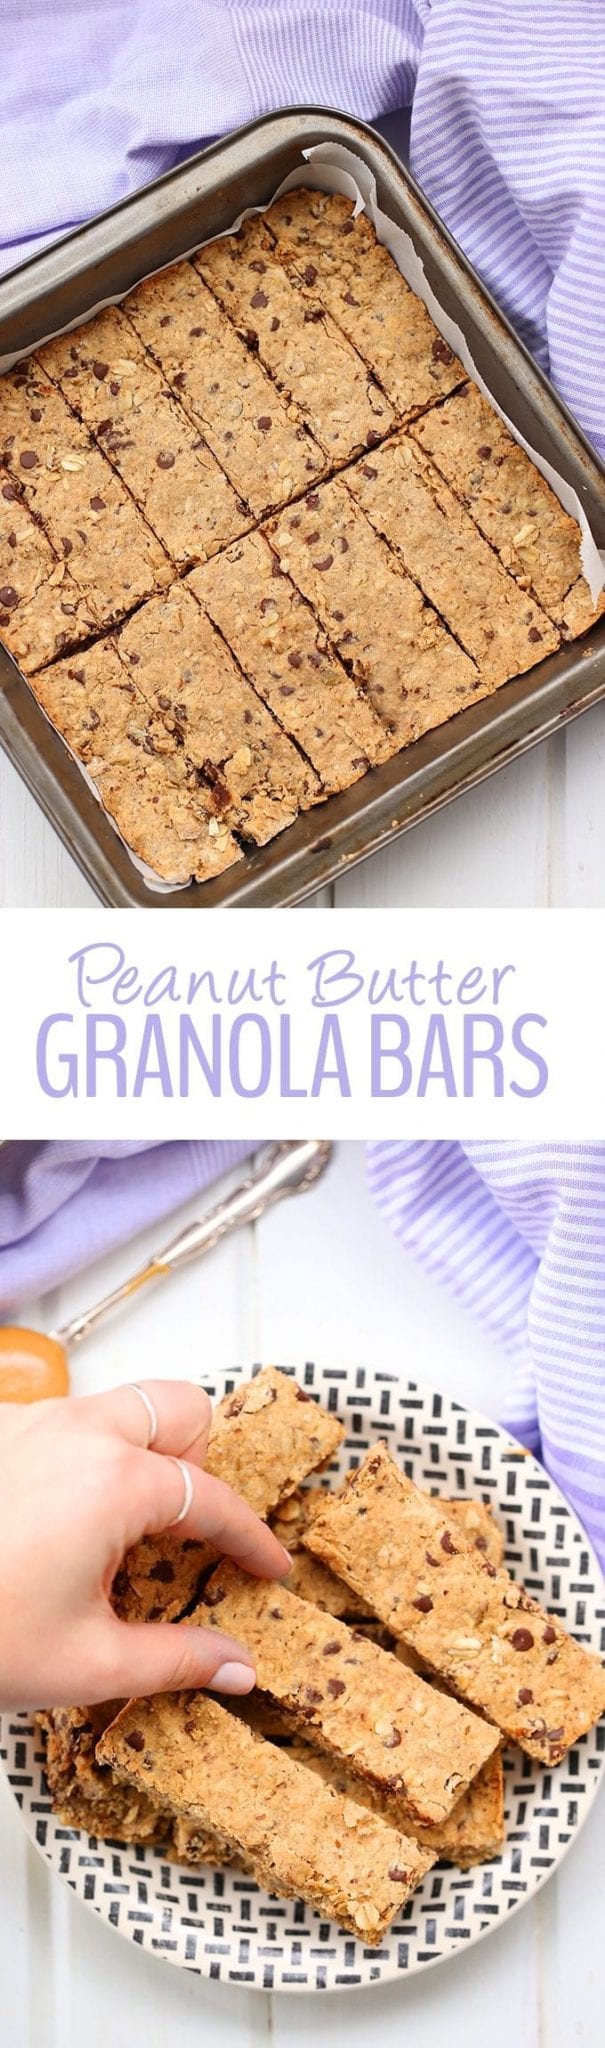
- Cut and Serve: Once completely cooled and firm, use the parchment paper overhangs to lift the entire slab of granola from the pan. Transfer it to a cutting board. Using a sharp knife, cut the slab into 12 equally sized bars. You can cut them into squares, rectangles, or any desired shape.
Storage and Meal Prep Tips for Your Homemade Granola Bars
One of the best features of these peanut butter granola bars is how incredibly well they store, making them ideal for meal prepping and ensuring you always have a healthy snack on hand. Proper storage is key to maintaining their freshness and texture.
- Allow to Cool Completely: Before storing, it’s absolutely essential that your granola bars have cooled down to room temperature. Storing them while still warm can create condensation inside the container, leading to soggy bars and a potential for spoilage.
- Countertop Storage: Once cooled, place the bars in an airtight container. They will maintain their freshness and delicious texture for up to 4 days when stored at room temperature on your countertop. This is perfect for quick access throughout the week.
- Refrigerator Storage: If you prefer a firmer bar or live in a warm climate, you can store them in an airtight container in the refrigerator for up to 7-10 days. The chill will make them slightly chewier and less prone to softening.
- Freezing for Longer Shelf Life: For extended storage, these granola bars freeze beautifully! Once completely cooled, you can wrap individual bars tightly in plastic wrap or parchment paper, then place them in a freezer-safe airtight container or a heavy-duty freezer bag. They can be frozen for several months (up to 3-4 months). When you’re ready to enjoy one, simply take it out of the freezer and let it thaw on the countertop for about 15-30 minutes, or enjoy it chilled directly from the fridge. This is an excellent strategy for having healthy snacks ready whenever a craving strikes.
- Packaging for On-the-Go: If you’re packing these for lunchboxes or taking them on hikes, consider wrapping individual bars in parchment paper or beeswax wraps to keep them fresh and prevent them from sticking together.
Peanut Butter Granola Bars Recipe Card
5 Stars
No reviews yet. Be the first to rate!
- Prep Time: 10 mins
- Cook Time: 20 mins
- Total Time: 30 mins
- Yield: 12 bars
Ingredients
Scale
- 1 cup oat flour (ground rolled oats)*
- 1 cup rolled oats*
- 1/4 tsp sea salt
- 2 T ground flaxseed
- 1/2 cup natural, smooth peanut butter
- 1/3 cup pure maple syrup
- 1–2 T water (as needed)
- optional: 1/2 cup chocolate chips (I use Enjoy Life dairy-free chocolate chips)
*Use gluten-free if necessary
Instructions
- Preheat oven to 350 degrees F (175°C).
- Line an 8 x 8 inch baking pan with parchment paper or spray/grease with coconut oil.
- In a large bowl, add the oat flour, rolled oats, sea salt, and ground flaxseed. Mix thoroughly.
- Top with peanut butter and maple syrup. Stir to combine until a sticky batter forms.
- The batter should be slightly sticky, but not wet. Add 1-2 tablespoons of water as needed to get to the right consistency (refer to the video for tips!).
- Add in chocolate chips, if using, and fold gently.
- Spread out the batter in the baking pan using wet hands. Pack it in tightly and ensure the top is flat and even.
- Bake for 18-20 minutes or until the edges are slightly brown.
- Let sit for 20 minutes before removing from the pan (using the parchment paper handles) and cutting into 12 bars.
- Store in an airtight container for up to 4 days on the countertop or freeze for several months.
Variations and Customization Ideas for Your Granola Bars
One of the joys of making homemade granola bars is the endless possibility for customization. Once you’ve mastered the basic peanut butter recipe, feel free to experiment with these exciting variations to keep things fresh and exciting:
- Nut Butter Swaps: Instead of peanut butter, try almond butter, cashew butter, or even a mixed nut butter blend. For a nut-free option, sunflower seed butter (often called sunbutter) works wonderfully and maintains a similar consistency.
- Sweetener Alternatives: While maple syrup is our top choice, you can also use agave nectar for a similar vegan profile, or honey (if not strictly vegan) for a different flavor note. Adjust the amount slightly based on your sweetness preference.
- Dried Fruit Medley: Beyond chocolate chips, incorporate a colorful mix of dried fruits. Chopped dates, figs, apricots, golden raisins, or even candied ginger can add unique textures and bursts of flavor.
- Seed Powerhouse: Boost the nutritional content and crunch with various seeds. Chia seeds, hemp seeds, pumpkin seeds (pepitas), and sunflower seeds are excellent choices. They add healthy fats, protein, and fiber.
- Spice it Up: Warm spices like cinnamon, nutmeg, allspice, or even a touch of cardamom can transform the flavor profile of your bars. A teaspoon of cinnamon in the dry ingredients pairs beautifully with peanut butter and oats.
- Protein Punch: For an extra protein boost, consider adding a scoop of your favorite vegan protein powder (vanilla or unflavored work best) to the dry ingredients. You might need to add an extra tablespoon of water or maple syrup to maintain the desired consistency.
- Extracts for Flavor: A teaspoon of vanilla extract or almond extract can enhance the overall taste. Add it with the wet ingredients.
- Citrus Zest: For a bright, fresh flavor, grate in the zest of an orange or lemon. This works particularly well with dried cranberries or apricots.
- Coatings and Drizzles: After cooling, consider drizzling your bars with melted chocolate, a nut butter drizzle, or even a simple glaze made from powdered sugar and a splash of plant-based milk for an extra touch of indulgence.
Frequently Asked Questions About Homemade Granola Bars
Here are some common questions you might have when making your peanut butter granola bars:
- Can I use quick oats instead of rolled oats?
While quick oats can be used, rolled oats are highly recommended for their texture. Quick oats are pre-steamed and cut into smaller pieces, which results in a softer, less chewy bar. If you do use quick oats, be aware the texture will be different, and you might need slightly less water. Steel-cut oats are too coarse and require longer cooking times, so they are not suitable for this recipe. - Can I make these bars without baking?
This specific recipe is designed for baking, as the heat helps to set the flaxseed binder and toast the oats, creating a firmer, more cohesive bar with a developed flavor. While you can make “no-bake” versions of granola bars, they typically rely on different ratios of wet binders (like more nut butter or syrup) and often need to be kept refrigerated to maintain their shape. For this recipe, baking is recommended for the best results. - How can I make these bars nut-free for allergies?
Absolutely! The simplest way is to substitute the peanut butter with a seed butter, such as sunflower seed butter (Sunbutter). Always ensure that all other ingredients, especially chocolate chips, are certified nut-free if severe allergies are a concern. - What if my bars are too crumbly?
Crumbliness usually indicates too little moisture or not enough packing. Ensure you’ve added enough water to achieve a very sticky consistency before baking. Also, make sure you pressed the mixture into the pan very firmly with wet hands. Cooling completely is also crucial, as warm bars will be much more prone to crumbling. - What if my bars are too soft or don’t hold their shape?
This could be due to too much water or not enough baking time. Make sure you’re adding water gradually. Baking longer, until the edges are golden, helps to set the ingredients. Chilling the bars in the refrigerator for an hour or two after cooling can also significantly help them firm up. - Are these truly healthy?
Yes, these homemade granola bars are a much healthier alternative to many store-bought options. They are packed with whole grains (oats), healthy fats (peanut butter, flaxseed), and natural sweetness (maple syrup). They are free from artificial ingredients, preservatives, and excessive added sugars often found in commercial bars. The fiber content helps with digestion and keeps you full, making them an excellent choice for a balanced snack.
Conclusion: Your New Favorite Healthy Snack Awaits!
These Homemade Peanut Butter Granola Bars are more than just a snack; they are a testament to how easy and delicious healthy eating can be. With their simple ingredients, straightforward preparation, and customizable nature, they offer a perfect solution for anyone seeking nutritious, grab-and-go fuel for their busy days. Whether you’re fueling a workout, packing a lunch, or simply craving a wholesome treat, these bars deliver on all fronts: flavor, texture, and undeniable goodness.
Ditch the processed snacks and embrace the satisfaction of creating something truly nourishing with your own hands. Give this recipe a try, experiment with your favorite add-ins, and discover the joy of effortless, healthy snacking. Your pantry, your taste buds, and your energy levels will thank you!
More Healthy Snack Recipes to Explore
If you loved these peanut butter granola bars, here are more delicious and healthy snack ideas you might enjoy:
- Matcha Protein Energy Bars
- Chocolate Cherry Granola
- Dark Chocolate Cherry Bars
- Banana Quinoa Breakfast Bars
- Cinnamon Roll Protein Bars