
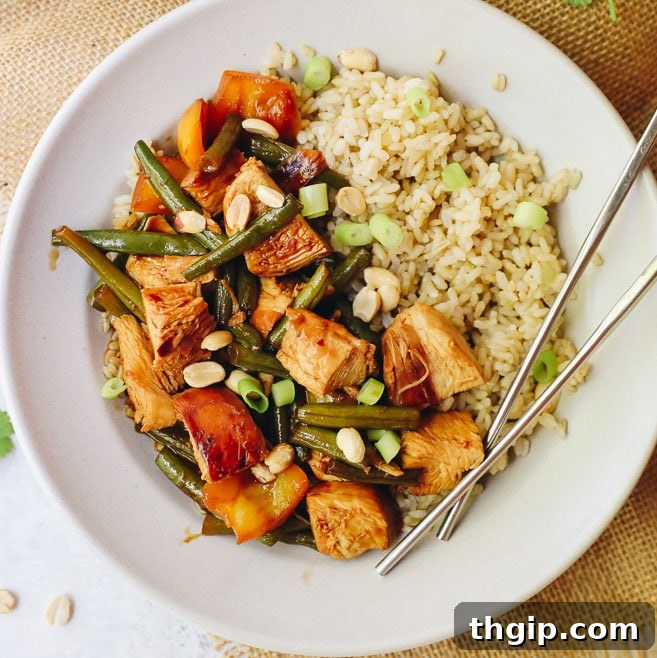
Looking for a hassle-free, mouth-watering dinner that’s ready in a flash? This healthy Instant Pot Kung Pao Chicken is your answer! Crafted with simple, wholesome ingredients, this one-pot wonder delivers tender, juicy chicken and a generous serving of fresh vegetables, all infused with rich, authentic flavors. Perfect for busy weeknights, this recipe is designed to impress your entire family and quickly become a go-to favorite.
Admittedly, I’ve always been a bit cautious when it comes to jumping on new food trends. It feels like just yesterday I finally bought a spiralizer, and I’m still contemplating an air fryer. My natural skepticism often holds me back, not to mention my partner, C, isn’t exactly thrilled about yet another kitchen gadget vying for precious counter space in our already cozy kitchen. The Instant Pot was no exception. For a long time, I questioned its necessity, thinking, “I already own a slow cooker; why on earth would I need an Instant Pot?” But as this incredible Instant Pot Kung Pao Chicken recipe proves, I eventually embraced the hype, and I’m so glad I did.
Our Instant Pot has actually been a part of our culinary arsenal for over two years now. It was after countless friends raved about its transformative powers and I personally tasted some truly delicious pressure cooker creations (special shoutout to Lee from Fit Foodie Finds, the undisputed queen of Instant Pot recipes!) that I decided to add it to our wedding registry. For the initial few months, its primary role was that of a glorified rice cooker. While it certainly cooks rice well, it quickly became apparent that the Instant Pot doesn’t always deliver the massive time savings many claim. Cooking short-grain brown rice, which typically took me 40 minutes on the stovetop, now took about 30 minutes in the Instant Pot. An extra 10 minutes is a welcome bonus on any given day, but let’s be clear: the Instant Pot isn’t solely about shaving off minutes; its true magic lies elsewhere.
Why the Instant Pot Reigns Supreme: More Than Just Speed
So, if it doesn’t consistently promise lightning-fast cooking, why bother with an Instant Pot at all? C and I recently delved into this very discussion over a plate of this delicious Instant Pot Kung Pao Chicken, and we quickly pinpointed several compelling reasons why this kitchen appliance has become indispensable:
- Unmatched Flavor Infusion: Slow-Cooked Taste, Fast! While it may not always be quicker than stovetop cooking, the Instant Pot excels in developing flavors that typically require hours of slow simmering. The beauty of a slow cooker lies in its ability to tenderize ingredients and infuse dishes with deep, rich tastes. The Instant Pot replicates this incredible depth of flavor in a fraction of the time, transforming simple ingredients into a complex, satisfying meal. The high-pressure environment forces liquids and aromatics deep into the food, creating exceptionally tender meats and vibrant sauces that taste like they’ve been lovingly cooked all day.
- Effortless Cleanup: The True One-Pot Advantage. For those who dread the post-dinner cleanup, the Instant Pot is a game-changer. C, especially, appreciates how remarkably easy it is to clean. The entire meal, from sautéing aromatics to pressure cooking the chicken, is prepared in a single inner pot. This eliminates the need for multiple pans, pots, and baking dishes, significantly reducing your time spent at the sink. Fewer dishes mean more time to relax and enjoy your evening.
- Set It and Forget It Convenience: Freedom for Busy Lifestyles. Much like a slow cooker, the Instant Pot offers unparalleled convenience. Once you’ve loaded your ingredients and set the cooking program, you can truly step away and let it do its work. There’s no constant stirring, monitoring, or worrying about things boiling over. Many models even come with delayed start timers, allowing you to prepare your meal in advance and have it perfectly cooked and ready when you walk through the door. This hands-off approach is a lifesaver for busy professionals, parents, or anyone seeking to simplify their meal preparation without sacrificing quality.
After overcoming my initial apprehension (mostly irrational fears of it exploding, which I assure you, it won’t!), I started to experiment with a variety of dishes. Now, I can confidently say that our Instant Pot is in constant rotation, used at least three times a week. As someone initially hesitant to embrace culinary trends, I am now a full-fledged Instant Pot convert, and there’s no looking back!
Essential Ingredients for Authentic Instant Pot Kung Pao Chicken
Crafting this flavorful Kung Pao Chicken in your Instant Pot requires a blend of fresh produce and pantry staples. Each ingredient plays a crucial role in building the dish’s signature sweet, savory, and tangy profile:
- Garlic Cloves: Freshly minced garlic provides a pungent, aromatic foundation, essential for most Asian-inspired dishes.
- Fresh Ginger: Grated or minced fresh ginger adds a warm, zesty, and slightly spicy kick that brightens the entire sauce. Avoid dried ginger for this recipe, as fresh offers superior flavor.
- Tamari (or Soy Sauce): Tamari is a gluten-free alternative to traditional soy sauce, offering a rich, umami depth. If gluten isn’t a concern, high-quality soy sauce works perfectly.
- Hoisin Sauce: This thick, dark, and sweet-savory sauce is a cornerstone of Chinese cuisine, providing a rich, slightly smoky flavor. Ensure you use a gluten-free hoisin sauce if necessary to maintain the dish’s dietary considerations.
- Raw Honey: A touch of natural sweetness from honey balances the savory and tangy components of the sauce, creating a well-rounded flavor profile.
- Sweet Chili Sauce: Adds a delightful blend of sweet, spicy, and tangy notes, contributing to the authentic Kung Pao experience. Adjust the amount based on your preferred spice level.
- Rice Wine Vinegar: A mild, slightly sweet vinegar that provides the necessary tang and acidity to cut through the richness of the sauce, brightening the overall taste.
- Sesame Oil: A finishing touch, sesame oil lends a distinct nutty aroma and flavor, typically added at the end of cooking for maximum impact.
- Boneless, Skinless Chicken Breasts: Lean and versatile, chicken breasts are ideal for absorbing the sauce’s flavors and cooking quickly under pressure. Cut into bite-sized pieces for even cooking.
- Bell Pepper: Diced bell peppers (any color works, but red or orange add lovely sweetness and color) provide a crisp texture and a mild, fresh flavor.
- Green Beans: Trimmed and chopped green beans add a vibrant green color, a satisfying crunch, and a subtle earthy flavor, enhancing the dish’s nutritional value.
- Tapioca Starch (or Cornstarch or Arrowroot Powder): A vital thickening agent that transforms the flavorful liquid into a glossy, rich sauce, ensuring it coats the chicken and vegetables beautifully.
Mastering Instant Pot Kung Pao Chicken: A Step-by-Step Guide
Learning to cook with your Instant Pot, like any new skill, requires a bit of practice. Don’t worry, these detailed, step-by-step instructions are designed to make preparing this delicious Kung Pao Chicken as straightforward and enjoyable as possible, guiding you to a perfect meal every time.
STEP 1: PREPARE THE SAUCE AND CHICKEN FOR PRESSURE COOKING
Begin by combining all your sauce ingredients—minced garlic, fresh ginger, tamari (or soy sauce), hoisin sauce, raw honey, sweet chili sauce, rice wine vinegar, sesame oil, and water—directly into the inner pot of your pressure cooker (or Instant Pot). Whisk thoroughly until well combined and smooth. Next, add your boneless, skinless chicken breasts to the pot. Gently flip the chicken pieces a few times to ensure they are fully coated in the aromatic sauce. Secure the lid, set the pressure cook function to HIGH, and cook for 10 minutes. Crucially, ensure the sealing valve is in the closed position to build pressure effectively.
STEP 2: PREP YOUR VEGETABLES
While the chicken is pressure cooking, take this time to prepare your vegetables. Dice your bell pepper into uniform, bite-sized pieces and trim and chop your green beans. Set them aside; they will be added later to maintain their perfect crisp-tender texture.
STEP 3: RELEASE PRESSURE, REMOVE, AND CHOP CHICKEN
Once the Instant Pot signals that cooking is complete, immediately perform a quick release by carefully turning the sealing valve to the venting position. Stand clear of the steam. Once all steam has dissipated and the float valve drops, you can safely remove the lid. Carefully take out the cooked chicken breasts and transfer them to a cutting board. Allow them to cool slightly before cutting them into uniform, bite-sized pieces. This ensures the chicken remains juicy and easy to manage.
STEP 4: SAUTÉ VEGGIES AND THICKEN THE SAUCE
With the chicken removed, set your Instant Pot to the Sauté mode. Add your chopped bell pepper and green beans directly into the flavorful sauce remaining in the pot. Cook the vegetables for approximately 5 minutes, or until they reach your desired level of tenderness – crisp-tender is usually ideal for Kung Pao. While the veggies are cooking, prepare your thickening slurry: in a small bowl, whisk together 1 tablespoon of tapioca starch (or cornstarch or arrowroot powder) with 2 tablespoons of warm water until a smooth, lump-free mixture forms. Pour this slurry into the pot with the vegetables and sauce. Stir continuously for 1-2 minutes; you’ll notice the sauce will begin to thicken beautifully, developing a glossy sheen that perfectly coats the vegetables.
STEP 5: COMBINE AND SERVE!
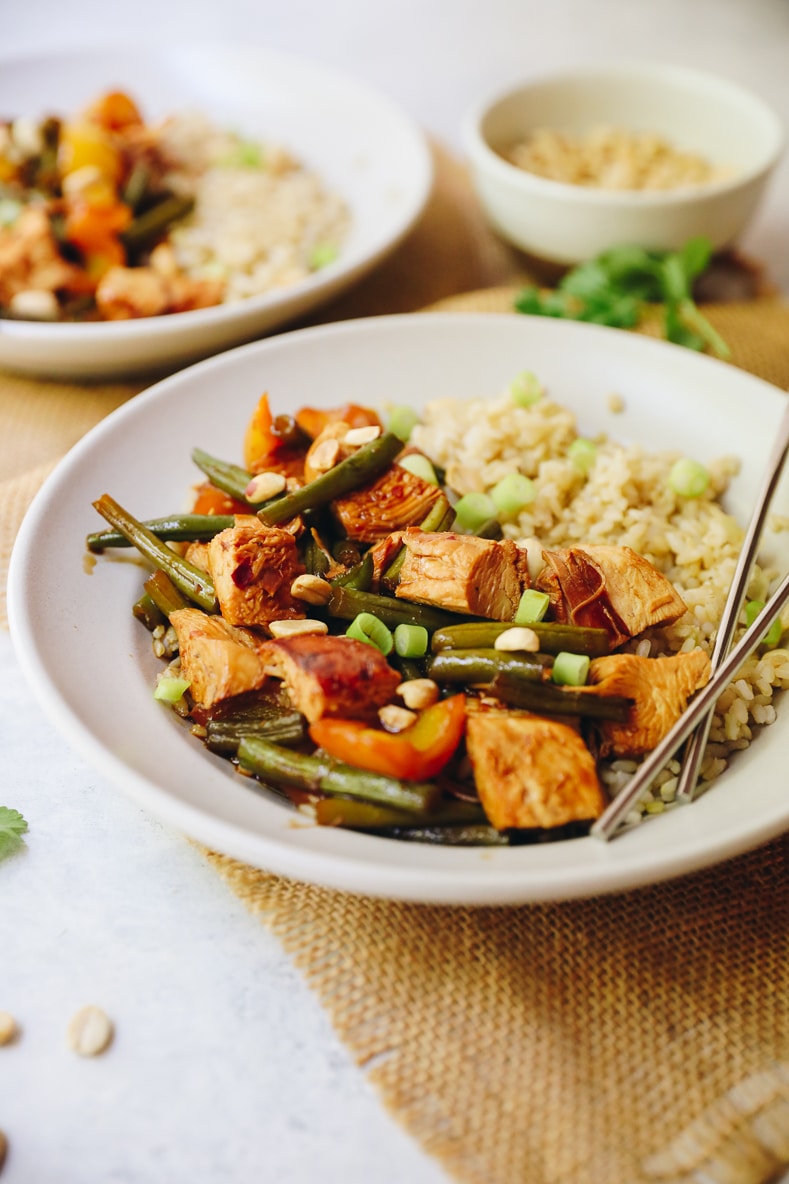
Finally, return the chopped, cooked chicken back into the pot with the thickened sauce and vegetables. Stir everything gently to ensure the chicken pieces are thoroughly coated in the rich Kung Pao sauce. Serve immediately over a bed of steamed rice (brown rice, jasmine, or even cauliflower rice are excellent choices). Enhance your dining experience with optional toppings such as crunchy roasted peanuts, fresh cilantro, a sprinkle of red chili flakes for extra heat, and thinly sliced scallions for a pop of color and mild onion flavor. Enjoy your delicious, homemade Instant Pot Kung Pao Chicken!
Achieving Perfectly Cooked Vegetables: A Key Instant Pot Hack
One of the most common questions about Instant Pot cooking is whether vegetables can be pressure cooked alongside the main protein. Through countless experiments, I’ve come to a definitive conclusion: it is generally not advisable to pressure cook delicate vegetables like bell peppers and green beans directly with the chicken. No matter how many different dishes I’ve tried, adding these vegetables from the start almost always results in a mushy, overcooked texture that detracts from the dish. The high heat and pressure are simply too intense for their delicate cell structures.
So, here’s the crucial hack for perfectly tender-crisp vegetables: Cook your meat separately using the pressure cook function. Once the meat is done and removed, switch your Instant Pot to Sauté mode and then add your prepped vegetables to the hot sauce. This method, while an extra step, guarantees that your vegetables retain their vibrant color, satisfying crunch, and nutritional integrity. It’s a small adjustment that makes a huge difference in the overall quality and enjoyment of your one-pot meal.
Creative Customizations: Easy Swaps for Your Kung Pao Chicken
This Instant Pot Kung Pao Chicken recipe is incredibly versatile and can be easily adapted to suit your preferences or what you have on hand. Don’t hesitate to get creative with these simple swaps:
- Swap Your Veggies: Feel free to experiment with different vegetables based on your favorites or what’s in season. Broccoli florets, snap peas, carrots (thinly sliced), mushrooms, or even zucchini would work wonderfully. You might need to adjust the sautéing time slightly to achieve your desired texture, but the core flavors will still shine through.
- Make it Gluten-Free: For those with gluten sensitivities or preferences, ensure you use certified gluten-free tamari instead of regular soy sauce, and always check the label for a gluten-free hoisin sauce. These substitutions will maintain the rich flavor profile without compromising your dietary needs.
- Change the Rice or Grain: While I love serving this pressure cooker Kung Pao Chicken with nutty brown rice, the possibilities are endless. Consider fragrant jasmine rice, fluffy basmati, nutritious quinoa, or even lower-carb alternatives like cauliflower rice or broccoli rice. You could also serve it over noodles for a different experience.
- Use Frozen Chicken: Forgot to thaw your chicken? No problem! If using frozen boneless, skinless chicken breasts, simply adjust your Instant Pot pressure cooking time from 10 minutes to 12-15 minutes (depending on thickness). The Instant Pot handles frozen meat beautifully, making meal prep even more flexible.
- Any Pressure Cooker Works: While the Instant Pot has become synonymous with electric pressure cooking, any brand of electric pressure cooker will yield excellent results with this recipe. Just follow your specific model’s instructions for pressure cooking and sautéing.
- Add Some Spice: If you crave more heat, don’t hold back! Incorporate an extra pinch or two of red pepper flakes into the sauce, or even stir in a teaspoon of sriracha or chili garlic sauce at the end for a bolder, spicier kick.
- Explore Other Proteins: While chicken is traditional, this sauce pairs beautifully with other proteins. Try it with diced pork, shrimp (add for the last 1-2 minutes of sautéing with veggies), firm tofu (pressed and cubed), or even thinly sliced beef for a delicious variation.
Stovetop Alternative: Enjoy Kung Pao Chicken Without a Pressure Cooker
Absolutely, you can still create a delicious Kung Pao Chicken right on your stovetop if you don’t own an Instant Pot or pressure cooker! The Instant Pot version boasts a prep and cook time of about 20 minutes (plus 5-10 minutes for pressure to build), but the stovetop method is equally achievable, though the flavors may not develop quite the same depth that pressure cooking offers.
Here’s my suggestion for making this recipe on the stovetop: Start by heating a large skillet or wok over medium-high heat with a tablespoon of oil. Add the chicken breasts whole and sauté them for approximately 5-6 minutes per side, or until they are fully cooked through and beautifully golden brown. Remove the chicken from the pan and set it aside to cool slightly. Once cool enough to handle, chop the chicken into bite-sized pieces. Next, return the skillet to medium heat. Add all of your sauce ingredients (except the chicken, veggies, and tapioca starch) to the pan and bring it to a gentle simmer, cooking for a few minutes until the flavors meld together. Then, add your prepared bell pepper and green beans to the sauce and cook until they reach your desired crisp-tender texture, typically 5-7 minutes. While the vegetables cook, prepare the tapioca starch slurry (1 tbsp tapioca starch mixed with 2 tbsp warm water). Stir the slurry into the simmering sauce and vegetables, continuing to cook for 1-2 minutes until the sauce thickens. Finally, reintroduce the chopped chicken to the pan, stirring to coat it evenly with the rich sauce. Serve immediately with rice and your favorite toppings. While the stovetop version might take a similar amount of time and offer a slightly less intense flavor profile compared to its pressure-cooked counterpart, it will undoubtedly still be a wonderfully delicious and satisfying meal!
Meal Prep and Storage Tips for Convenience
This Instant Pot Kung Pao Chicken is an excellent candidate for meal prepping, ensuring you have delicious, healthy meals ready to go throughout the week. To maximize its convenience and flavor, consider these tips:
- Advance Preparation: The sauce can be made ahead of time and stored in an airtight container in the refrigerator for up to 3-4 days. You can also chop your vegetables in advance, keeping them fresh in sealed bags or containers. This significantly cuts down on active cooking time on busy nights.
- Storing Leftovers: Once cooked, allow the Kung Pao Chicken to cool completely before transferring it to airtight containers. It will keep well in the refrigerator for up to 3-4 days. For best results, store the chicken and sauce separately from rice if you anticipate eating it over several days, to prevent the rice from becoming soggy.
- Freezing Instructions: This dish freezes beautifully! Once cooled, transfer portions of the Kung Pao Chicken (without rice) into freezer-safe containers or heavy-duty freezer bags. It can be stored in the freezer for up to 2-3 months. Thaw overnight in the refrigerator before reheating.
- Reheating: For best results, reheat leftovers gently on the stovetop over medium heat, adding a splash of water or broth if the sauce has thickened too much. Alternatively, you can microwave individual portions, stirring occasionally, until heated through. Be careful not to overcook, as this can dry out the chicken.
Love this recipe? You might also enjoy these other healthy and easy meal ideas:
- Nourishing Instant Pot Bone Broth
- Quick 20-Minute Veggie Pad Thai
- Effortless Slow Cooker Sweet and Sour Chicken
- Flavorful Easy Thai Basil Stir Fry
- Zesty Orange Chicken Noodles
- Comforting Spicy Ramen Noodles
Instant Pot Kung Pao Chicken
5 Stars 4 Stars 3 Stars 2 Stars 1 Star
5 from 3 reviews
Simplify your dinner routine with this incredible one-pot Instant Pot Kung Pao Chicken! This healthy recipe brings together succulent chicken and fresh vegetables in a vibrant, flavorful sauce, all made with everyday ingredients. Achieve authentic Asian-inspired flavors in a fraction of the time, perfect for a satisfying family meal.
- Author: Davida Lederle
- Prep Time: 5 minutes
- Cook Time: 15 minutes
- Total Time: 20 minutes
- Yield: 4 servings 1x
Ingredients
Scale
- 2 garlic cloves, minced
- 1 tbsp fresh ginger, minced or grated
- 1/4 cup tamari (or soy sauce)
- 1 tbsp hoisin sauce (use gluten-free hoisin sauce, if necessary)
- 1 tbsp honey
- 1 tbsp sweet chili sauce
- 2 tbsp rice wine vinegar
- 1 tsp sesame oil
- 1/4 cup water
- 1 lb boneless, skinless chicken breasts
- 1 bell pepper, diced
- 1 lb green beans, ends trimmed and chopped
- 1 tbsp tapioca starch (or cornstarch or arrowroot)
- optional toppings: peanuts, cilantro, red pepper flakes, scallions etc…
Instructions
- Mix all of your ingredients (except chicken, veggies and tapioca starch) in the Instant Pot.
- Place your chicken on top and then flip so it’s coated on both sides.
- Set to pressure cook on high for 10 minutes and make sure valve is set to close.
- While chicken is cooking, chop up your veggies and set aside.
- As soon as chicken is done, quick release to relieve all steam. Remove chicken and cut into cubes.
- Set Instant Pot to saute mode and add veggies. Cook in sauce for 5 minutes or until fully cooked through.
- Meanwhile mix together 1 tbsp of tapioca flower (or cornstarch or arrowroot powder) with 2 tbsp of warm water and mix together to form a “slurry”.
- Add slurry to your sauce and veggies. Sauce should start to thicken (1-2 minutes)
- Once sauce has thickened, add your chicken back in and stir to coat with sauce.
- Serve with rice and optional toppings like peanuts, cilantro and scallions.