
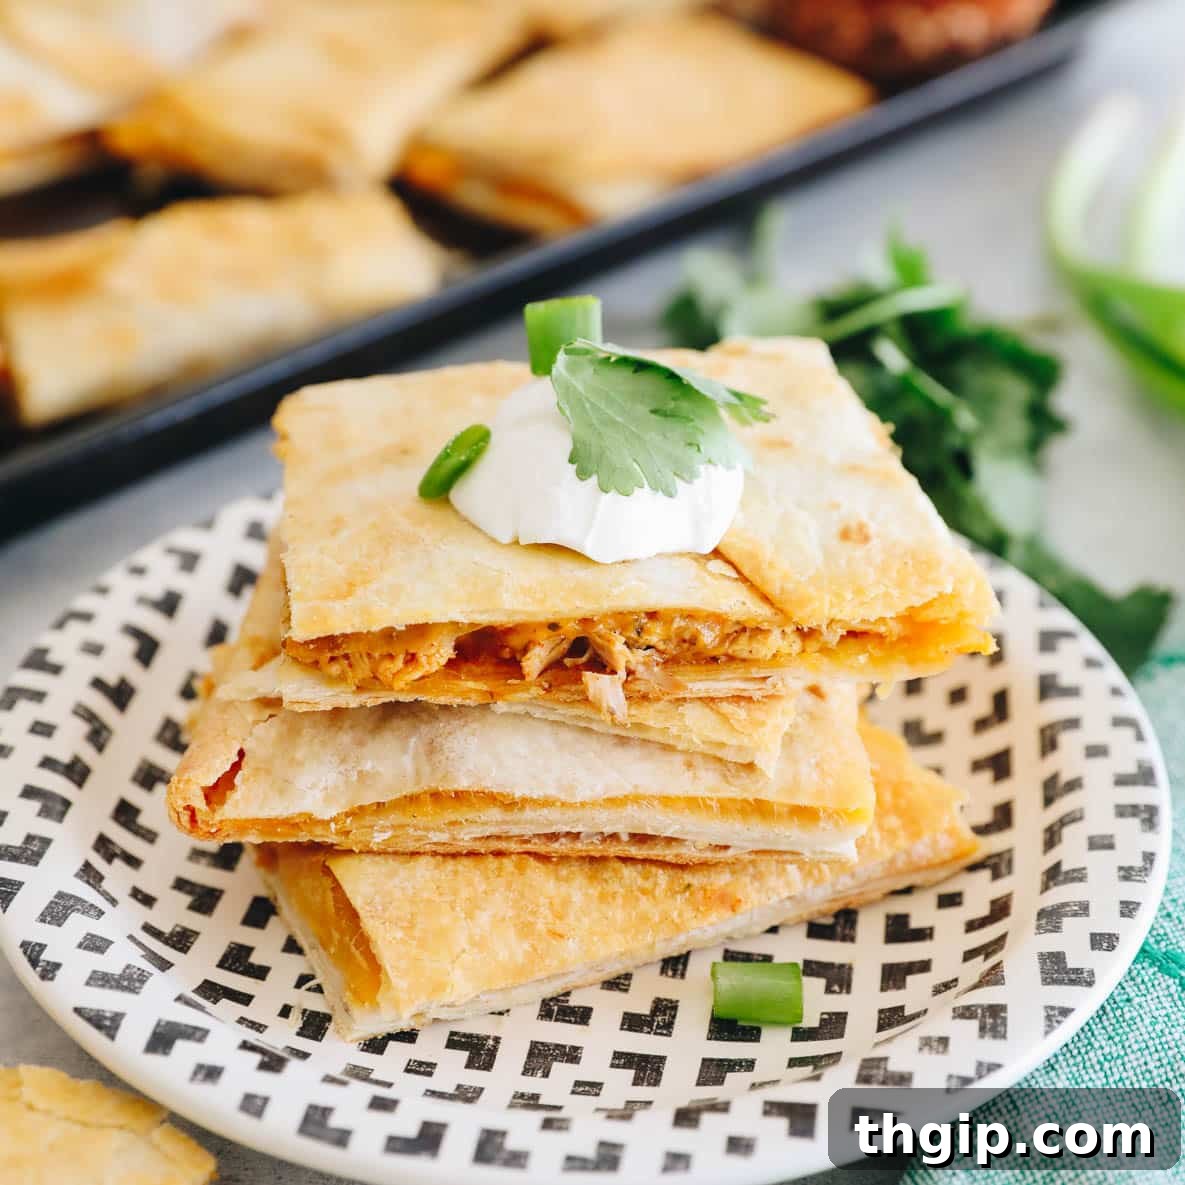
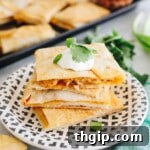
Say goodbye to endless flipping and hello to effortless group meals with these incredible Sheet Pan Chicken Quesadillas! Utilizing the genius of sheet pan cooking, this recipe transforms simple ingredients like store-bought rotisserie chicken, a generous helping of shredded cheese, and vibrant taco seasoning into a family-favorite quesadilla feast. Perfectly crispy, gooey, and packed with flavor, these oven-baked quesadillas are designed for maximum convenience and minimal cleanup.
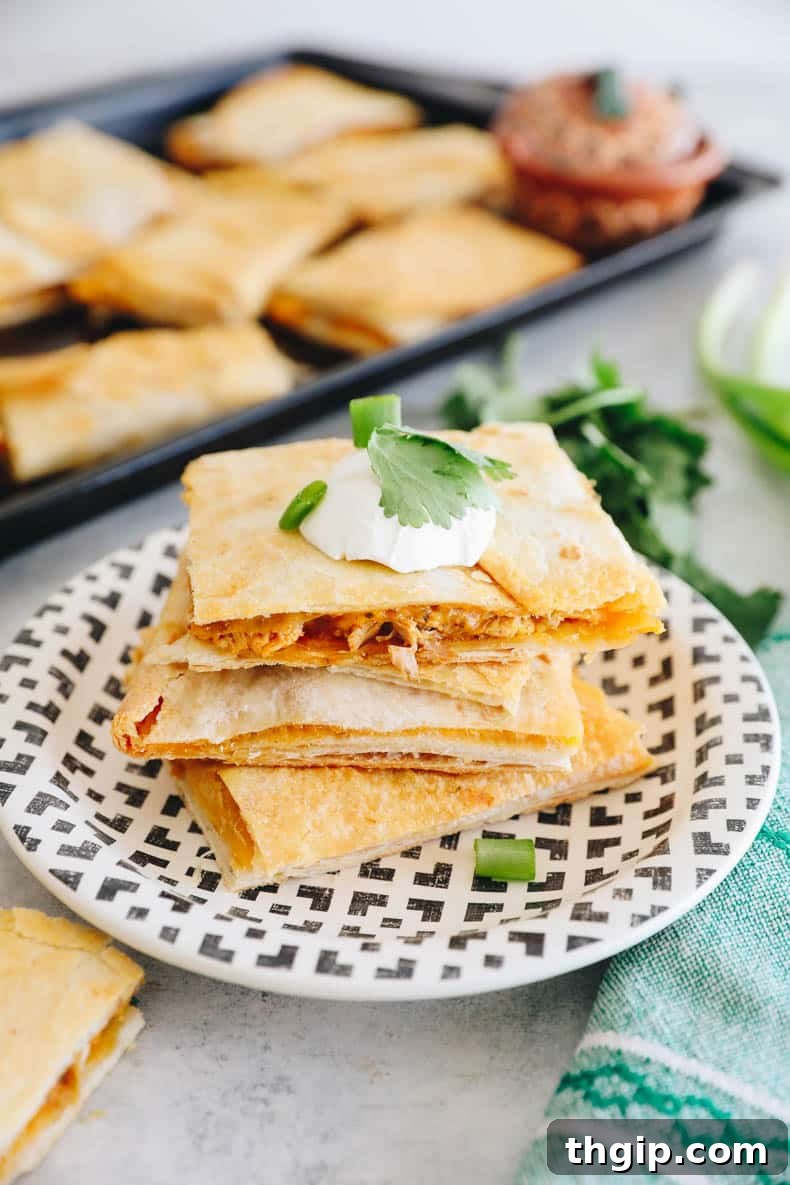
Table of Contents
- The Magic of Sheet Pan Cooking
- Essential Sheet Pan Quesadilla Ingredients
- How to Master Oven-Baked Sheet Pan Quesadillas
- Delicious Quesadilla Toppings & Serving Suggestions
- FAQs: Your Sheet Pan Quesadilla Questions Answered
- Storage & Reheating for Maximum Freshness
- More Mouth-Watering Mexican-Inspired Recipes
- Sheet Pan Quesadillas Recipe Card
The Magic of Sheet Pan Cooking for Quesadillas
Following the immense popularity of my sheet pan grilled cheese recipe, it became clear that you, our wonderful readers, are constantly seeking easy, large-batch recipes that also happen to be incredibly kid-friendly. And what’s more universally loved than a quesadilla? While every human, young or old, finds comfort in these cheesy tortilla delights, they hold a special place in the hearts of toddlers everywhere. The ability to prepare a generous batch of perfectly crisp and gooey quesadillas in the oven is truly a game-changer for busy parents and anyone looking to streamline their meal prep!
The beauty of these oven-baked quesadillas lies in their incredible adaptability. This recipe provides a fantastic base, allowing you to easily customize the fillings to suit any palate or dietary preference. While I often stick to a classic chicken and cheese combination (primarily because my toddler has an uncanny ability to spot a rogue vegetable from a mile away!), the possibilities for incorporating your favorite veggies or different proteins are endless. Imagine black beans, corn, sautéed bell peppers, or even a different type of shredded meat – all baking together in harmony.
Once you experience the sheer convenience and delicious results of making quesadillas on a sheet pan, you’ll wonder how you ever managed without this ingenious method. The minimal prep time and hands-off baking mean you can spend less time slaving over a hot stove and more time enjoying a fantastic meal with your loved ones. So, grab your baking sheets, because it’s time to revolutionize your quesadilla game and create a satisfying, customizable meal in the oven!
Essential Sheet Pan Quesadilla Ingredients
Crafting the perfect sheet pan quesadilla begins with a few key ingredients. Each component plays a crucial role in achieving that desirable crispy exterior and wonderfully melted, flavorful interior. Here’s what you’ll need to gather:
- Flour Tortillas: For this recipe, I highly recommend using large, burrito-sized flour tortillas. Their generous size allows for ample filling and provides enough overlap to create a fully enclosed, single-unit quesadilla on the sheet pan. If you’re looking for gluten-free or grain-free alternatives, those can certainly be used, but be aware that they might be less pliable and could require slight adjustments to baking times to achieve the perfect crispness.
- Melted Butter: Butter is your secret weapon for achieving a beautifully golden-brown and extra-crispy tortilla. You’ll use it not only to grease your sheet pan, ensuring the quesadillas don’t stick and get an initial crisp, but also for brushing the tops of the tortillas for that irresistible crunch and rich flavor.
- Olive Oil: A small amount of olive oil is mixed with the shredded chicken. This helps to moisten the chicken, ensuring it doesn’t dry out during baking, and also helps the taco seasoning adhere evenly, infusing every bite with flavor.
- Rotisserie Chicken: This is where the “easy” factor truly shines! Store-bought rotisserie chicken is a phenomenal time-saver, eliminating the need for pre-cooking your protein. Simply shred it, and you’re halfway there. Of course, you can always use homemade shredded chicken or substitute with another cooked protein like ground beef, turkey, or even pulled pork if you prefer.
- Taco Seasoning: A good quality taco seasoning blend is essential for giving your quesadillas that classic, zesty Mexican-inspired flavor. If you don’t have a pre-made blend, it’s incredibly easy to whip up your own using a combination of common pantry spices: chili powder, ground cumin, paprika, garlic powder, onion powder, dried oregano, plus salt and black pepper to taste. This allows you to control the spice level and sodium content.
- Shredded Cheese: The heart of any good quesadilla! I personally love using shredded cheddar or Monterey Jack cheese for their excellent melting properties and mild, creamy flavor. However, feel free to get creative and use your favorite shredded cheese blend – pepper jack for a bit of a kick, a Mexican blend for convenience, or even a mix of several cheeses.
- Salt + Black Pepper: Essential for seasoning the chicken mixture and bringing out all the flavors. Adjust the amounts to your personal taste and dietary preferences.
To successfully execute this recipe, you will also need two large baking sheets. One will be used to bake your quesadillas, and the second will be placed directly on top of the tortillas during part of the baking process. This crucial step helps to press the quesadillas down, ensuring they hold their shape beautifully and develop an even crispness throughout.
How to Master Oven-Baked Sheet Pan Quesadillas
Making a large batch of crispy, cheesy quesadillas has never been simpler, thanks to the efficiency of sheet pan cooking. Follow these straightforward steps for a perfectly baked result every time:
STEP 1: PREP YOUR SHEET PAN & TORTILLA BASE
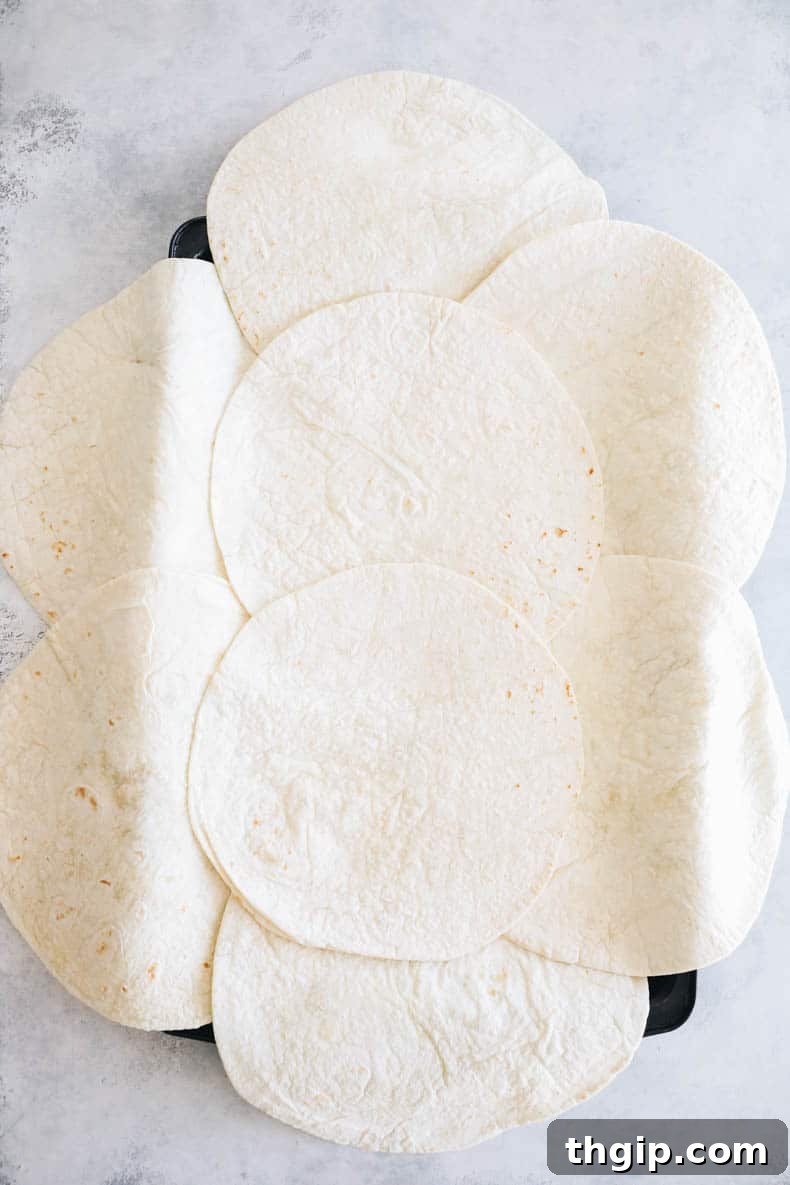
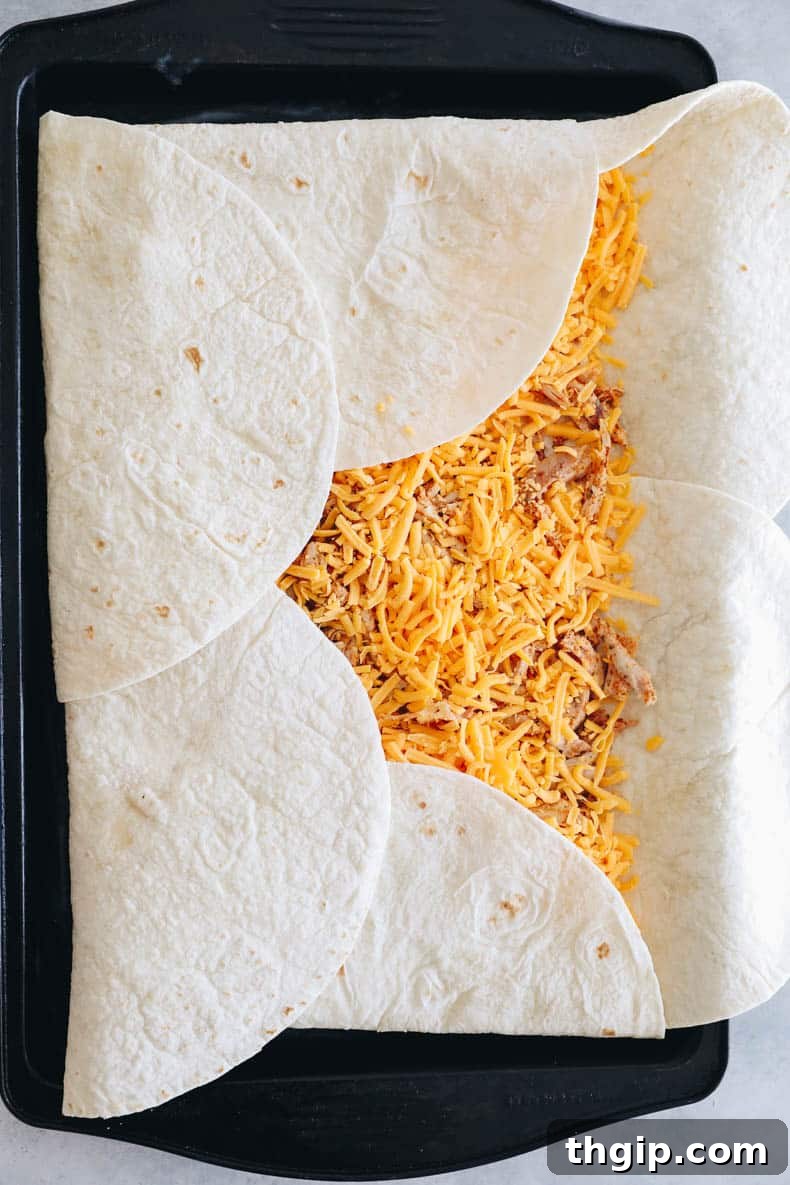
Begin by preheating your oven to a steady 400 degrees Fahrenheit (200 degrees Celsius). While the oven heats, take one of your large baking sheets and generously brush it with about 1 tablespoon of melted butter. This butter layer is key for achieving a golden, crispy bottom crust. Next, arrange 6 of your large flour tortillas around the edges of the sheet pan, allowing them to slightly overlap the rim of the pan and also overlap with each other in the center. Then, place the remaining 2 tortillas directly in the middle of the pan. This creates a large, continuous base for your quesadilla filling, with the overhanging edges ready to fold over and seal everything in.
STEP 2: PREPARE THE FLAVORFUL CHICKEN MIXTURE
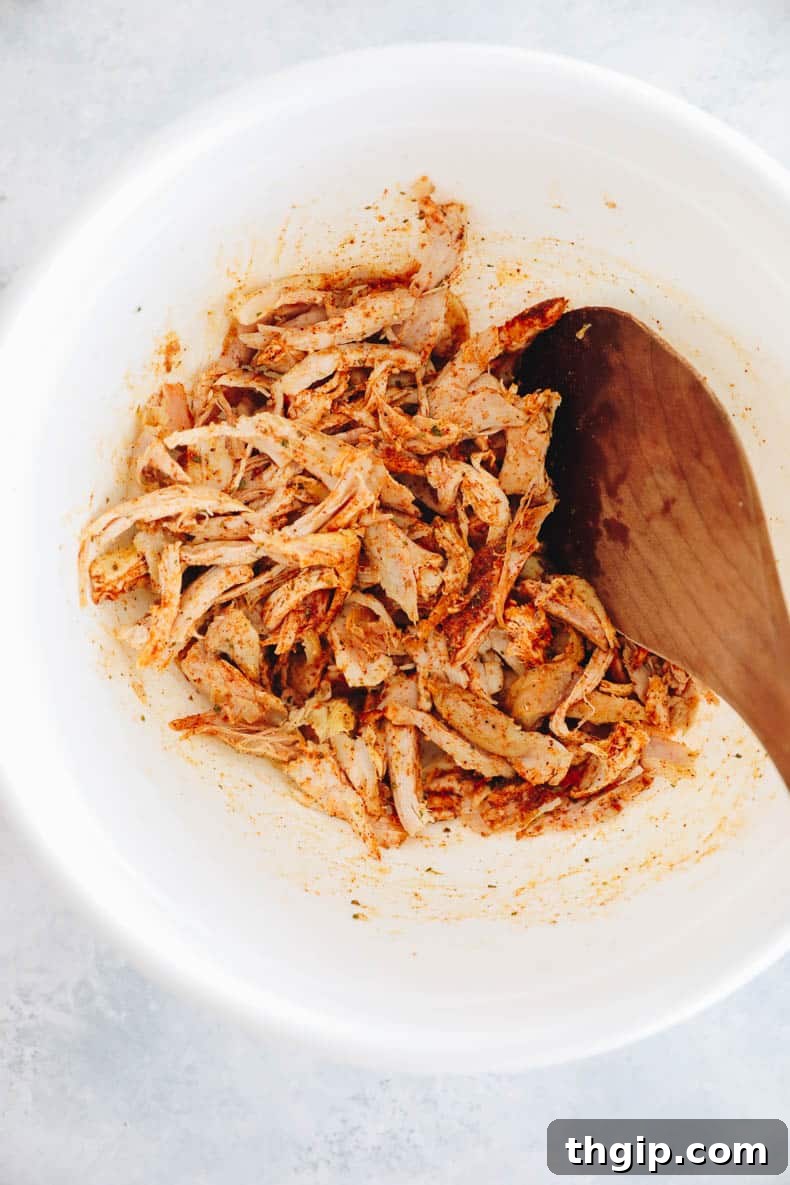
In a spacious mixing bowl, combine your shredded rotisserie chicken, a drizzle of olive oil, and the vibrant taco seasoning. Use your hands or a spoon to thoroughly mix all the ingredients together, ensuring the chicken is evenly coated with the seasoning. This step is crucial for distributing the delicious taco flavor throughout your quesadillas, preventing any bland bites. The olive oil also helps to keep the chicken moist as it bakes in the oven.
STEP 3: ASSEMBLE, STUFF & BAKE TO PERFECTION
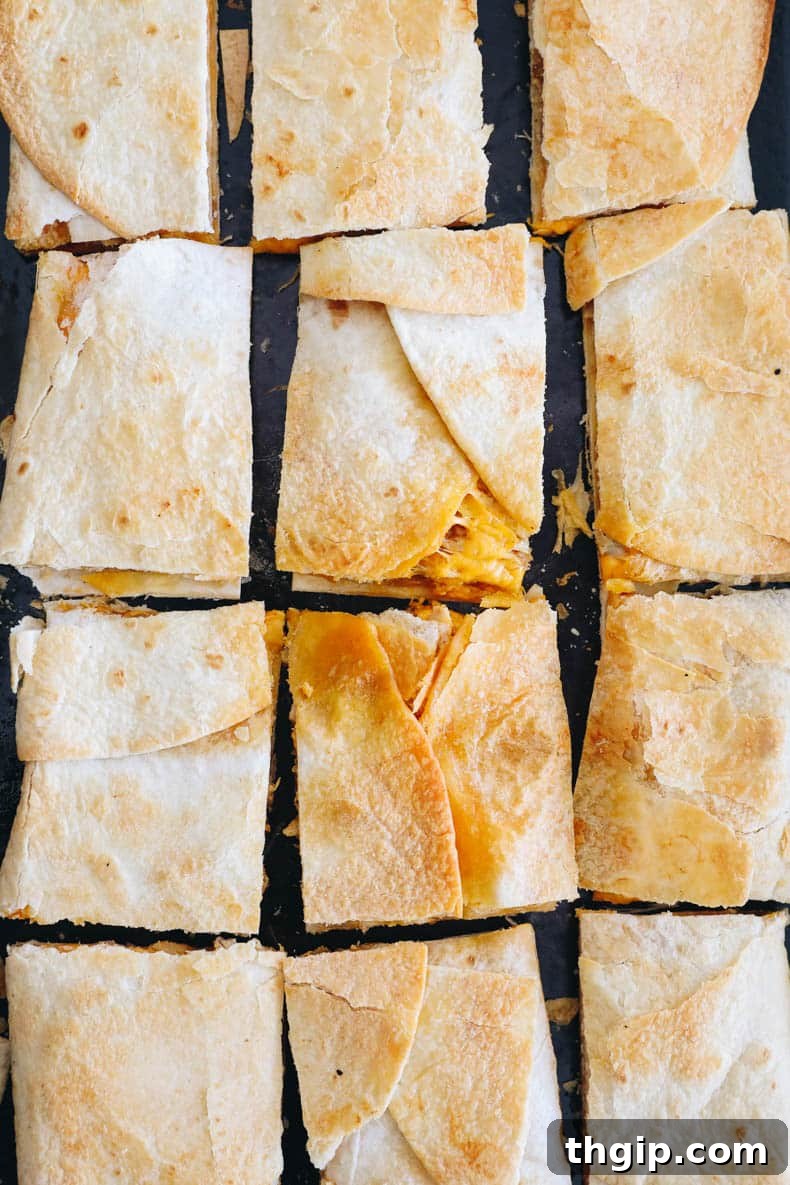
Once your tortilla base is set and your chicken mixture is ready, it’s time for assembly. Evenly spread the seasoned chicken mixture over all the tortillas on the sheet pan, ensuring every section gets a good amount of filling. Next, generously sprinkle the shredded cheese over the chicken, followed by a light seasoning of salt and pepper to taste. Now, carefully fold the overhanging tortilla edges from the perimeter back over the center tortillas, completely covering all the delicious filling. This creates a large, single, enclosed quesadilla unit. Brush the top of these folded tortillas with the remaining melted butter – this will contribute to that irresistible golden-brown and crispy finish. Finally, place your second baking sheet directly on top of the quesadillas. This acts as a press, ensuring even cooking and crisping, and helps the quesadillas hold their shape. Bake in the preheated oven for 20 minutes. After this time, carefully remove the top baking sheet and continue to bake the quesadillas, uncovered, for an additional 5 to 10 minutes, or until they are beautifully crisp and golden brown on top.
STEP 4: CHOP, SERVE & ENJOY
Once your sheet pan quesadillas emerge from the oven, looking deliciously golden brown and crisp around the edges, carefully remove them. Allow them to rest for a few minutes on the sheet pan – this makes them easier to cut and helps the cheese set slightly. Then, using a pizza cutter or a sharp knife, cut the large quesadilla into your desired serving sizes, whether that’s squares, rectangles, or triangles. Transfer them to plates and get ready to elevate your meal with a selection of your favorite toppings. The warm, cheesy, and crispy quesadillas are best enjoyed immediately!
Delicious Quesadilla Toppings & Serving Suggestions
While these sheet pan chicken quesadillas are absolutely delicious on their own, a selection of fresh and flavorful toppings can take them to the next level. Here are some of our favorite garnishes and accompaniments:
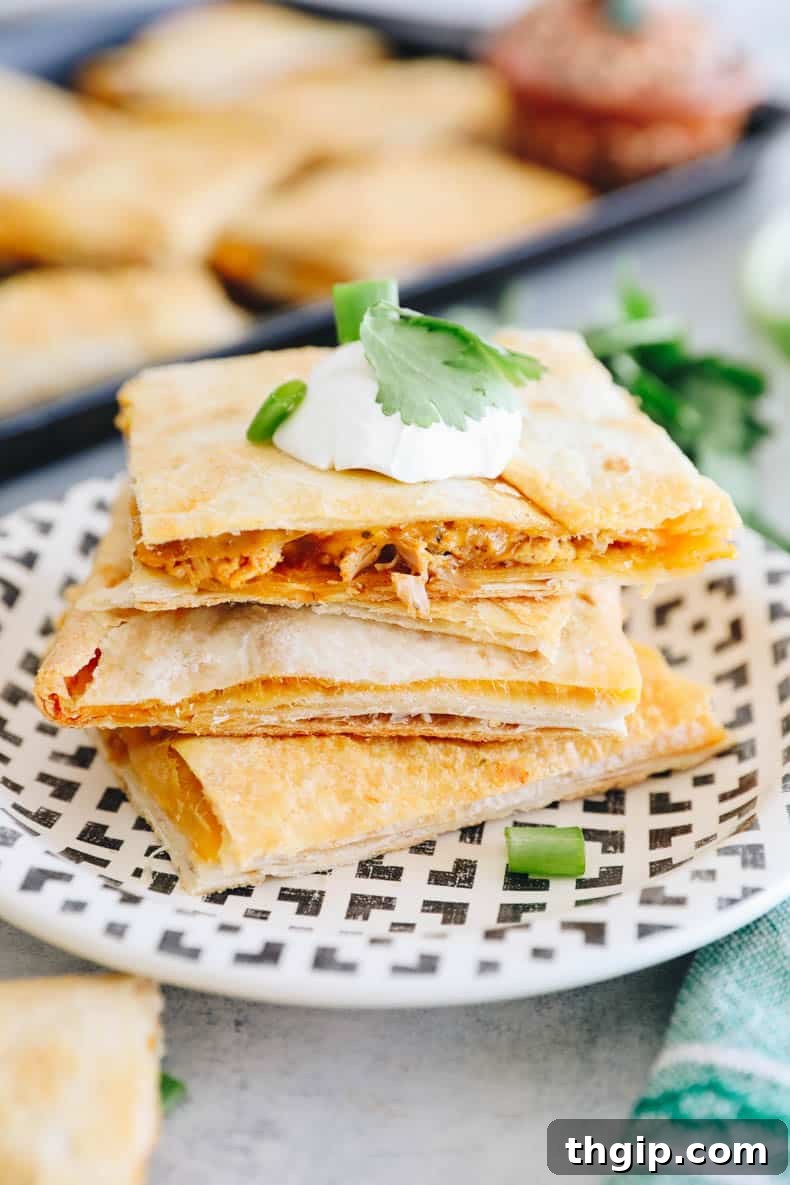
- Sour Cream or Greek Yogurt: A dollop of cool, creamy sour cream or a healthier Greek yogurt alternative provides a wonderful contrast to the warm, savory quesadillas. It also helps to temper any spice!
- Salsa: Whether you prefer a chunky pico de gallo, a smooth red salsa, or a tangy green salsa (salsa verde), a fresh salsa adds a burst of freshness and acidity. For an authentic experience, my pico de gallo recipe is always a fantastic choice!
- Guacamole or Sliced Avocado: You can never have enough creamy, rich avocado! Whip up a batch of my homemade guacamole, or simply fan out some fresh avocado slices for a healthy and satisfying addition.
- Hot Sauce: For those who love a bit of heat, a dash of your favorite hot sauce is a must. We adore adding a drizzle of my homemade jalapeño hot sauce, but any store-bought variety will do the trick!
- Jalapeños: Craving even more of a kick? Top your quesadillas with thinly sliced fresh jalapeños for vibrant heat, or use pickled jalapeños for a tangy, milder spice.
- Cilantro + Green Onion: Freshly chopped cilantro and thinly sliced green onions not only add a beautiful pop of color but also contribute a bright, herbaceous flavor that perfectly complements the rich quesadillas. They’re excellent as a garnish!
- Diced Red Onion: For a sharp, piquant crunch, a scattering of finely diced red onion can elevate the flavor profile.
- Corn and Black Beans: For extra texture and nutrition, a spoonful of warmed corn kernels (fresh or frozen) and rinsed black beans can be added as a topping, or even mixed into the chicken filling for added heartiness.
FAQs: Your Sheet Pan Quesadilla Questions Answered
Absolutely! This recipe is incredibly versatile and encourages customization. Some fantastic additions include black beans (drained and rinsed), corn (fresh or frozen), finely diced red or green bell peppers, chopped onions, or even sautéed mushrooms. For vegetables, I recommend sautéing them lightly in a pan with a little olive oil and taco seasoning before adding them to the quesadillas. This ensures they soften properly and meld well with the other flavors. A classic veggie mix often includes finely chopped onion, red bell pepper, and green bell pepper – just give them a quick sauté until tender-crisp before stuffing them right into your quesadillas.
Yes, absolutely! While store-bought rotisserie chicken is a fantastic time-hack for this already simplified recipe, feel free to substitute with your favorite cooked protein. If you prefer to make your own shredded chicken, you could poach chicken breasts and shred them, or try the chicken from this delicious burrito recipe. For an even quicker option, our Instant Pot Salsa Chicken is perfect. Ground beef, turkey, or pork (cooked and seasoned with taco seasoning) would all work wonderfully as fillings. For a vegetarian option, seasoned refried beans or black beans make an excellent protein substitute.
For sure! The choice of cheese largely comes down to personal preference. I often opt for shredded cheddar cheese or Monterey Jack for their excellent melting consistency and classic flavor. However, feel free to experiment with pepper jack for a spicy kick, a Mexican blend for convenience, or even a mix of Gruyère and cheddar for a richer, nuttier flavor. Just ensure it’s a good melting cheese to get that desirable gooey interior.
Yes, with a few simple swaps! To make them vegetarian, simply replace the chicken with seasoned black beans, refried beans, or a hearty sautéed vegetable mixture (like bell peppers, onions, and corn). For a vegan version, use plant-based tortillas (check ingredients carefully), omit the butter or use a vegan butter alternative, swap the chicken for beans or plant-based crumbles, and use your favorite vegan shredded cheese.
Several factors contribute to crispy quesadillas! First, ensure your oven is fully preheated. Second, don’t skimp on the butter for brushing the pan and the tortillas – this creates a barrier and helps with browning. Third, don’t overfill the quesadillas, as too much moisture from the filling can make them soggy. Finally, baking with the second sheet pan on top for the initial 20 minutes helps press them down, ensuring even contact with the hot pan and promoting crispness. The final uncovered bake then allows any remaining moisture to evaporate, resulting in a perfectly golden, crispy finish.
While corn tortillas can be used, they are generally less pliable and tend to break more easily than flour tortillas, especially when folding and baking in this large sheet pan format. They also have a distinct flavor and texture. If you opt for corn tortillas, you might need to use slightly fewer and layer them more carefully, possibly brushing each with a little oil to prevent cracking. The overall result will be different in texture compared to flour tortillas, but still delicious if you prefer corn. For the easiest and most cohesive sheet pan quesadilla, flour tortillas are recommended.
Storage & Reheating for Maximum Freshness
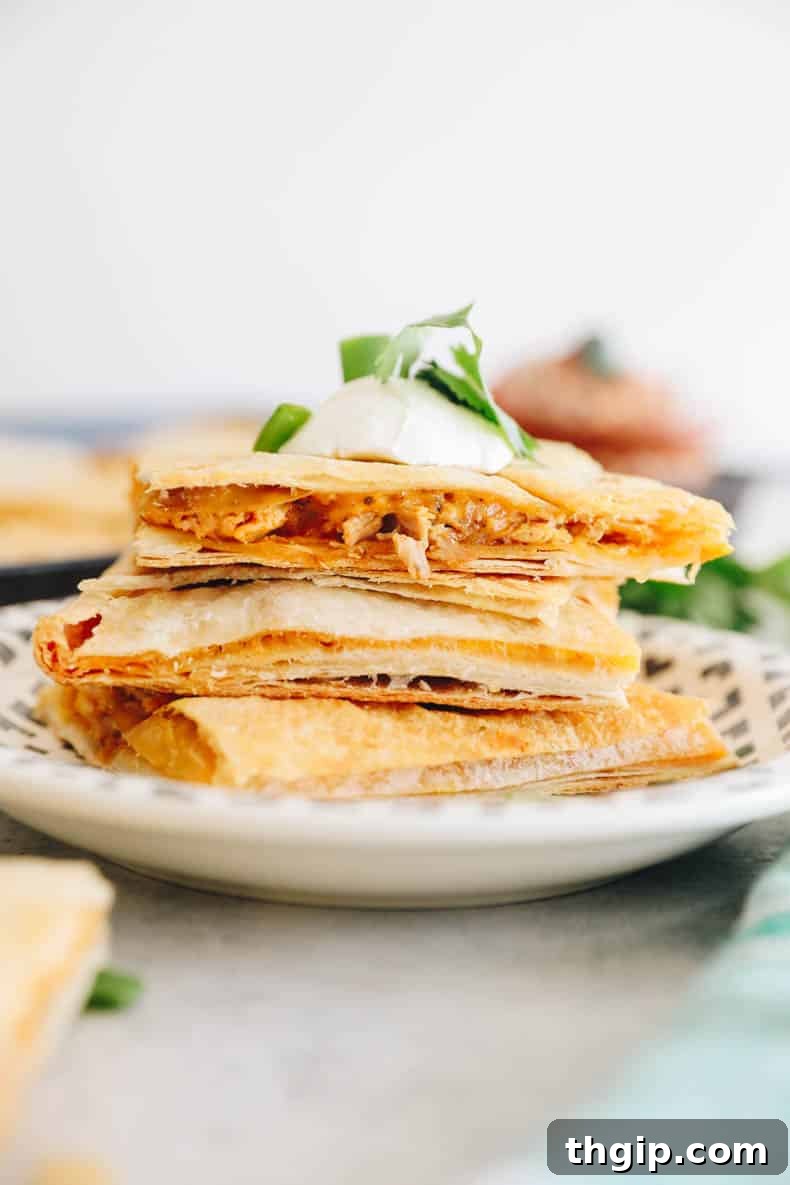
These sheet pan quesadillas are fantastic for making ahead or enjoying as leftovers. Proper storage ensures they stay delicious, and knowing the best reheating methods helps them regain their delightful crispness.
Refrigerator: To store your leftover quesadillas, allow them to cool completely to room temperature. Then, transfer them to an airtight container. They will keep fresh in the refrigerator for up to 3 days. When ready to reheat, you have a few options: for maximum crispness, reheat them in a preheated oven (around 350°F / 175°C) for 5-10 minutes, or in a dry skillet over medium heat until warmed through and crispy. For a quicker option, the microwave works, but the tortillas will be softer.
Freezer: Sheet pan quesadillas are excellent for freezing, making them a superb meal prep option. Once baked and cooled, cut the quesadillas into individual servings. For best results, wrap each serving tightly in plastic wrap, then place them in a freezer bag or a freezer-safe container. They can be stored in the freezer for up to 3 months. To reheat from frozen, you can microwave them for about 2-3 minutes until heated through, then finish them in a hot skillet or oven for a few minutes to regain some crispness. Alternatively, allow them to thaw in the refrigerator overnight, and then reheat using the oven or stove-top methods mentioned above.
More Mouth-Watering Mexican-Inspired Recipes
If you’re loving the vibrant flavors of these sheet pan quesadillas and are looking for more delicious Mexican-inspired meals, explore these other fantastic recipes from our collection:
- Enchilada Soup
- The Best Quinoa Tortilla Soup
- Chicken Pozole
- Black Bean Enchiladas
- Instant Pot Chicken Taquitos
- Chicken Burritos
- Copycat Chipotle Burrito Bowls
Print Recipe
Sheet Pan Quesadillas
No reviews yet
These chicken sheet pan quesadillas could not be easier to make! With store-bought rotisserie chicken, shredded cheese and taco seasoning you’ll have the perfect base for a quesadilla that can easily be made in the oven, offering a convenient, delicious, and fully customizable meal for any day of the week.
- Author: Davida Lederle
- Prep Time: 10 minutes
- Cook Time: 25 minutes
- Total Time: 35 minutes
- Yield: 4 servings
- Category: Dinner, Lunch, Appetizer
- Method: Bake, Oven
- Cuisine: Mexican, Tex-Mex, American
Ingredients
- 8 x 10 inch flour tortillas (burrito-size)
- 2 tbsp melted butter
- 1 tbsp olive oil
- 2 cups shredded rotisserie chicken
- 1 tbsp taco seasoning
- 3 cups shredded cheese (I like cheddar or pepper jack)
- Salt + Pepper, to taste
Instructions
- Preheat oven to 400 degrees F (200 degrees C).
- Brush half of the melted butter directly onto a large sheet pan, ensuring even coverage.
- Layer 6 of the large flour tortillas around the edges of the sheet pan, allowing them to slightly hang over the sides. Place the remaining 2 tortillas in the middle of the pan to create a full base.
- In a bowl, combine the shredded chicken, olive oil, and taco seasoning. Spread this chicken mixture evenly over the entire tortilla base on the sheet pan.
- Generously sprinkle the shredded cheese over the chicken mixture, then season with salt and pepper to your preference.
- Carefully fold the overhanging tortillas from the perimeter back over the center tortillas, completely covering all the filling to seal it in.
- Brush the top of the folded tortillas with the remaining melted butter. Place a second baking sheet directly on top of the quesadillas.
- Bake in the preheated oven for 20 minutes. After 20 minutes, remove the top baking sheet and continue to bake, uncovered, for an additional 5-10 minutes, or until the quesadillas are wonderfully crisp and golden brown.
- Remove from the oven, cut into desired serving sizes (squares or rectangles), and top with your favorite suggestions (listed above).
- Store any leftovers in the fridge for up to 3 days or in the freezer for longer storage (see detailed freezer instructions above).