
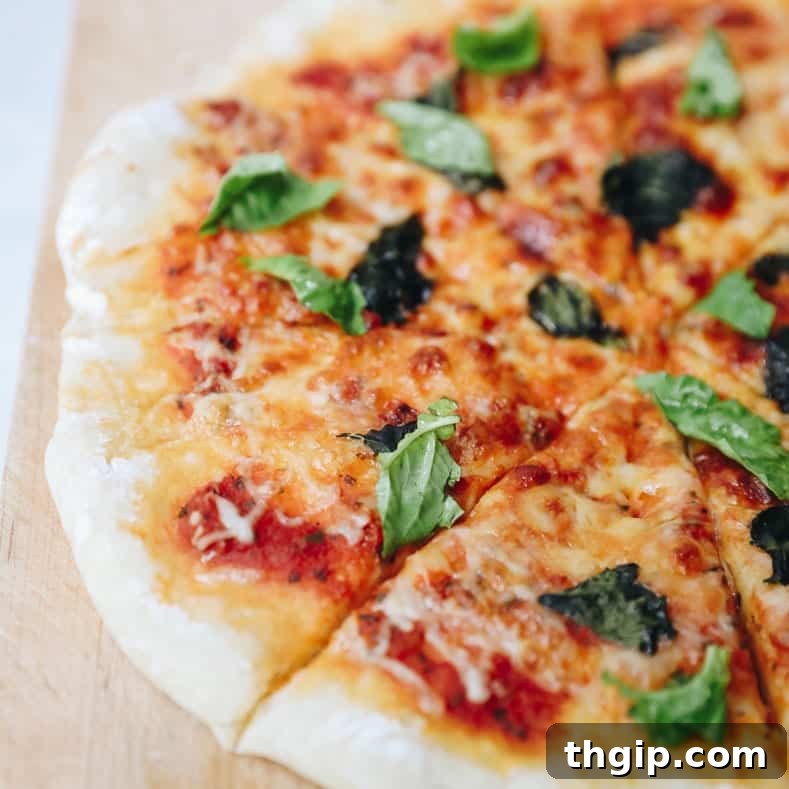
Dreaming of a delicious, bubbly pizza crust but intimidated by baking? This easy, fool-proof pizza dough recipe is specifically designed for beginners, guaranteeing a perfect pizza crust every time, no matter your experience level. We’ll guide you through simple instructions for creating the ultimate foundation for your favorite pizza, along with a classic Margherita pizza recipe that you can customize and make your own. Whether you prefer to knead by hand or use a stand mixer, we’ve included clear directions for both methods!
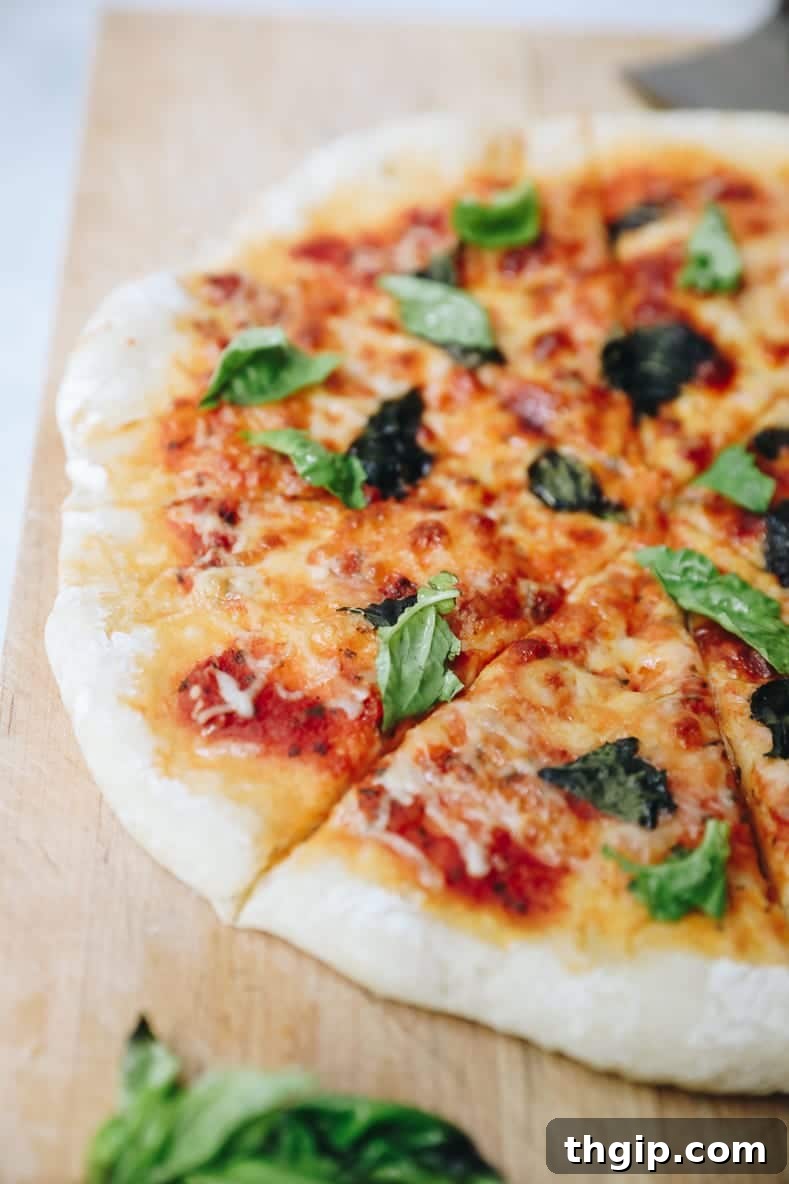
Baking Bliss: Why Homemade Pizza Dough is Your Next Culinary Adventure
In recent times, many of us have found solace and creativity in the kitchen, turning to baking as a comforting escape. It seems there’s a collective instinct to bake bread when the world feels uncertain, and this phenomenon has led to a fascinating surge in home baking. From seasoned cooks to absolute novices, people are experimenting with everything from intricate sourdough starters to simple cookies. It’s inspiring to see so many embracing the joys of creating something delicious from scratch, even if it means flour and yeast become temporary luxury items! While elaborate bread-making can be a significant undertaking, there are many simple pleasures to be found in homemade baked goods.
You might recall my sourdough baking journey a few years ago, an experience that taught me profound respect for professional bakers and their craft. Sourdough requires dedication, patience, and a delicate touch – your starter truly does become like a pet! After numerous attempts and a steep learning curve, I concluded that some culinary feats are best left to the experts. My local baker earns every penny for their beautifully crafted loaves, and I happily support their artistry.
However, this doesn’t mean all bread making is overly complex. Certain doughs are incredibly straightforward and offer immense satisfaction with minimal fuss. For me, pizza dough sits proudly at the top of that list. It’s wonderfully forgiving, requires only a handful of basic ingredients, and transforms into something truly magical. This recipe is designed to be as simple as possible, making it the perfect entry point for anyone looking to dabble in yeast-based baking or simply enjoy fresh, homemade pizza whenever the craving strikes. You’ll be amazed at how easily you can create a perfectly chewy, crispy crust that rivals your favorite pizzeria.
The Magic of Homemade Pizza: A Fool-Proof Dough for Every Beginner
For those who have never ventured into bread making or are intimidated by the thought of working with yeast, fear not! This recipe is your secret weapon. It’s truly fool-proof and incredibly forgiving. And let’s be honest, once you load it up with your favorite cheese and toppings, any minor imperfections in the dough become utterly irrelevant. The joy of pulling a hot, bubbling, homemade pizza from your oven is unparalleled, and it all starts with this simple, reliable crust.
Making pizza dough at home offers numerous benefits beyond just taste. It’s a fun, engaging activity for the whole family, a wonderful way to control ingredients, and surprisingly cost-effective. Plus, there’s an immense sense of accomplishment that comes with creating something so delicious from scratch. Let’s dive into the essential ingredients you’ll need to begin your pizza-making adventure.
Essential Ingredients for Your Easy Pizza Dough
Creating delicious homemade pizza dough doesn’t require a pantry full of exotic flours or specialty ingredients. In fact, its beauty lies in its simplicity. Here’s what you’ll need:
- All-Purpose Flour: Forget fancy, expensive flours. Regular all-purpose flour works perfectly for this dough, yielding a wonderfully chewy and satisfying crust. It’s accessible, affordable, and produces fantastic results for beginners.
- Dry Active Yeast (1 packet or 2 1/4 tsp): If yeast feels intimidating, let me assure you, it’s easier than you think! Yeast is a living organism that, when activated by warm water, produces carbon dioxide, causing your dough to rise and develop its airy texture. We’ll show you exactly how to work with it for guaranteed success.
- Salt: Essential for seasoning the dough, salt not only enhances the flavor of your crust but also helps regulate the yeast’s activity and strengthens the gluten structure. Don’t skip it!
- Warm Water: The lifeblood of your dough! Warm water (ideally between 105-115°F or 40-46°C) is crucial for activating the dry active yeast. It also serves as the primary liquid component, bringing all the ingredients together to form a cohesive dough.
- Olive Oil: This is your dough’s fat component. Olive oil adds richness, flavor, and helps to create a tender, pliable dough that’s easy to work with. It also contributes to a crispier crust when baked.
That’s it! Seriously, the ingredient list couldn’t be more basic. This recipe yields enough dough for three standard-sized pizzas (approximately 11 inches each). You’ll have plenty to enjoy immediately, with options to refrigerate or freeze any leftover dough for future pizza nights. Detailed instructions for proper storage are provided below.
Mastering the Perfect Pizza Crust: Step-by-Step Guide
Forget the notion that you need specialized equipment or gourmet ingredients to make incredible pizza. This recipe prioritizes simplicity and delicious results over fussiness. While some might suggest specific flours or expensive pizza stones, our goal here is to get you enjoying delicious homemade pizza with what you likely already have. Most of us don’t have pizza ovens at home, and that’s perfectly fine! This recipe is designed to work beautifully in a standard home oven, ensuring a fantastic crust without overcomplicating things.
Do you need a stand mixer to make pizza dough?
Absolutely not! While a stand mixer with a dough hook attachment can make the process significantly easier and more hands-off, it is by no means essential. I often use my stand mixer for convenience, but hand-kneading is a wonderful way to connect with your dough and build arm strength! I’ve included detailed instructions for both methods, so choose whichever works best for you.
Easy Pizza Dough Instructions (Approximate Prep Time: 70 minutes, Cook Time: 10 minutes, Yields: 3 crusts)
- Step 1: Combine Dry Ingredients. In a large mixing bowl (or the bowl of your stand mixer), combine the 3 1/2 cups of all-purpose flour, 1 packet (2 1/4 tsp) of dry active yeast, and 1 tsp of sea salt. Use a whisk or a spoon to thoroughly mix them together. This ensures the yeast and salt are evenly distributed throughout the flour.
- Step 2: Prepare and Add Wet Ingredients. In a separate small bowl or liquid measuring cup, combine the 1 1/2 cups of warm water (ensure it’s warm to the touch, not hot, as too hot water can kill the yeast) and 1 tbsp of olive oil. Slowly pour this liquid mixture into your bowl of dry ingredients. If using a stand mixer, start on the lowest setting (using the dough hook attachment) as you pour. If kneading by hand, use a sturdy spoon or spatula to stir until the mixture just comes together into a shaggy ball.
- Step 3: Knead the Dough.
- For Stand Mixers: Once the dough has come together, continue mixing on the lowest setting for 8 minutes. The dough will be sticky at first but should eventually form a cohesive, slightly sticky ball that pulls away from the sides of the bowl.
- For Hand Kneading: Lightly flour a clean work surface and your hands. Transfer the sticky dough onto the floured surface. Begin kneading by pressing the base of your palms into the dough, pushing it away from you, then folding it back over itself. Rotate the dough slightly and repeat this push-fold-turn motion for about 8 minutes. The dough is ready when it feels soft, elastic, and has a smooth, pillowy outer texture. It should spring back slowly when gently poked.
- Step 4: Portion and Rise. Cut the dough into three equal-sized pieces. Gently fold each piece of dough over itself a few times to form a smooth ball. Place these dough balls on a lightly floured or olive-oiled baking sheet, ensuring there’s enough space between each. Drizzle a tiny bit more olive oil over each ball to prevent drying. Cover the baking sheet loosely with a clean kitchen towel or plastic wrap and let the dough rise in a warm spot for about 1 hour, or until it has visibly doubled in size. This proofing stage is crucial for developing flavor and creating an airy crust.
- Step 5: Stretch the Dough. If you plan to make pizza immediately, preheat your oven to 500°F (260°C) at least 30-60 minutes before baking to ensure it’s thoroughly hot. To stretch the dough, lightly flour a clean surface and place one dough ball onto it. Lightly flour your hands and gently press into the dough from the center outwards to flatten it into a disc. Then, carefully lift the dough and drape it over your knuckles. Gently rotate the dough, letting gravity and the weight of the dough stretch it while lightly working your knuckles into it. Continue until the dough reaches your desired size, typically around 11 inches in diameter. Be mindful not to make the center too thin. If it starts to tear, simply patch it up and continue gently.
- Step 6: Top and Bake! Your beautifully stretched pizza dough is now ready for your favorite toppings! We’re including an easy Margherita pizza recipe below, but feel free to unleash your creativity. For a delightful alternative, I highly recommend exploring my zucchini and ricotta white pizza recipe if you’re looking to try something different. The possibilities are endless when you have a great homemade crust as your base.
Storing Your Homemade Pizza Dough: Fridge or Freezer?
One of the best features of this pizza dough recipe is its versatility for storage. You can make it ahead of time, which makes pizza night even easier! In fact, many bakers find that allowing the dough to cold-proof in the refrigerator for 1-3 days actually enhances its flavor, developing a more complex and nuanced taste. Here’s how to store it:
Refrigerating Pizza Dough:
If you plan to use your dough within a few days, refrigeration is ideal. Place each individual pizza dough ball in its own airtight container or a bowl lightly coated with olive oil. Cover it tightly with plastic wrap or a lid. This prevents a crust from forming and maintains moisture. Before baking, remove the dough from its container, place it back on a lightly floured baking sheet, and cover it with a towel. Allow it to come to room temperature for 30-60 minutes. This makes the dough easier to stretch and helps it bake more evenly. The cold proofing process not only deepens the flavor but also often results in a better texture.
Freezing Pizza Dough:
For longer storage, freezing is your best option. After forming the dough balls (after step 4 in the instructions), lightly coat each with olive oil. Place each dough ball into a separate freezer-safe plastic bag, pressing out as much air as possible before sealing it tightly with a twist tie or zip-top. Your dough will keep well in the freezer for 4-6 months.
To use frozen dough: Remove the desired number of dough balls from the freezer and allow them to thaw completely on the counter. This can take several hours, so plan ahead! Once thawed, remove the dough from the bag and place it on a baking sheet. Cover it with a towel and let it come to room temperature for 30-60 minutes before stretching and topping, just as you would with refrigerated dough. This method allows you to have homemade pizza on demand, whenever the craving strikes!
Classic & Simple: Easy Margherita Pizza Recipe
If you’re looking for a super easy, yet incredibly delicious pizza topping idea, the classic Margherita is a perfect choice. Its simplicity allows the quality of your homemade dough and fresh ingredients to truly shine. Here’s how to make it:
Margherita Pizza Ingredients:
- 3-4 tbsp quality tomato sauce (avoid overdoing this; too much sauce can make your pizza soggy)
- 4-6 oz mozzarella cheese (fresh mozzarella, pre-grated, or a blend – choose what you prefer!)
- Fresh basil leaves
- High-quality olive oil for drizzling
- Salt and freshly ground black pepper to taste
Margherita Pizza Baking Instructions:
- Preheat Oven: Preheat your oven to its highest setting, typically 500°F (260°C). It’s ideal to do this up to an hour before baking to ensure the oven is truly hot throughout, especially if you’re using a baking steel or pizza stone.
- Prepare Dough: Place your stretched pizza dough onto a lightly floured pizza peel or directly onto a baking sheet.
- Add Sauce: Spread the tomato sauce evenly over the dough, leaving about a 1/2-inch border along the edges for a beautiful crust. Remember, less is often more with sauce!
- Drizzle Olive Oil: Drizzle a little olive oil over the sauce for added richness and flavor.
- Add Cheese & Basil: Scatter the mozzarella cheese all over the pizza. Top with fresh basil leaves, torn into smaller pieces if they are large.
- Season: Season lightly with salt and freshly ground black pepper to taste.
- Bake: Carefully transfer your pizza to the preheated oven. Bake for 4-10 minutes, depending on your oven’s heat and how long it has been preheating. Watch closely! The pizza is done when the crust is golden brown and crispy, and the cheese is melted and bubbling with some browned spots.
- Serve: Remove from the oven, allow it to cool for a minute or two, then slice into 8 pieces. Enjoy your perfect homemade Margherita pizza!

Frequently Asked Questions About Homemade Pizza Dough
What makes this pizza dough recipe beginner-friendly?
This recipe uses readily available all-purpose flour and dry active yeast, both of which are forgiving and easy to work with. The instructions are broken down into clear, simple steps, and we’ve included tips for both hand-kneading and stand mixer methods, along with clear visual cues for when your dough is ready. It’s designed to minimize complexity and maximize your success.
Can I use different types of flour?
While this recipe specifically calls for all-purpose flour for its ease of use and consistent results, you can experiment with bread flour for a chewier crust, or a small percentage of whole wheat flour for added nutrients and flavor. However, for your first attempt, sticking to all-purpose is recommended to ensure success.
How do I know if my yeast is active?
When you combine warm water with the yeast (and often a pinch of sugar, though not in this specific recipe), it should become bubbly and foamy within 5-10 minutes. This “bloom” indicates that your yeast is alive and active. If it doesn’t foam, your water might have been too hot or too cold, or your yeast may be expired. In that case, start over with fresh yeast and properly tempered water.
My dough is too sticky/too dry – what went wrong?
Dough consistency can be affected by factors like humidity and how precisely ingredients are measured. If your dough is too sticky to handle, add a tablespoon of flour at a time until it becomes manageable. If it’s too dry and crumbly, add a teaspoon of warm water until it comes together. Kneading will help incorporate these additions.
What’s the best way to get a crispy crust in a home oven?
Preheating your oven to its highest temperature for a significant amount of time (30-60 minutes) is key. If you have a pizza stone or baking steel, place it in the oven while it preheats. This allows the stone/steel to get incredibly hot, mimicking a traditional pizza oven and giving your crust a fantastic crisp. If you don’t have one, simply use a preheated baking sheet placed upside down. Baking directly on a hot surface makes all the difference.
How can I customize my pizza?
The beauty of homemade pizza is endless customization! Beyond the classic Margherita, consider:
- Vegetable Lover’s: Bell peppers, onions, mushrooms, olives, spinach, zucchini.
- Meat Feast: Pepperoni, sausage, ham, bacon, grilled chicken.
- Gourmet Options: Caramelized onions, goat cheese, arugula (added after baking), sun-dried tomatoes, pesto base instead of tomato sauce.
- Cheese Blends: Experiment with provolone, parmesan, fontina, or ricotta in addition to mozzarella.
Just remember not to overload your pizza, as too many toppings can make the crust soggy.
Can I make the dough without kneading?
While this recipe involves kneading (either by hand or mixer), there are also “no-knead” pizza dough recipes that rely on long fermentation times. This recipe offers a relatively quick and satisfying kneading process that develops the gluten structure for a great texture. For beginners, getting a feel for the dough through kneading is a valuable skill.

Expand Your Culinary Horizons with These Related Recipes:
If you’ve enjoyed mastering this easy pizza dough, you might love exploring other simple yet impressive recipes:
- Savory Galette with Goat Cheese, Caramelized Onions and Asparagus: A rustic and elegant tart perfect for brunch or a light dinner.
- Vegan Mac and Cheese: A creamy, comforting classic reinvented for plant-based diets.
- Mushroom, Asparagus and Ricotta Pizza: A sophisticated pizza option with fresh, vibrant flavors.
- Sun-Dried Tomato Pesto Pasta Salad: A flavorful and hearty salad, perfect for meal prep or picnics.