
Starting a food blog can be an incredibly rewarding journey, transforming your passion for culinary delights into a thriving online community or even a full-time career. Many aspiring food bloggers dream of sharing their recipes, culinary adventures, and vibrant food photography with the world. However, the initial setup process can often feel overwhelming, filled with technical jargon and crucial decisions that determine your blog’s future success. This comprehensive guide aims to demystify the process, providing a clear, step-by-step roadmap to launch your successful food blog today. Forget the stress and uncertainty; we’re here to make your transition from aspiring blogger to published food maven as smooth as possible.
I distinctly recall the apprehension I felt when first embarking on my blogging journey. I had a clear vision for my blog’s name, a mental catalog of posts, and enough recipe ideas to last for years. Yet, the technicalities of setting up the blog – from choosing a platform to configuring all the backend elements – seemed incredibly daunting. This led me to postpone my blogging dreams for an entire year, waiting for an elusive “right time” to conduct extensive research. Even after this initial research, I encountered numerous hurdles and learning curves, experiences I hope to spare you from with this detailed tutorial.
Consider this guide your essential blueprint, designed to help you establish a robust foundation for a food blog that has the potential for significant success, however you personally define it. While there are countless steps that follow the initial setup, starting with a solid and scalable base is paramount. This guide is crafted to address the mindset of someone just starting out, cutting through the noise to provide actionable advice. In fact, reading this comprehensive guide might take longer than the actual process of getting your blog up and running!
Drawing on my own experience before launching The Healthy Maven (THM) – a blog that transitioned from a hobby to a business within a year and became my full-time occupation in less than two – I understand the challenges. The initial setup was, by far, the most challenging phase. My goal here is to simplify this for you, enabling you to launch your very own food blog and start sharing your culinary passion with the world, potentially in less than 10 minutes. Let’s begin.
Step 1: Choosing the Right Blogging Platform for Food Bloggers
Your blogging platform is the fundamental framework upon which your entire website will be built. Unless you possess advanced coding skills, you’ll need to leverage an established platform. While several popular options exist, such as WordPress, Blogger, and Squarespace, your choice here is critical for the long-term success and scalability of your food blog.
Initially, I started with Blogger, primarily due to a lack of guidance on more robust alternatives. While Blogger is free and straightforward, it comes with significant limitations that can hinder a food blog’s growth. Its customization options are severely restricted, often resulting in a generic aesthetic that struggles to stand out in a crowded online space. If your ambition is to build a unique brand and visually appealing platform that truly reflects your culinary style, Blogger will quickly prove insufficient. This realization prompted my swift transition to WordPress, a move I wholeheartedly recommend.
I cannot emphasize enough the importance of choosing WordPress for your food blog. However, it’s crucial to understand the distinction between the two WordPress entities:
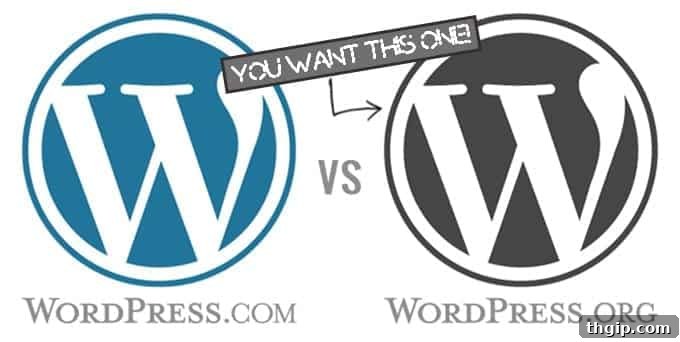
WordPress.COM vs. WordPress.ORG: A Critical Choice for Food Blogs
- WordPress.COM: This is the free, hosted version of WordPress. While convenient, it imposes a distinct set of limitations that are particularly detrimental to food bloggers. You will have minimal control over theme (layout) customizations, severely restricting your ability to create a unique and branded look. More importantly, WordPress.com does not typically allow monetization through ads, affiliate links, or selling products – crucial revenue streams for a successful food blog. It also offers limited storage space, which can quickly become an issue given the high volume of images and videos common in food blogging. While it might seem appealing initially due to its free nature, you’ll likely outgrow its capabilities and face costs for additional features anyway.
- WordPress.ORG: This is the self-hosted version of WordPress, which is what I recommend without reservation. While it requires an upfront investment for web hosting (which we’ll cover next), the benefits are immense. WordPress.org offers unparalleled flexibility with thousands of themes (both free and premium) and extensive customization options, allowing you to design a food blog that perfectly embodies your brand. Crucially, it provides the unrestricted ability to monetize your blog through various avenues, including display advertising, sponsored content, affiliate marketing, and selling your own digital or physical products. If you envision your food blog evolving into a business – whether through ad revenue, brand partnerships, or e-commerce – starting with WordPress.org is not just recommended, it’s essential for long-term growth and success. Even if monetization isn’t your immediate goal, having the option readily available will save you immense hassle down the line. Trust me on this one.
Before you jump into signing up for WordPress.org, let’s move on to the next foundational step.
Step 2: Securing Web Hosting and Your Unique Domain Name
The primary reason WordPress.org requires an investment (unlike its .com counterpart) is that you need to purchase web hosting. Think of web hosting as the virtual land where your food blog lives. It’s an external service that provides server space to store all your blog’s content – every recipe, every mouth-watering photograph, every post. Essentially, you’re not paying WordPress.org itself, but rather a hosting service that works in conjunction with WordPress.org to ensure your site is always accessible to your readers. This is the essence of what is commonly referred to as “self-hosting.”
To summarize: You need a robust platform (WordPress.org) on which to build your food blog, but this platform requires a dedicated space (a web host) to store all its invaluable content.
While purchasing web hosting is a necessary cost, it’s surprisingly affordable, especially when considering the immense value it provides. There are several reputable hosting providers available, but for ease of setup, reliability, and excellent value, I wholeheartedly recommend Bluehost.
Why Bluehost is Ideal for New Food Bloggers
Bluehost is my preferred hosting company, and I recommend it to all aspiring bloggers for several compelling reasons:
- Seamless Setup: Bluehost’s interface is incredibly user-friendly, guiding you through the setup process with remarkable ease. This is particularly beneficial for those new to blogging and web administration.
- Reasonable Pricing: They offer competitive pricing plans, often including promotional rates that make starting a blog incredibly affordable. For instance, a monthly cost less than that of a daily coffee from your favorite cafe makes it a negligible investment for your dream blog.
- Reliability and Performance: Bluehost provides reliable service, ensuring your food blog is consistently online and loads quickly – a crucial factor for user experience and SEO.
- Integrated Domain Name: Many hosting providers require you to purchase your domain name (your blog’s unique URL, e.g., yourfoodblog.com) separately through a third-party registrar like GoDaddy. A significant advantage of Bluehost is that it often includes a free domain name registration for the first year with your hosting package. This consolidates the process and saves you an additional expense.
- WordPress Integration: Bluehost works seamlessly with WordPress. As soon as you purchase your hosting plan, Bluehost provides a direct path to install WordPress and link it to your new domain, simplifying the entire setup process.
For a detailed, step-by-step tutorial that walks you through the entire process of purchasing hosting with Bluehost and getting your blog set up on WordPress, I encourage you to check out this dedicated guide. Once you’ve completed this step, you’ll have your blog foundation securely in place, hosted on Bluehost and powered by WordPress. Now, it’s time to make it visually appealing. Let’s proceed to Step 3.
Step 3: Selecting and Installing a Visually Engaging Theme
With your WordPress blog now hosted and accessible, you can navigate to your blog’s backend or “dashboard” by typing yourdomainname.com/wp-admin into your browser. Here, using the login credentials you created during your Bluehost signup, you’ll access the control panel for your new food blog. The next crucial step is to install a theme. A theme dictates the entire visual layout and aesthetic of your blog – it’s the design “mask” you apply to WordPress to define how your site appears to visitors. Your theme plays a vital role in user experience and brand identity.
Understanding Themes: Free vs. Premium Options
WordPress.org offers access to thousands of free themes, some of which are quite functional and aesthetically pleasing. These can be a great starting point for beginners, allowing you to get a feel for WordPress without additional cost. However, many free themes are widely used, making it challenging for your blog to stand out. They may also lack the advanced features, customization options, and dedicated support often required for a professional-grade food blog.
This is where premium themes come into play. Investing in a professionally designed theme can significantly elevate your food blog’s appearance, functionality, and overall user experience. While there’s an initial cost, the benefits in terms of unique design, enhanced features (like built-in recipe cards, advanced gallery options, and better mobile responsiveness), and dedicated support often outweigh the expense. The market offers a vast array of themes and theme developers, which can initially feel overwhelming. The good news is that most premium themes are reasonably priced and relatively easy to install, allowing for some experimentation before settling on your final choice.
Recommended Theme for Food Bloggers: The Foodie Theme
For food bloggers just starting out, I highly recommend the Foodie theme. This theme is specifically designed with the needs of food bloggers in mind, offering features that showcase recipes and food photography beautifully. It’s the very theme I used for The Healthy Maven, and it proved instrumental in establishing a professional and engaging presence.
Understanding Parent and Child Themes: The Genesis Framework
It’s important to understand the concept of “child themes” and “parent themes” in the WordPress ecosystem. A child theme essentially inherits the design and functionality of a “parent theme” while allowing for independent modifications. This structure ensures that any updates to the parent theme don’t overwrite your custom changes, providing a robust and flexible way to customize your blog.
One of the most popular and highly regarded parent themes you’ll encounter is the Genesis Framework. Genesis is renowned for its secure code, search engine optimization, and robust foundation, making it an excellent choice for any professional blog. The Foodie theme, which I recommended earlier, is a child theme of Genesis. Therefore, to utilize the Foodie theme effectively, you would need to purchase both the Genesis Framework and the Foodie child theme. While this involves two separate purchases, the combined cost is a worthwhile investment for a professional, secure, and highly functional food blog that will stand the test of time and provide a powerful platform for your culinary content.
Step 4: Customizing Your Food Blog and Building Your Brand Identity
With your theme successfully installed, it’s time to move beyond the default appearance and truly develop your food blog into a distinctive brand. Your blog’s layout and visual identity are often the very first impressions a visitor receives, making it paramount that they are professional, inviting, and reflective of your unique culinary voice.
Developing Your Unique Brand Aesthetics
This stage involves refining your blog’s visual elements: choosing your color palette, selecting fonts, designing a compelling logo, and configuring your theme to align with your brand’s personality. If you possess a background in graphic or web design, you’re at a significant advantage. However, for most of us who lack these specialized skills, recognizing the value of professional help can be a game-changer.
While hiring a web designer might seem like an additional expense, if you are serious about treating your blog as a business – whether for monetization, brand collaborations, or building a strong online presence – it is an investment that yields substantial returns. A well-branded, professionally designed website commands credibility, attracts more visitors, and facilitates monetization efforts. The increased revenue generated from a polished site can quickly offset the initial cost of a designer. For example, after hiring a designer in November 2013, I began monetizing my blog in the same month. By the end of December 2013, I had already recouped my total investment in hosting, my theme, and the designer’s fees. This demonstrates the powerful impact a professional touch can have on your blog’s financial viability and overall success.

Recommended Web Designers for Food Bloggers
If you’re considering professional design, here are some highly recommended designers known for their expertise with food blogs and the Genesis framework:
- Julie | Deluxe Designs (My designer/developer at The Healthy Maven – specializes in logo development and Genesis framework customization.)
- Amanda | Lemon and Lapis (Specializes in comprehensive brand and logo development, graphic design, and custom web design solutions.)
- Ami | Poppy Designs (Offers expertise in brand and logo development, graphic design, and professional photography, which is invaluable for food blogs.)
Whether you choose to DIY your customization or invest in a designer, dedicate ample time to this step. A well-crafted visual identity is essential for attracting and retaining readers, building trust, and establishing your blog’s authority in the vibrant food blogging niche.
Step 5: Unleash Your Creativity and Start Blogging!
Congratulations! You’ve successfully navigated the technical landscape of starting a successful food blog. Your platform is chosen, hosting and domain are secured, and your theme is installed and customized. Now, the most exciting part begins: creating captivating content that will inspire, educate, and delight your audience. This is where your unique culinary voice truly shines.
Crafting High-Quality Food Content
Focus on producing exceptional content that resonates with your soon-to-be readers. For a food blog, this typically means:
- Original and Delicious Recipes: Develop and test recipes that are unique, easy to follow, and genuinely delicious.
- Stunning Food Photography: High-quality, appealing visuals are non-negotiable for food blogs. Invest time in learning food photography basics or consider professional help. Each dish should look as tempting as it tastes.
- Engaging Storytelling: Connect with your audience by sharing the stories behind your recipes, your culinary inspirations, and personal anecdotes. This builds community and makes your blog more relatable.
- Helpful Tips and Resources: Beyond recipes, offer valuable cooking tips, ingredient guides, kitchen hacks, and meal planning strategies.
- Consistency: Regular posting keeps your audience engaged and signals to search engines that your blog is active and valuable.
The journey of a food blogger is continuous, involving not just creation but also promotion and community engagement. Utilize social media platforms like Instagram and Pinterest (which are visual goldmines for food content), engage with your readers in comments, and explore guest posting opportunities to expand your reach. Remember, every successful food blog started with a single post driven by passion.
Before you dive headfirst into your content creation journey, be sure to join my exclusive blogging tips & tricks mailing list! I promise a spam-free inbox, delivering only relevant insights to help your blog flourish. We’ve previously covered topics such as leveraging Pinterest’s Smart Feed, identifying common blogging pitfalls, and effective strategies for content promotion after publishing a post. Don’t miss out on the next invaluable tips designed to accelerate your growth!
*This page contains affiliate links from which I could receive a small commission if you sign up through them. Regardless, I wholeheartedly endorse all these products and services, as they were instrumental in building and growing The Healthy Maven.
Your Feedback Matters: What Else Would You Like to Learn About Food Blogging?
I’m continuously striving to provide the most valuable resources for aspiring food bloggers. Am I missing any crucial information in this guide? Is there a particular topic you’d like me to elaborate on further, perhaps in a future installment of this series? What specific challenges are you facing as you embark on your food blogging journey? Share your thoughts and questions in the comments below – your input helps shape future content!