
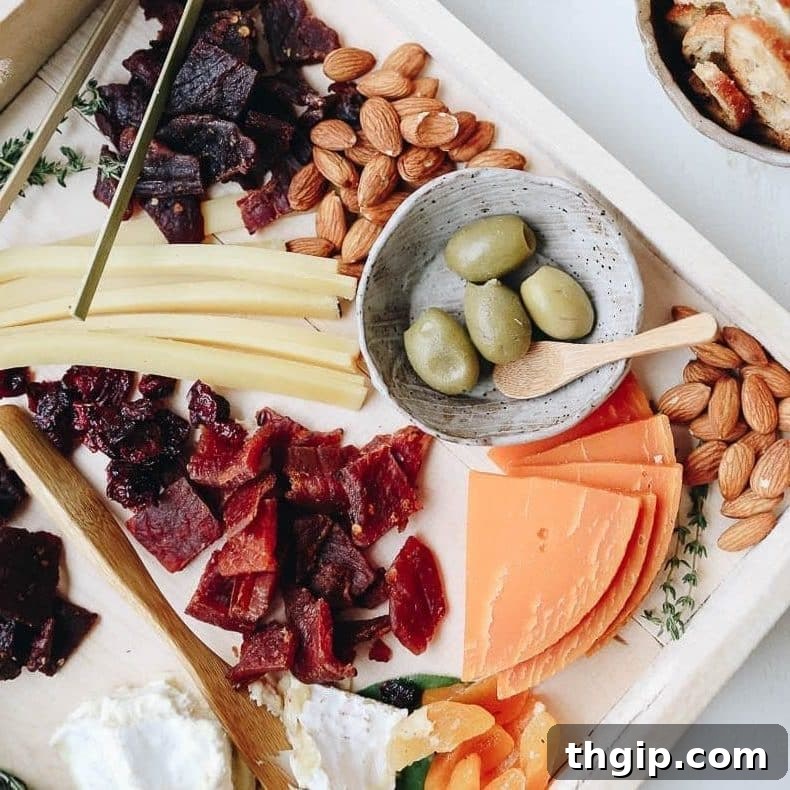
Building the perfect charcuterie board might just be one of those quintessential “adulting” skills – right after mastering taxes and basic survival, of course! But seriously, don’t underestimate the power and necessity of a beautifully arranged charcuterie spread. It’s not just an appetizer; it’s an experience, a conversation starter, and a delightful way to gather friends and family.
I distinctly remember my very first charcuterie board endeavor. My friend C and I, just 21 and navigating the bustling streets of NYC, were excitedly hosting our inaugural dinner party. The act of carefully selecting ingredients, especially our pilgrimage to a local fromagerie for “fancy cheese,” felt incredibly sophisticated. If memory serves, we probably paired it with a $3 bottle of Trader Joe’s finest, having splurged all our cash on that gourmet cheese!
That experience taught me an invaluable lesson: as long as you prioritize quality ingredients, the rigid “rules” of charcuterie take a backseat. While there are countless combinations of meats, cheeses, and accoutrements to choose from, the true magic lies in making the board uniquely yours. It’s about personalizing the spread to reflect your taste and delight your guests.
This guide will provide a clear framework of ingredients to help you get started, offering a solid foundation for your culinary masterpiece. However, I wholeheartedly encourage you to experiment and infuse your own creativity. The proportions suggested here are generally suitable for serving around 8 people. Feel free to double everything if you’re hosting a larger crowd – after all, who ever complained about having delicious leftover meat and cheese?
Let’s dive into the delightful world of charcuterie…
Mastering the Art of Charcuterie: Your Ultimate Guide
Crafting a charcuterie board is more than just arranging food; it’s an art form that transforms simple ingredients into an inviting feast. It’s an ideal choice for entertaining because it requires minimal cooking, allows for endless customization, and provides a visually stunning centerpiece that encourages mingling and sharing. Whether it’s a casual get-together, a sophisticated dinner party, or a holiday celebration, a well-curated charcuterie board sets a delightful tone.
The Foundation: Choosing Your Canvas
Before you begin assembling, select the right board. Wooden boards offer a rustic charm, while slate or marble slabs provide a modern, elegant backdrop. Consider the size based on your guest count; a larger board allows for more variety and less crowding. For a party of 8, a board roughly 18×24 inches (or similar dimensions) is a good starting point.
Essential Components for a Sensational Charcuterie Board
The key to a balanced board lies in offering a variety of flavors, textures, and colors. Here’s a breakdown of the core elements, along with tips for selection and presentation:
1. The Meats: A Symphony of Savory Flavors
Aim for 3 distinct meat options to provide variety without overwhelming the palate. Think about different curing methods, spices, and textures. For a board serving 8 people, consider approximately one package of each chosen meat (about 3-4 oz per package).
- Cured & Classic: Include thinly sliced cured meats like prosciutto, salami (Genoa, Soppressata, or Calabrese for a bit of spice), or coppa. These are staples for a reason, offering rich, complex flavors.
- Smoked & Savory: For a delightful twist, I always recommend incorporating the high-quality steak strips and chicken cuts from Lorissa’s Kitchen. Their commitment to quality shines through in every bite. Lorissa, the inspiring #girlboss behind the brand, set out to create healthy, delicious snacks using responsible ingredients, a mission I deeply admire.
- Why Lorissa’s Kitchen? I find their products to be an exceptional addition to any charcuterie spread. Their steak strips are crafted from 100% grass-fed beef, and their chicken cuts are raised without antibiotics or added growth hormones. All their products are bursting with flavor, free of preservatives, MSG, added nitrites, and gluten. They also pair wonderfully with a wide array of cheeses, and their website even offers specific pairing suggestions! My personal favorites for a charcuterie board include the rich Korean Barbeque Beef, the subtly sweet Ginger Teriyaki Chicken, and the bold Szechuan Peppercorn Beef. You can easily find these delicious options at Target, Walgreens, convenience stores, and Amazon.com.
- Presentation: Fold larger slices of prosciutto artfully, fan out salami, or stack jerky neatly.
2. Artisanal Cheeses: A World of Texture and Taste
Just like with meats, 3 different cheese options provide an excellent spectrum of flavors and textures. For a board serving 8, you’ll want approximately one block or wedge of each type of cheese (about 4-6 oz per cheese).
- Hard Cheese: A firm, aged cheese offers a satisfying bite and nutty flavor. Think aged Gouda, Manchego (sheep’s milk), or Parmesan.
- Soft Cheese: A creamy, spreadable cheese adds a luxurious element. Brie, Camembert, or a fresh goat cheese are excellent choices. Serve soft cheeses at room temperature for optimal flavor and texture.
- “Fun” or Semi-Hard Cheese: This is where you can get adventurous! Consider a sheep’s or goat’s milk cheese for a unique tang, a spicy cheddar, or even a mild blue cheese like Gorgonzola for a pungent kick. Havarti or Gruyere also make great additions.
- Presentation: Cut some cheeses into slices or cubes, leave others as wedges with a small knife.
3. The “Crunch” Factor: Textural Delights
A charcuterie board thrives on contrasting textures. Include elements that offer a satisfying crunch. Aim for at least 1 cup spread throughout the board.
- Nuts: Toasted pecans, Marcona almonds, pistachios, or those irresistible Thai Chili Lime Cashews from Trader Joe’s add a rich, earthy crunch.
- Seeds: Roasted pumpkin seeds (pepitas) or sunflower seeds provide a lighter, yet still satisfying, bite.
- Olives: While not strictly “crunchy,” a small bowl of mixed olives (Kalamata, Castelvetrano) offers a briny counterpoint that cleanses the palate and adds a different texture.
4. Sweet Endings: Fruits and Spreads
Sweet elements balance the savory meats and cheeses, adding freshness and vibrancy. For dried sweets, about 1 cup; for liquid sweets, approximately 1/2 cup.
- Fresh Fruits: Grapes (red and green), sliced apples or pears, seasonal berries, and fresh figs are visually appealing and offer a juicy, refreshing taste.
- Dried Fruits: Dates, dried apricots, cherries, or craisins provide concentrated sweetness and a chewy texture.
- Spreads & Preserves: Local honey, fig jam (especially if you have access to homemade!), marmalade, or a fruit preserve offer a delightful complement to both cheeses and bread.
- Optional Sweet Treat: A few squares of high-quality dark chocolate can be a sophisticated addition.
5. Briny & Tangy Bites: The Unexpected Pop
These acidic elements cut through the richness of the meats and cheeses, providing a refreshing zing. Consider a small bowl of each.
- Pickled Vegetables: Cornichons (miniature dill pickles), pickled onions, or even pickled asparagus add a sharp, vinegary punch.
- Artisan Mustards: A small dollop of whole grain or Dijon mustard can elevate the meat selections.
6. The Vessel: Your Canvas for Culinary Art
You need something to transport all these delicious elements from board to mouth! Offer a variety of vessels. Plan for at least one loaf of fresh bread (sliced) and 4 cups of assorted crackers.
- Crackers: A selection of artisan crackers – water crackers, seed crackers, or multi-grain – offers different textures and flavors.
- Bread: A crusty baguette, sliced crostini, or even sweet potato toast provides a substantial base.
- Gluten-Free Options: Include gluten-free crackers or rice cakes to accommodate all dietary needs.
7. The Art of Presentation: Aesthetic Touches
While often overlooked when in a rush, a little decor can elevate your charcuterie board from good to truly extraordinary. There are no measurements here – just have fun with it!
- Fresh Herbs: Sprigs of fresh rosemary, thyme, or basil add a fragrant and visual garnish.
- Small Bowls: Use attractive small bowls for olives, nuts, and liquid sweets.
- Cheese Knives & Spreaders: Provide appropriate utensils for each cheese and spread.
- Labeling (Optional but Recommended): Small signs for cheeses and meats can be a thoughtful touch, helping guests identify different items.
- Strategic Placement: Arrange items with varying colors and textures next to each other to create visual interest. Don’t be afraid to create small clusters and then fill in the gaps.
Building Your Board: A Step-by-Step Assembly Guide
With all your ingredients prepped and ready, assembling your charcuterie board becomes a fun and creative process. Follow these steps for a stunning presentation:
- Gather Your Essentials: Start with your chosen board, small bowls, and any necessary serving utensils.
- Anchor with Cheeses: Begin by placing your cheeses evenly across the board. Distribute them strategically to create focal points and balance the spread.
- Arrange the Meats: Next, artfully arrange your meats. Fold or roll slices to add volume and visual appeal. Place them near the cheeses they pair well with, or simply spread them out to encourage exploration.
- Add the Vessels: Position your bread and crackers around the perimeter of the board, or in small piles within the larger gaps. You can also place them in a separate basket alongside the board for convenience.
- Fill with Fruits, Nuts, and Briny Bites: Now, fill in the larger empty spaces with your fresh and dried fruits, nuts, and bowls of olives or pickled vegetables. These elements add color, texture, and flavor variation.
- Incorporate Spreads and Dips: Place small bowls of honey, fig jam, or mustard wherever there’s a natural fit, ensuring they’re easily accessible with a spreader.
- Garnish and Refine: Finish with fresh herbs like rosemary or thyme sprigs, tucking them into any remaining gaps for a professional, aromatic touch. Ensure there are extra dishes nearby for olive pits or cheese rinds.
- Serve or Store: Your charcuterie board is now ready to impress! Serve immediately for the freshest experience, or cover it loosely and refrigerate until guests arrive.
Tips for a Flawless Charcuterie Experience
- Temperature Matters: Remove cheeses from the refrigerator about 30-60 minutes before serving to allow them to come to room temperature. This enhances their flavor and texture. Meats also benefit from not being too cold.
- Don’t Overcrowd: While it’s tempting to fill every inch, leaving a little negative space makes the board feel more inviting and less overwhelming.
- Prep Ahead: Most ingredients can be pre-cut and pre-arranged in containers hours before assembly. This makes last-minute setup a breeze.
- Consider Dietary Needs: Be mindful of guests with allergies or dietary restrictions. Labeling items or having a small separate section for gluten-free options can be very thoughtful.
- Pairing Perfection: Encourage guests to experiment with different combinations of meat, cheese, fruit, and crunch. Offer wine or beverage suggestions that complement the spread.
Disclaimer: This post is proudly sponsored by Lorissa’s Kitchen. I’m thrilled to continue our partnership for the third consecutive year! Your support of the brands that help make THM possible is truly appreciated.
What do your charcuterie boards look like? What feels like “adulting” to you? Share your thoughts in the comments below!