
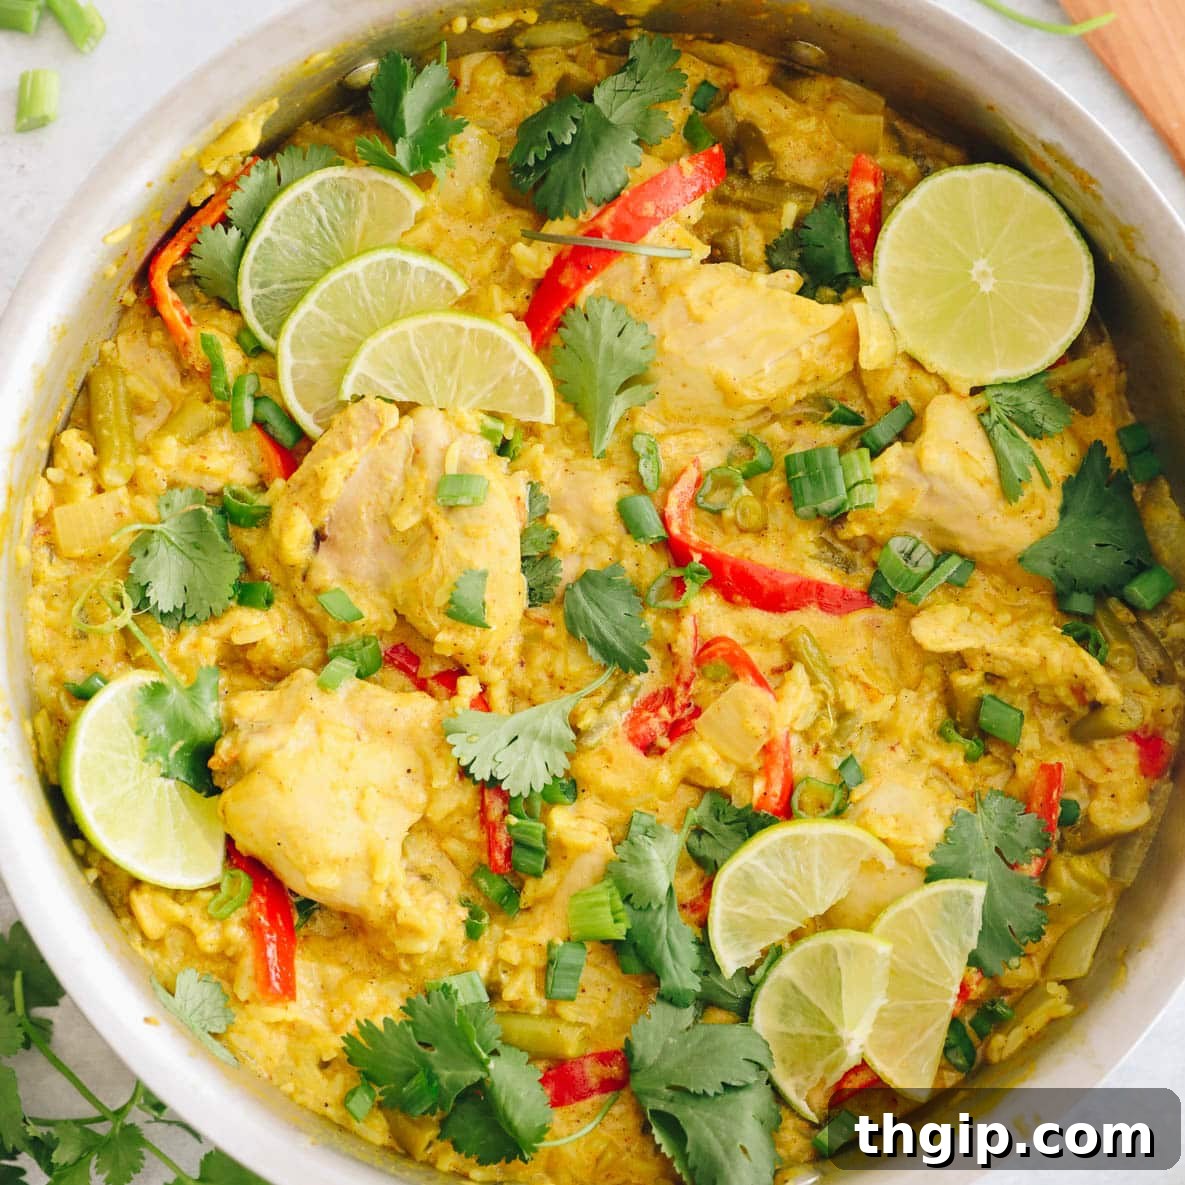
Experience the rich, aromatic flavors of tandoori chicken transformed into an effortless, hearty one-pot meal! This exceptional tandoori chicken and rice recipe eliminates excessive cleanup and can be conveniently prepped in advance, making it a fantastic choice for a large family dinner or nutritious meals throughout the week.
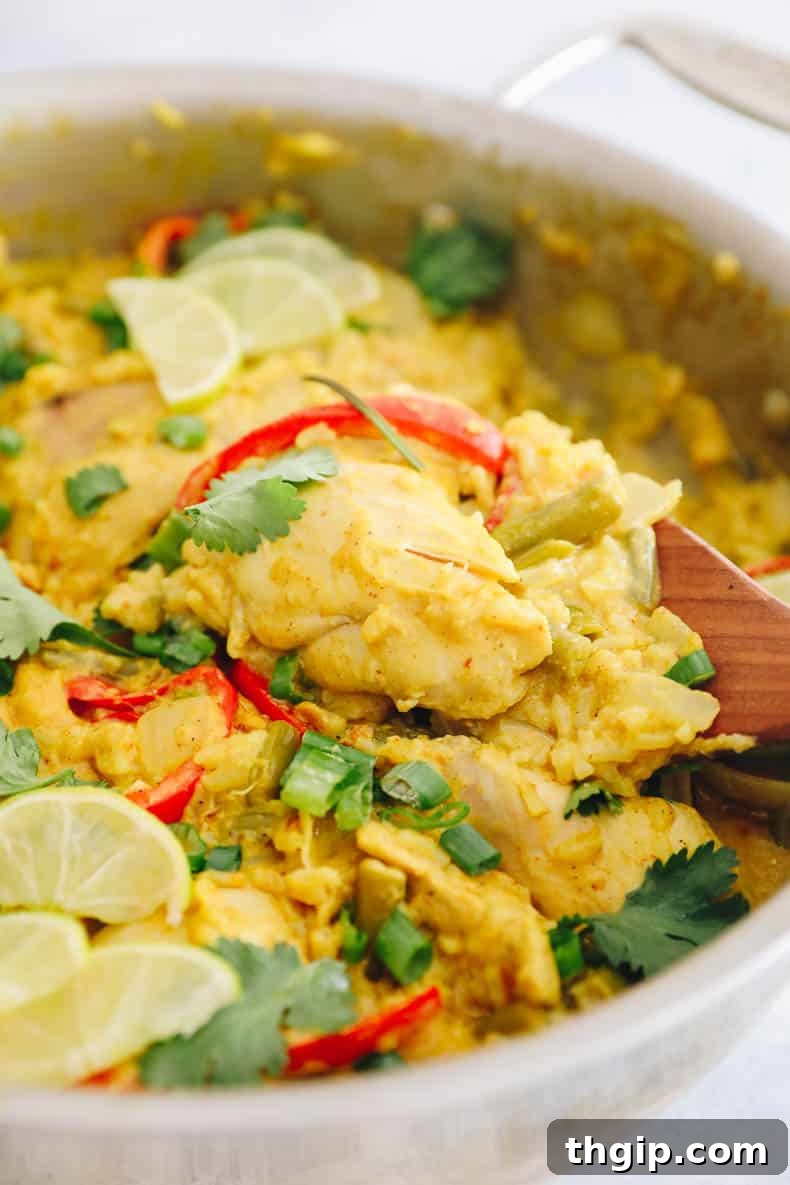
Table of Contents
- Why You’ll Love This One-Pot Tandoori Chicken
- Essential Ingredients for Tandoori Chicken and Rice
- Step-by-Step Guide: Crafting Your One-Pot Tandoori Chicken
- Easy Swaps & Clever Substitutions
- Storage & Meal Prep Instructions
- Explore More One-Pot Wonders
- One-Pot Tandoori Chicken and Rice Recipe Card
For many, the mention of “tandoori chicken” conjures images of vibrant, char-grilled chicken, traditionally cooked in a scorching clay oven. While that experience is undeniably delicious, it often comes with the requirement of special equipment or multiple dishes to prepare a complete meal. My previous adventure with grilled tandoori chicken kebabs certainly delivered on flavor, but I understand that not everyone has an outdoor grill or the desire to juggle several side dishes for a weeknight dinner.
That’s precisely why this one-pot chicken tandoori and rice recipe was created. It’s the perfect solution for anyone craving authentic tandoori flavors without the need for a traditional tandoor oven, an outdoor grill, or a mountain of dishes. This ingenious recipe allows you to cook everything – the marinated chicken, aromatic rice, and colorful vegetables – all in a single pot on your stovetop. It’s a truly streamlined approach to a classic, making it an ideal choice for busy households looking to enjoy a wholesome, flavorful meal with minimal fuss.
My family has given this dish a resounding double thumbs-up, solidifying its place as a regular on our weekly meal plan. Its simplicity, combined with its robust and satisfying taste, guarantees it will become a favorite in your home too. Prepare to be amazed by how easily you can bring restaurant-quality Indian-inspired cuisine to your table!
Why You’ll Love This One-Pot Tandoori Chicken
Beyond its incredible flavor, this recipe offers a myriad of benefits that make it a standout choice for home cooks:
- Unmatched Convenience: True One-Pot Cooking
This is perhaps its greatest selling point! While you’ll need one bowl for the initial chicken marinade, the entire cooking process, from searing the chicken to simmering the rice and vegetables, takes place in a single pot or Dutch oven on your stovetop. Imagine the joy of a delicious, complete meal with almost no cleanup! This dramatically cuts down on post-dinner chores, giving you more time to relax and enjoy your evening. - Effortless Meal Prep Champion
If you’re a fan of meal prepping, this one-pot tandoori chicken and rice will quickly become your new best friend. It’s designed for efficiency, making it incredibly easy to prepare a large batch on a Sunday or a free afternoon. You can then portion it out for quick and healthy lunches or dinners throughout the busy week. Detailed storage instructions are provided below to help you maximize its freshness and flavor for days. - Nutrient-Packed & Wholesome Goodness
Not only is this dish incredibly convenient, but it’s also a powerhouse of nutrition. Featuring lean chicken thighs, which are rich in protein, combined with a generous medley of fresh vegetables, this recipe offers a well-balanced meal in every serving. It’s a healthy, satisfying option that fuels your body without compromising on taste. - Authentic Tandoori Flavor, Simplified
Achieving the distinctive tangy, spicy, and smoky flavor of tandoori chicken is surprisingly easy with our carefully crafted marinade. Using readily available spices like garam masala, turmeric, and paprika, combined with creamy Greek yogurt, we replicate the essence of traditional tandoori cooking without needing a specialized oven. - Family-Friendly & Crowd-Pleasing
The appealing aroma and rich, savory taste of this dish make it a hit with both adults and children alike. It’s a comforting and hearty meal that can easily feed the whole family, making weeknight dinners stress-free and enjoyable. Plus, with customizable toppings, everyone can tailor their plate to their liking!
Essential Ingredients for Tandoori Chicken and Rice
Crafting this flavorful dish begins with a selection of fresh, high-quality ingredients. Here’s a detailed look at what you’ll need:
- Chicken Thighs – I highly recommend boneless, skinless chicken thighs for their tenderness and ability to absorb the marinade beautifully. They stay incredibly moist during the cooking process. You can also use bone-in or skin-on thighs for extra flavor, but be aware that cooking times may vary slightly. Chicken breast can be substituted, but it tends to dry out more easily.
- Yellow Onion – A large yellow onion, finely chopped, forms the aromatic base of this dish, adding a subtle sweetness and depth of flavor as it cooks down with the spices. A white onion would also work well.
- Greek Yogurt – Full-fat plain Greek yogurt is crucial for the marinade. Its thickness and acidity tenderize the chicken while infusing it with flavor and creating a creamy texture. Avoid flavored or low-fat yogurts, as they won’t yield the same results.
- Fresh Garlic Cloves – Freshly minced garlic is non-negotiable for that pungent, aromatic kick that defines Indian cuisine. Don’t skimp here; fresh makes all the difference.
- Lemon Juice – Freshly squeezed lemon juice brightens the marinade and helps to tenderize the chicken. Bottled lemon juice can be used in a pinch, but fresh is always superior for flavor.
- Freshly Grated Ginger – Ginger adds a warm, zesty, and slightly peppery note. Grating it fresh ensures maximum flavor. If you don’t have a grater, finely chopping it will also suffice.
- Signature Tandoori Spices – This blend is where the magic happens! You’ll need:
- Garam Masala: A fragrant blend of ground spices, it’s the heart of tandoori flavor.
- Ground Coriander: Adds a warm, citrusy, and slightly sweet note.
- Paprika: Contributes a mild, sweet pepper flavor and a beautiful reddish hue.
- Turmeric: Gives the dish its characteristic golden color and earthy aroma.
- Ground Cumin: Earthy, warm, and slightly pungent, it’s essential for depth.
- Sea Salt: To season and enhance all the flavors.
- Cayenne Pepper: For a touch of heat. Adjust according to your preference.
- Coconut Oil – Used for sautéing the chicken and vegetables. Its high smoke point and subtle flavor complement the Indian spices. Any neutral cooking oil like avocado or grapeseed oil would also work.
- Bell Pepper – One large bell pepper, seeded and sliced. Red, yellow, or orange bell peppers are preferred for their sweetness and vibrant color, adding visual appeal and nutritional value.
- Green Beans – Fresh green beans, trimmed and cut into 1-inch pieces, provide a lovely crunch and fresh green element to the dish.
- White Basmati Rice – The ideal choice for its aromatic quality and fluffy texture when cooked. Jasmine rice can be a suitable alternative. IMPORTANT: DO NOT USE BROWN RICE. Brown rice requires a significantly longer cooking time, which will lead to overcooked chicken and an unevenly textured dish.
- Full-Fat Coconut Milk – A 15 oz can of full-fat coconut milk adds creaminess and a subtle sweetness that balances the spices, creating a rich sauce. Light coconut milk can be used for a lighter version, but the full-fat option provides superior texture and flavor.
- Water – Necessary for cooking the rice to perfection alongside the coconut milk.
- Optional Toppings: Enhance your meal with fresh cilantro (chopped), lime wedges (for a squeeze of acidity), thinly sliced green onions, or even a sprinkle of chopped peanuts for added texture.
Step-by-Step Guide: Crafting Your One-Pot Tandoori Chicken
STEP 1: MARINATE THE CHICKEN FOR MAXIMUM FLAVOR
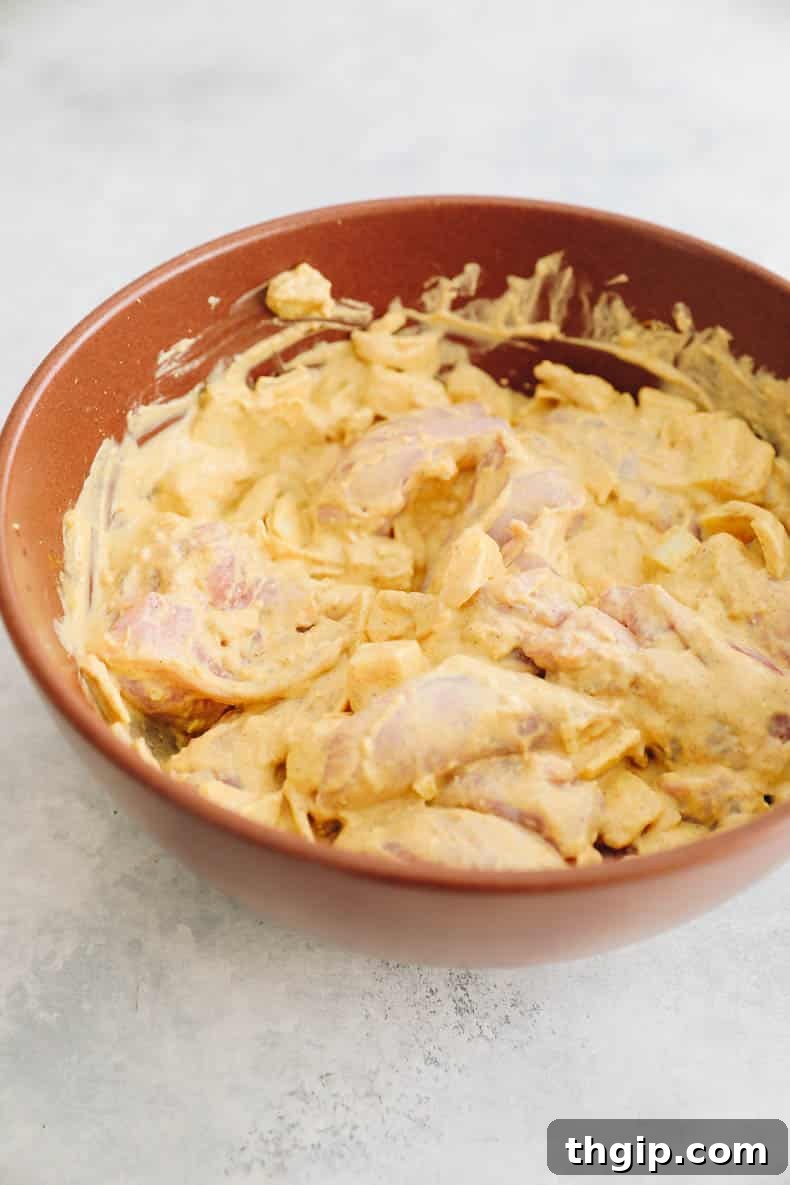
In a large mixing bowl, combine the plain Greek yogurt, minced garlic, fresh lemon juice, grated ginger, and all the dry spices: garam masala, ground coriander, paprika, turmeric, ground cumin, sea salt, and cayenne pepper. Whisk these ingredients together until thoroughly combined and aromatic. Add the boneless, skinless chicken thighs and the chopped yellow onion directly into this vibrant yogurt mixture. Toss everything until the chicken and onion are completely coated. Cover the bowl tightly and refrigerate. For optimal flavor and tenderness, allow the chicken to marinate for at least 4 hours, or ideally overnight. If you’re short on time, a minimum of 30 minutes will still impart good flavor.
STEP 2: SEAR THE CHICKEN TO LOCK IN JUICES
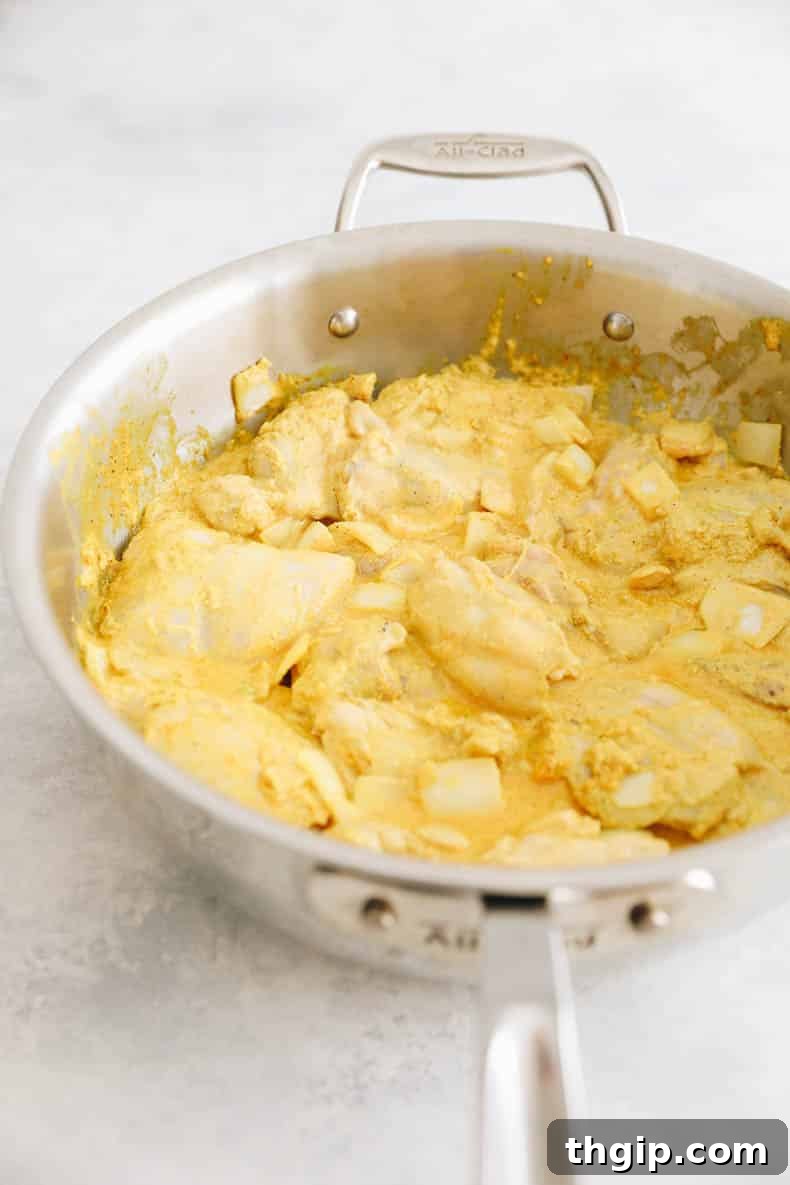
Heat a large, heavy-bottomed pot or a Dutch oven over medium-high heat. Add 1 tablespoon of coconut oil (or your preferred cooking oil) and allow it to shimmer. Once hot, carefully add the marinated chicken and onion mixture to the pot, spreading it out into a single layer as much as possible. Sear the chicken for approximately 3 minutes per side, until it develops a beautiful golden-brown crust. The goal here is to brown the exterior and build flavor, not to cook the chicken all the way through. Once browned, remove the chicken pieces from the pot and set them aside on a plate. It’s perfectly fine to leave any remaining marinade and onion in the pot, as this will contribute to the sauce’s depth of flavor.
STEP 3: SAUTÉ THE VEGETABLES AND TOAST THE RICE
With the remaining marinade and onions still in the pot, add the sliced bell pepper and the 1-inch pieces of green beans. Sauté these vegetables for 3-4 minutes, stirring occasionally, until they start to soften slightly and their vibrant colors become more intense. Next, stir in the white basmati rice. Cook for an additional minute, stirring continuously, to lightly toast the rice grains. This brief toasting step helps to develop a nuttier flavor in the rice and ensures a fluffier texture once cooked.
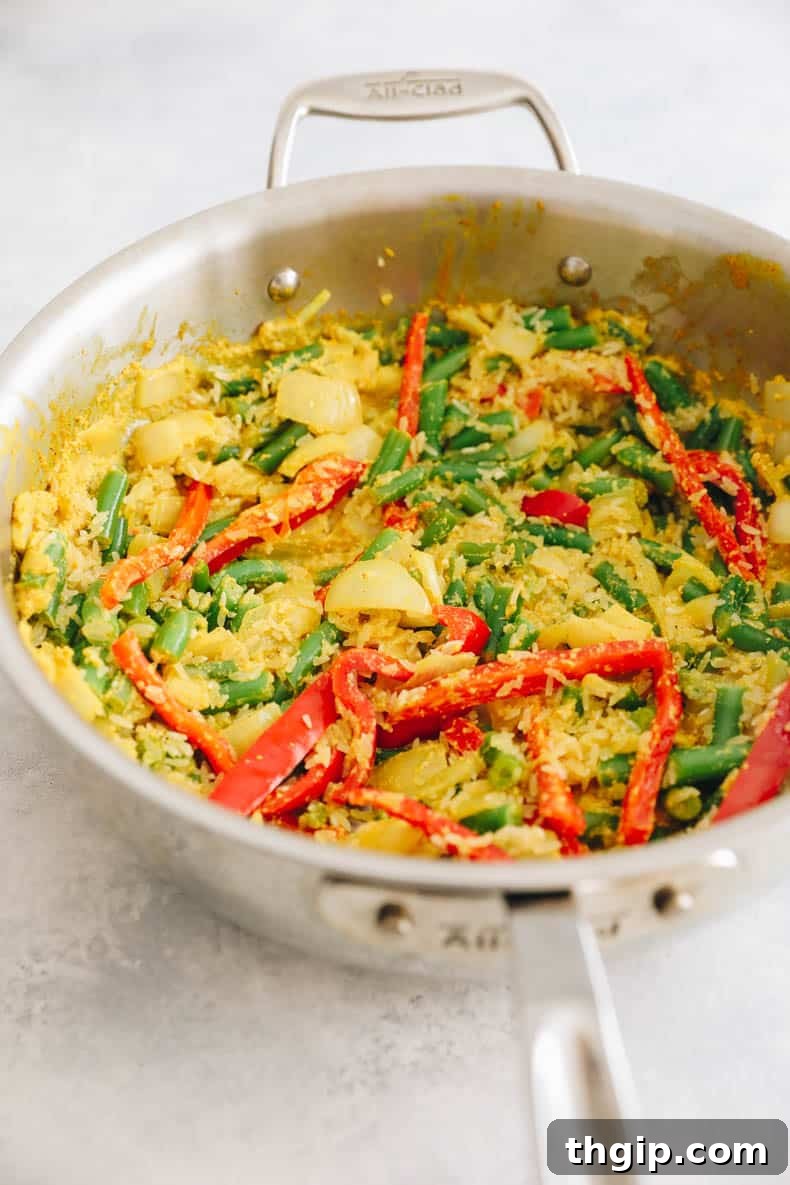
STEP 4: SIMMER TO PERFECTION AND GENTLY NESTLE THE CHICKEN
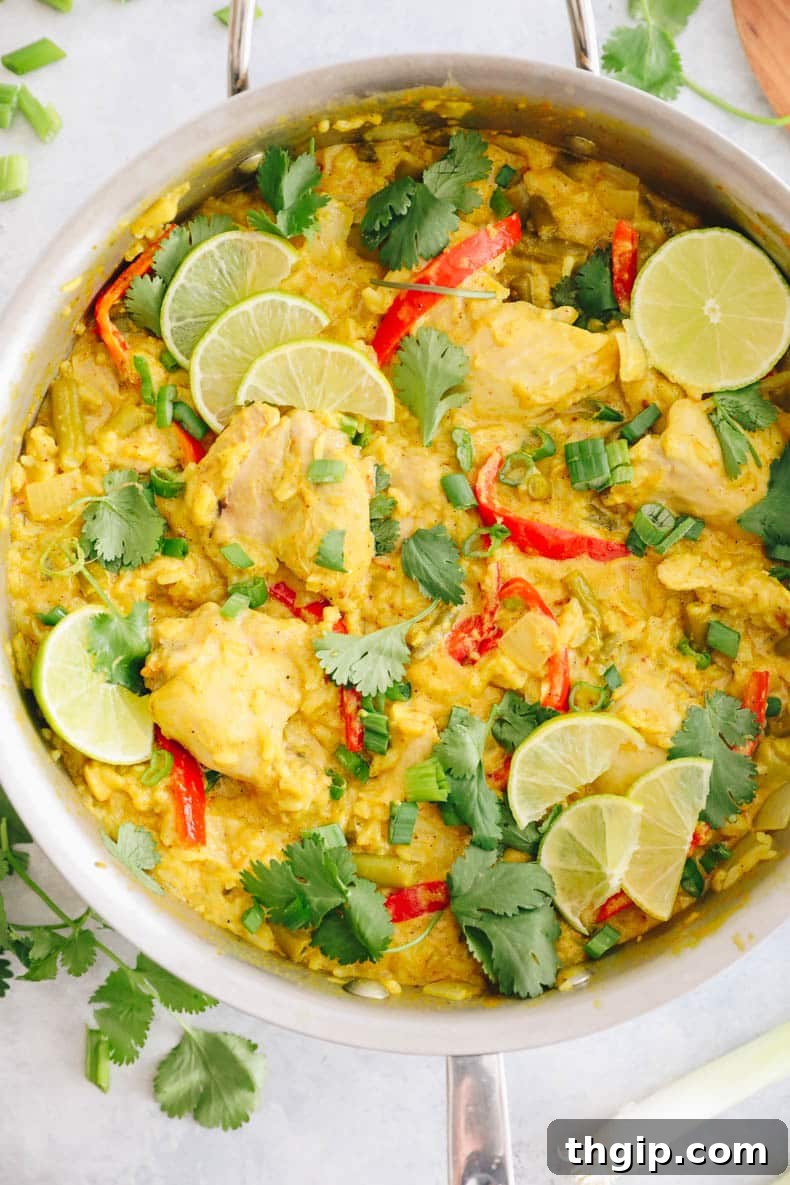
Pour in the full-fat coconut milk and water into the pot. Add a little bit of additional salt to taste, ensuring the liquid is well-seasoned. Bring the mixture to a gentle simmer, stirring occasionally to prevent the rice from sticking. Once simmering, reduce the heat to low, ensuring a steady, gentle cook. Carefully arrange the browned chicken pieces on top of the rice mixture, nestling them slightly into the liquid. Cover the pot or skillet tightly with a lid (or foil if your lid isn’t snug) and cook for 20-25 minutes. During this time, the rice will absorb all the liquid, and the chicken will finish cooking through, becoming incredibly tender. After 20-25 minutes, remove the lid and give the dish a good stir to ensure all liquid has been absorbed and the ingredients are evenly distributed. Serve immediately, garnished with fresh lime juice, chopped green onions, or any other optional toppings you desire. Enjoy the fragrant, tender, and incredibly satisfying result!
Easy Swaps & Clever Substitutions
- Opt for Chicken Breast – If you prefer a leaner cut, boneless, skinless chicken breast can easily replace the chicken thighs. Keep in mind that chicken breast tends to cook faster and can dry out if overcooked, so monitor it closely during the simmering phase. You might want to cut it into slightly smaller pieces for even cooking.
- Amplify the Spice Level – The recipe includes a modest amount of cayenne pepper for a gentle warmth. If you’re a heat enthusiast, feel free to increase the quantity of cayenne, or add a pinch of red chili powder or a finely chopped fresh green chili to the marinade for an extra fiery kick!
- Vary the Vegetables – This recipe is highly adaptable to your favorite veggies. Instead of bell peppers and green beans, consider incorporating peas (add them during the last 5-10 minutes of simmering), finely diced carrots (add with the bell peppers), or small broccoli florets (add them in the last 10 minutes of cooking) for different textures and nutrients.
- Make it Vegetarian or Vegan – Transform this into a delicious meat-free meal by replacing the chicken with firm tofu (pressed and cubed), paneer (Indian cheese), or chickpeas. If using tofu or paneer, brown them briefly in the pot before adding the vegetables, similar to how you would cook the chicken. For chickpeas, add them directly with the vegetables. Ensure to use a plant-based yogurt for the marinade if making it vegan.
- A Note on Brown Rice: A Firm “Do NOT Use” – I understand the desire for whole grains, but after extensive testing, I must strongly advise against using brown rice in this recipe. Its significantly longer cooking time (often 40-50 minutes) will inevitably lead to overcooked, dry chicken and mushy vegetables. For the best results, stick to white basmati or jasmine rice for that perfect texture and flavor balance.
- Alternative Grains (with caution) – While white basmati is ideal, if you’re looking for other white grain options, a good quality long-grain white rice or even orzo could theoretically work with careful adjustments to liquid amounts and cooking times. However, for a fool-proof, consistent result, basmati is king.
- Boost Freshness – A handful of fresh mint leaves, chopped and stirred in at the end, can add a refreshing counterpoint to the rich spices.
Storage & Meal Prep Instructions
This one-pot tandoori chicken and rice is a fantastic candidate for meal prepping, allowing you to enjoy delicious, homemade meals throughout your busy week.
- Refrigeration: Once cooled, transfer any leftovers to an airtight container. It will keep beautifully in the refrigerator for up to 5 days. To reheat, simply microwave individual portions until heated through, or gently warm on the stovetop over medium-low heat, adding a splash of water or broth if the rice seems dry, to restore moisture.
- Freezing: For longer storage, this recipe freezes exceptionally well. Allow the dish to cool completely, then transfer it to freezer-safe containers in individual portions or in a larger foil pan. Cover tightly with plastic wrap, then an additional layer of aluminum foil to prevent freezer burn. It can be stored in the freezer for up to 3 months. When ready to enjoy, thaw the frozen dish in the refrigerator overnight, or on the counter for several hours. Reheat using the same methods as refrigerated leftovers: microwave until hot, or gently warm on the stovetop, adding a little liquid if needed.
Explore More One-Pot Wonders
If you love the convenience and flavor of this one-pot meal, you’ll definitely want to explore these other fantastic recipes that keep cleanup to a minimum:
- Classic One-Pot Chicken and Rice
- One-Pot Israeli Chicken + Couscous
- Hearty One-Pot Paprika Chicken
- Mediterranean One-Pot Greek Chicken + Orzo
- Comforting One-Pot Enchilada Soup
- Flavorful One-Pot Green Chili
Print Recipe
One-Pot Tandoori Chicken and Rice

5 Stars
4 Stars
3 Stars
2 Stars
1 Star
No reviews yet. Be the first!
Savor the incredible flavors of tandoori chicken and aromatic rice, all cooked effortlessly in one pot! This recipe is perfect for busy weeknights, offering easy meal prep and a satisfying serving that the whole family will adore. Minimal cleanup, maximum flavor!
- Author: Davida Lederle
- Prep Time: 4 hours (includes marination time)
- Cook Time: 35 minutes
- Total Time: 4 hours 35 minutes
- Yield: 4 servings
- Category: Dinner
- Method: Stovetop Cook
- Cuisine: Indian
- Diet: Gluten-Free
Ingredients
For the chicken marinade:
- 1 1/2 lbs boneless, skinless chicken thighs
- 1 large yellow onion, chopped
- 1 cup plain Greek yogurt (full-fat recommended)
- 2 garlic cloves, minced
- Juice of 1 lemon
- 2 tsp freshly grated ginger
- 1 tsp garam masala
- 1 tsp ground coriander
- 1 tsp paprika
- 1/2 tsp turmeric
- 3/4 tsp ground cumin
- 1/2 tsp sea salt
- 1/4 tsp cayenne pepper (adjust to your spice preference)
For the dish:
- 1 tbsp coconut oil
- 1 bell pepper (red, yellow, or orange), seeded + sliced
- 8 oz green beans, ends trimmed and cut into 1-inch long pieces
- 1 cup white basmati rice (do not substitute with brown rice)
- 1 (15 oz) can full-fat coconut milk
- 1/2 cup water
- Optional toppings: Fresh cilantro (chopped), lime wedges, green onions (sliced), chopped peanuts
Instructions
- Prepare the Marinade: In a large bowl, combine the Greek yogurt, minced garlic, lemon juice, grated ginger, garam masala, ground coriander, paprika, turmeric, ground cumin, sea salt, and cayenne pepper. Mix well until a smooth paste forms.
- Marinate Chicken: Add the boneless, skinless chicken thighs and chopped yellow onion to the yogurt mixture. Toss until all pieces are thoroughly coated. Cover the bowl and refrigerate for at least 4 hours (or ideally overnight) to allow the flavors to meld and the chicken to tenderize. A minimum of 30 minutes will still work if you are short on time.
- Sear Chicken: Heat 1 tbsp of coconut oil in a large pot or Dutch oven over medium-high heat. Add the marinated chicken and onion mixture, spreading it out. Sear the chicken for about 3 minutes per side until it’s beautifully browned. Remove the chicken from the pot and set aside; it doesn’t need to be cooked through at this stage. You can leave any remaining marinade and onion in the pot.
- Sauté Vegetables & Rice: To the same pot, add the sliced bell pepper and green beans. Sauté for 3-4 minutes until they begin to soften. Stir in the white basmati rice and cook for 1 more minute, stirring constantly, to lightly toast the grains.
- Simmer the Dish: Pour in the full-fat coconut milk and water, adding a pinch more salt if desired. Bring the mixture to a gentle simmer, stirring well.
- Add Chicken & Cook: Once simmering, reduce the heat to low. Carefully place the browned chicken pieces on top of the rice and vegetables, nestling them slightly into the liquid. Cover the pot tightly with a lid.
- Finish Cooking: Allow the dish to simmer for 20-25 minutes, or until all the liquid has been absorbed by the rice and the chicken is fully cooked and tender.
- Serve: Give the entire dish a gentle stir to combine. Top with fresh lime juice, chopped green onions, fresh cilantro, or any other preferred toppings before serving. Enjoy your delicious one-pot tandoori chicken and rice!
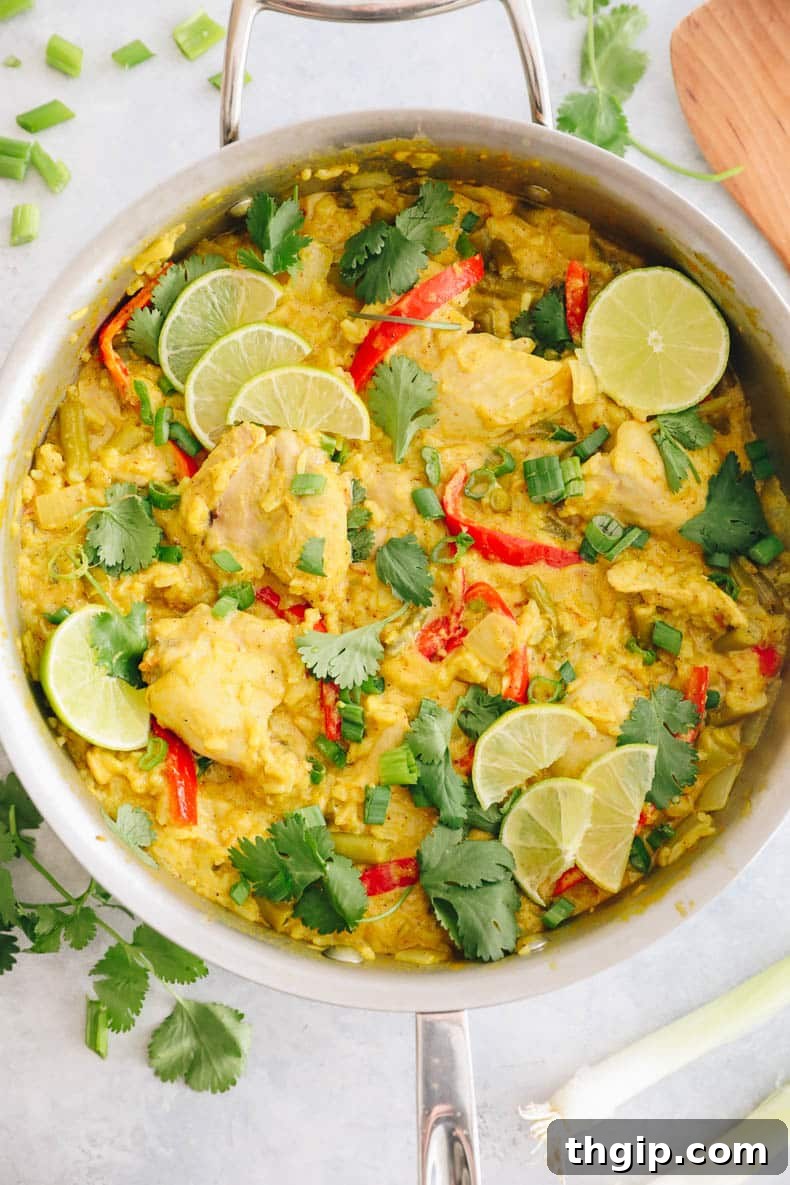
There you have it – a truly fantastic one-pot tandoori chicken and rice recipe that brings exotic flavors and ultimate convenience to your kitchen. Whether you’re a seasoned chef or a busy home cook, this dish promises to impress with its depth of flavor and ease of preparation. Don’t hesitate to make it your next weeknight favorite or a star in your meal prep rotation. Share your creations and let me know how much you enjoyed this simplified taste of India!