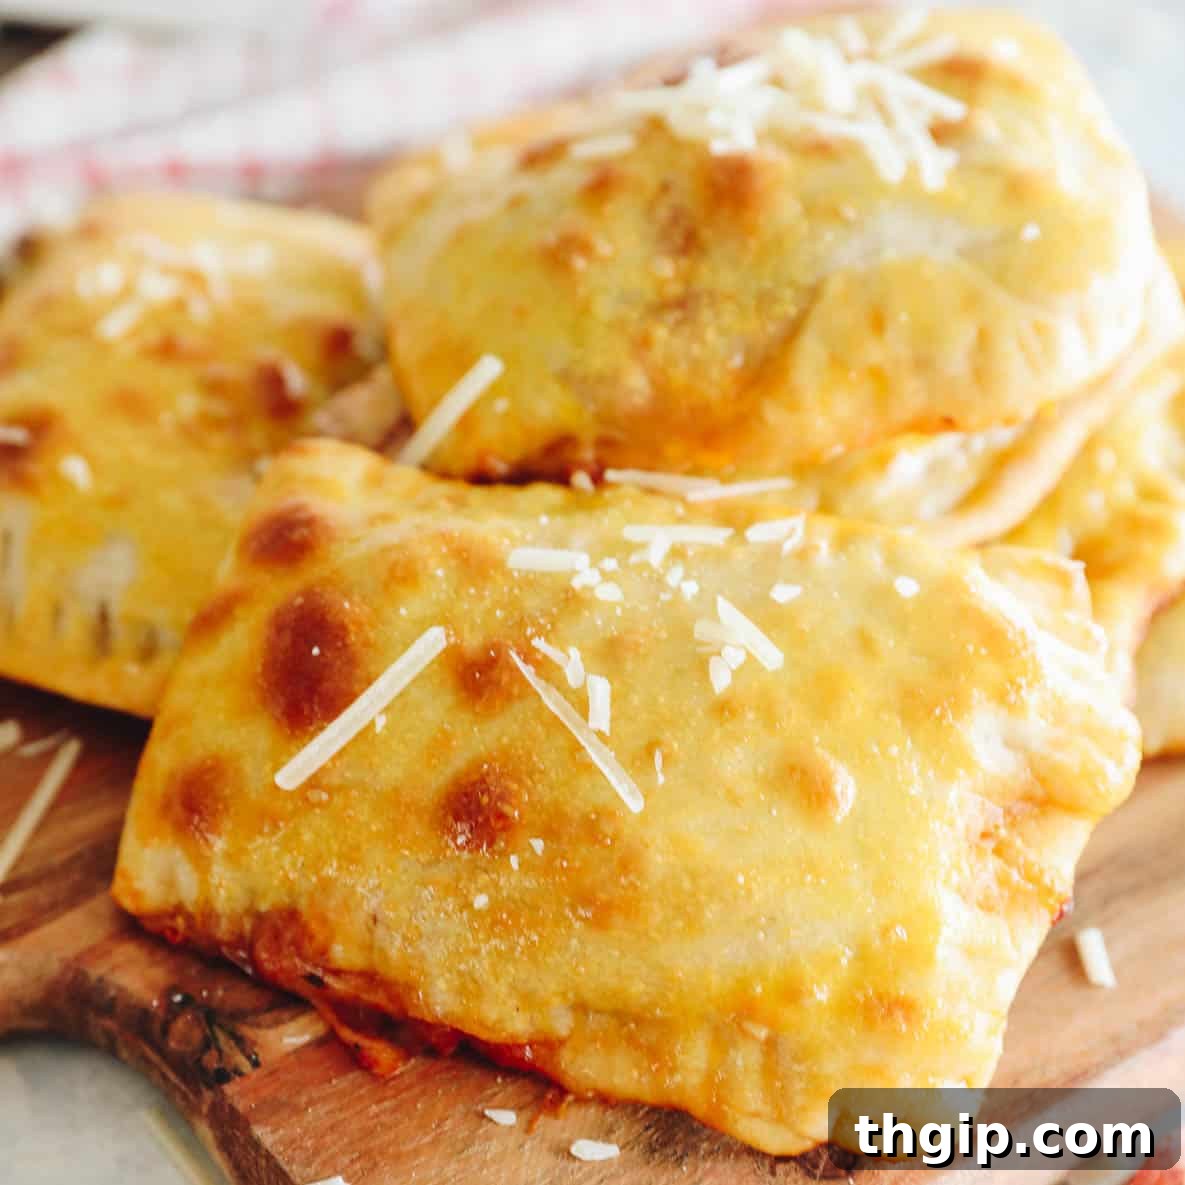
Unleash your inner chef and create delicious, customizable pizza pockets right in your own kitchen! Whether you opt for homemade or store-bought pizza dough, these pockets are designed to be stuffed with your favorite pizza toppings, offering endless flavor combinations. This kid-approved recipe is incredibly quick, coming together in as little as 20 minutes, making it a perfect solution for busy weeknights. Plus, they’re wonderfully freezer and meal-prep friendly, ensuring you always have a satisfying snack or meal on hand!

Table of Contents
- Why These Homemade Pizza Pockets Are a Must-Try!
- Key Ingredients for Perfect Pizza Pockets
- Creative Pizza Pocket Filling Ideas
- Step-by-Step Guide: How to Make Homemade Pizza Pockets
- Homemade Pizza Pocket FAQs
- Storage and Reheating Tips
- Freezing Pizza Pockets for Later
- More Irresistible Pizza Recipes
- Homemade Pizza Pockets Recipe
If there’s one recipe I truly feel passionate about sharing, it’s these incredible homemade pizza pockets. My own childhood was practically fueled by the convenient, savory goodness of pizza pockets (and perhaps a little too much Gatorade, but that’s a tale for another time). Growing up as a competitive figure skater, countless hours were spent gliding across the ice rink. Post-practice meals often involved a quick trip to the microwave for a pepperoni pizza pocket – my absolute favorite. While perhaps not the pinnacle of healthy eating, they were undeniably effective in satisfying my hunger and replenishing my energy during those intense, calorie-burning days.
Now, as a parent, I find myself reliving many cherished childhood favorites through the eyes of my own child. A recent trip to Toronto sparked a memory and prompted me to buy some store-bought pizza pockets for her. That simple act ignited a realization: how remarkably easy they are to make from scratch! This recipe is a game-changer, whether you prefer the rich flavor of homemade pizza dough or the convenience of store-bought. The true beauty lies in the ability to customize every single ingredient, making them a healthier and more personalized alternative to their frozen counterparts. I wholeheartedly recommend giving these a try – your taste buds, and your family, will thank you!
Why These Homemade Pizza Pockets Are a Must-Try!
Ditch the processed versions and discover the unparalleled joy of making your own pizza pockets. Here’s why this recipe deserves a permanent spot in your kitchen:
- Unbelievably Kid-Friendly: Just ask my toddler, who absolutely adores these! Their compact size makes them easy for little hands to hold, and the ability to customize fillings means even the pickiest eaters can enjoy a meal tailored to their preferences. It’s a fun, interactive way to get kids involved in the kitchen and excited about what they’re eating.
- Infinitely Customizable: The possibilities are truly endless! Craving a simple, gooey cheesy pizza pocket? Go for it! What about classic pepperoni? Absolutely! You can even elevate them with gourmet touches like homemade sun-dried tomato pesto, an array of fresh vegetables, or even breakfast-inspired fillings. They cater to every dietary need and flavor whim, making them perfect for family dinners or entertaining.
- Super Freezer-Friendly & Ideal for Meal Prep: Just like their store-bought cousins, these homemade pizza pockets are perfectly designed for freezing. Whip up a large batch in advance, store them in your freezer, and you’ll have instant, ready-to-heat meals or snacks for weeks. This is a lifesaver for busy individuals and families, allowing for quick and healthy options on demand without compromising on taste or quality.
- A Healthier Alternative: By making pizza pockets from scratch, you gain complete control over the ingredients. This means you can choose fresher, higher-quality components, reduce sodium and preservatives, and incorporate more vegetables, creating a significantly healthier snack or meal option for your entire family.
- Fun for the Whole Family: Making these pizza pockets can be a fantastic family activity. Kids love rolling out the dough, choosing their fillings, and sealing their own creations. It’s a wonderful way to spend quality time together, teach basic cooking skills, and enjoy the fruits of your labor!
Key Ingredients for Perfect Pizza Pockets
Crafting the perfect pizza pocket starts with a few simple, high-quality ingredients. Here’s what you’ll need and some tips for selection:
- Pizza Dough: The foundation of your pocket! You have two excellent options: either use your favorite homemade pizza dough recipe for superior flavor and texture, or opt for the convenience of store-bought dough. Many grocery stores offer fresh pizza dough balls in their refrigerated section, which work wonderfully. Just ensure it’s not pre-baked.
- Pizza Sauce: The heart of the pizza flavor. Again, feel free to use your go-to homemade tomato sauce or a high-quality store-bought marinara or pizza sauce. Look for options with low sugar and fresh ingredients. A good sauce makes all the difference!
- Mozzarella Cheese: For that classic, melty, gooey pull! Shredded mozzarella is ideal. While pre-shredded works, shredding your own from a block often melts better and avoids anti-caking agents. You can also experiment with a blend of mozzarella and a touch of provolone, parmesan, or cheddar for added complexity.
- Egg Yolk: This is for creating an “egg wash” that brushes onto the pockets before baking. It gives them a beautiful golden-brown color and a slightly crispier, appealing crust. Simply whisk one egg yolk with a tablespoon of water. If you prefer to omit egg, a brush of milk or olive oil can also provide some color.
- All-Purpose Flour: Essential for dusting your work surface and rolling pin. This prevents the dough from sticking and makes it much easier to handle. You can also use a mix of flour and semolina for a slightly crispier base.
- Salt + Pepper: Basic seasonings to enhance the flavor of your fillings. Add them to taste, especially if your chosen toppings need a little extra punch.
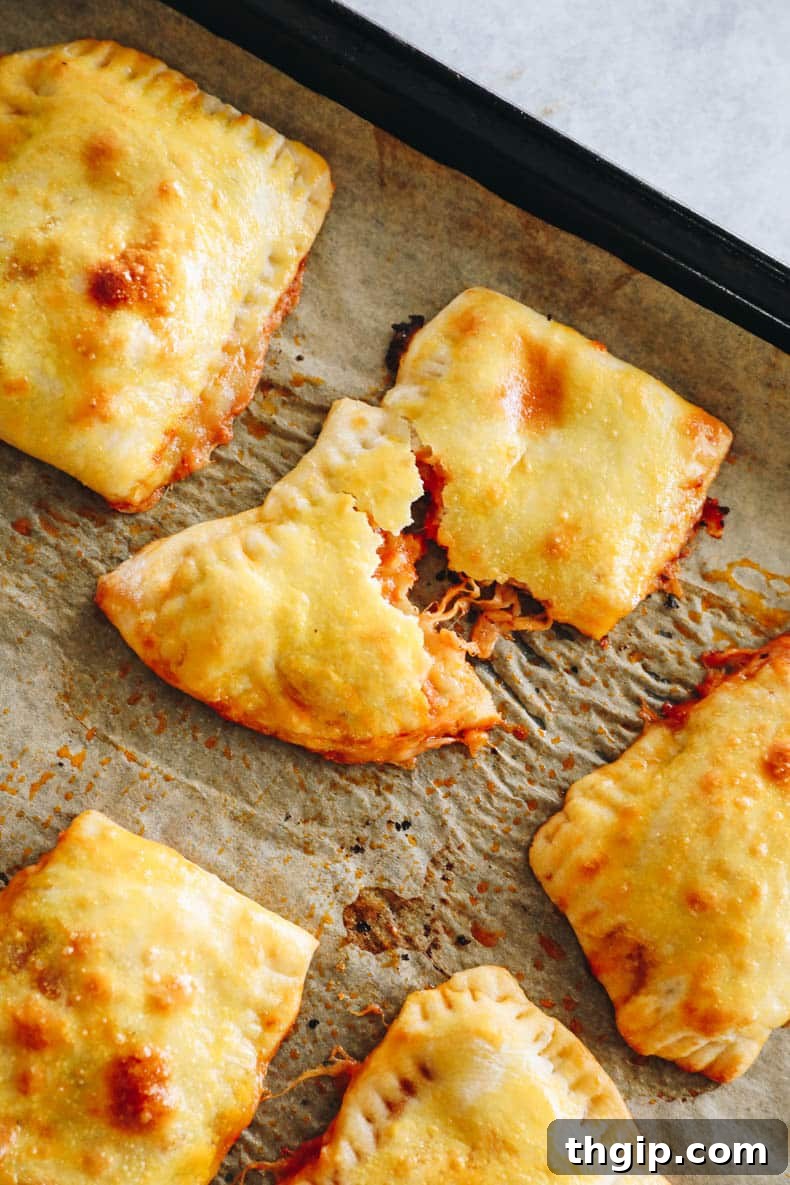
Creative Pizza Pocket Filling Ideas
While technically these are “fillings” since they go inside, let’s call them “toppings” for consistency! Here are some of my absolute favorite combinations to inspire your next batch of homemade pizza pockets:
- Classic Pepperoni or Meat Lovers: Layer 2-3 slices of good quality pepperoni, or combine it with a small crumble of cooked Italian sausage, cooked bacon bits, or even diced cooked chicken. Ensure any meat is fully cooked before adding.
- Vibrant Veggie Lovers: Sprinkle finely chopped onions, green peppers, red peppers, and sliced mushrooms over your pizza sauce and cheese. For best results, you can lightly sauté the vegetables beforehand to remove excess moisture and enhance their flavor. Add a touch of dried oregano for an authentic Italian taste.
- Mediterranean Escape: Skip the traditional pizza sauce and use sun-dried tomato pesto as your base. Combine with cooked, squeezed-dry spinach and chopped Kalamata olives for a salty, tangy, and earthy flavor profile. Crumbled feta cheese can also be a wonderful addition here.
- Tropical Hawaiian Delight: A controversial but delicious choice! Layer a slice of cooked ham (diced) and a tablespoon of fresh, drained pineapple chunks. The sweet and savory combination is surprisingly satisfying in a pocket.
- BBQ Chicken: Use BBQ sauce instead of pizza sauce, then add shredded cooked chicken and a sprinkle of red onion.
- Spinach & Feta: A simple and savory option. Combine cooked, well-drained spinach with crumbled feta cheese and a hint of garlic powder.
- Breakfast Pockets: Get creative for a brunch treat! Fill with scrambled eggs, cooked crumbled sausage or bacon, and cheddar cheese.
- Sweet Dessert Pockets: For a sweet twist, spread a thin layer of Nutella or fruit preserves, add some mini marshmallows or chocolate chips, and bake until golden. A sprinkle of powdered sugar after baking is a delightful finish.
Step-by-Step Guide: How to Make Homemade Pizza Pockets
Making these delicious pockets is a straightforward process. Follow these simple steps for perfect results every time:
STEP 1: PREP & ROLL OUT DOUGH
Begin by preheating your oven to 425 degrees F (220 degrees C). Line a large baking sheet with parchment paper to prevent sticking and make cleanup easier. Lightly flour a clean work surface (your countertop or a large cutting board) and your rolling pin. Place your pizza dough ball onto the floured surface and, using the rolling pin, roll it out evenly into a large rectangle, aiming for a thickness of about 1/4 inch. The exact dimensions aren’t critical, but a consistent thickness is key for even baking.
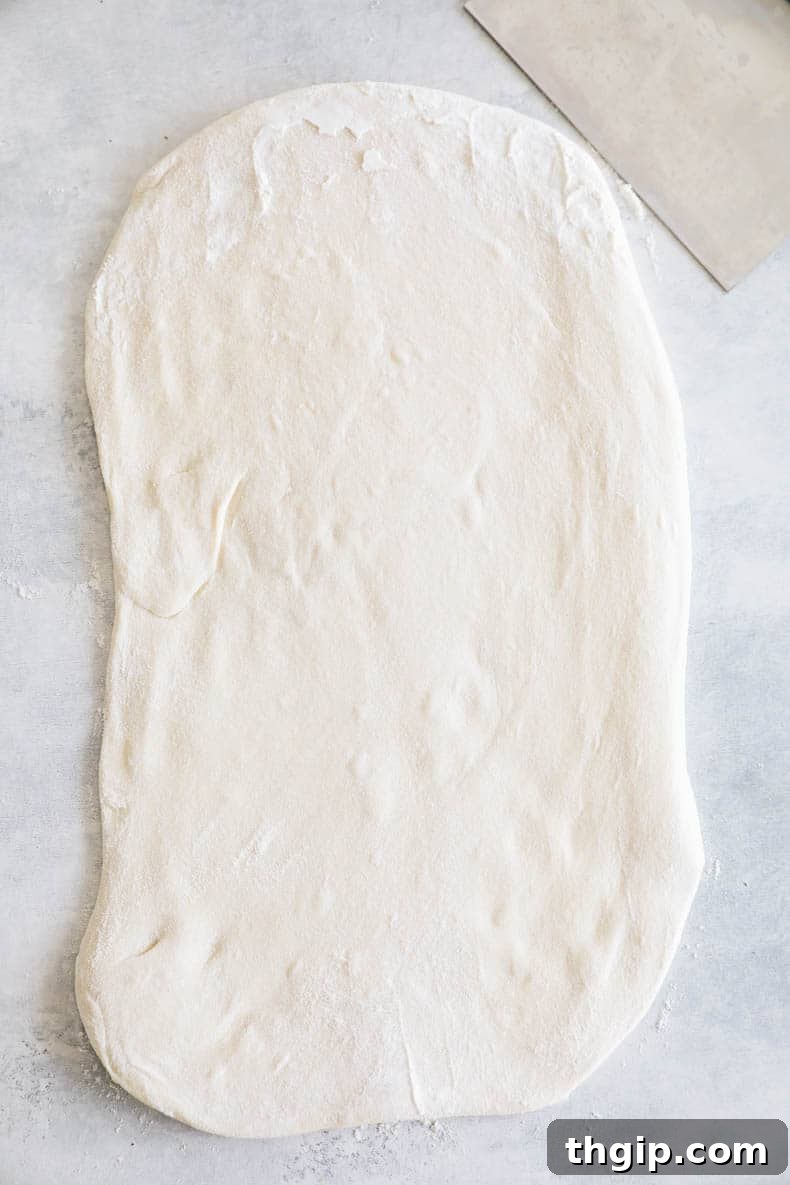
STEP 2: CUT AND ARRANGE DOUGH
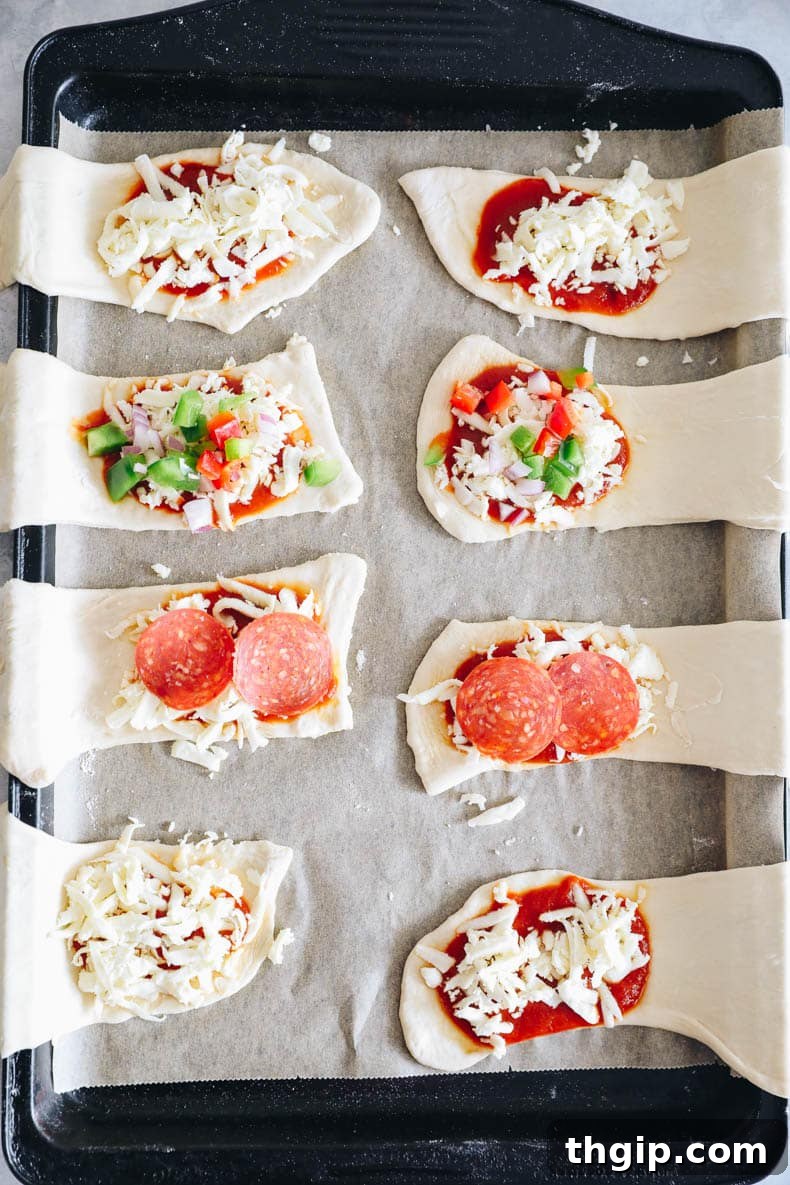
Once your dough is rolled, use a sharp knife or a pizza cutter to carefully slice the large rectangle into 8 evenly sized smaller rectangles. Precision here helps ensure uniform pocket sizes. If your rectangles aren’t quite 8 inches long, gently stretch and roll each one again until they reach approximately that length. This provides enough surface area for generous filling. Carefully transfer these dough rectangles to your parchment-lined baking sheet, arranging them so that half of each rectangle hangs slightly over the edge of the sheet. This setup makes the stuffing and folding process much easier.
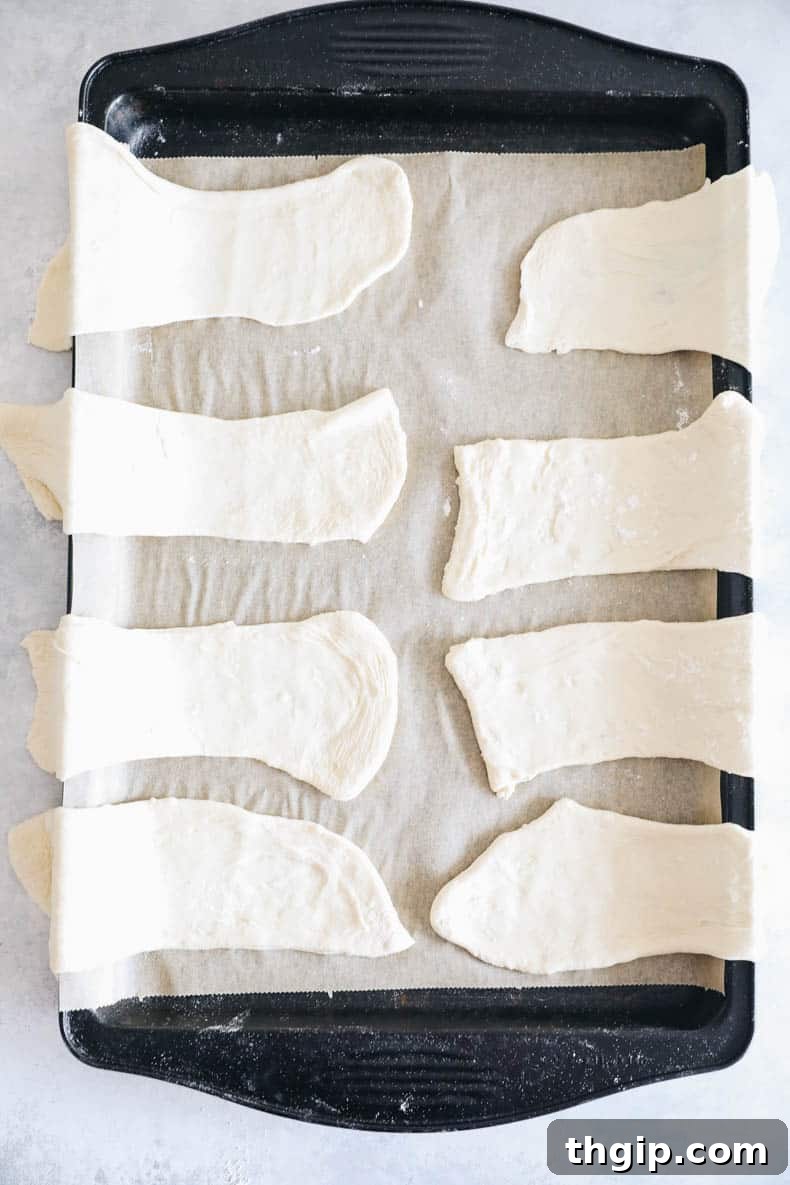
STEP 3: STUFF & SEAL PIZZA POCKETS
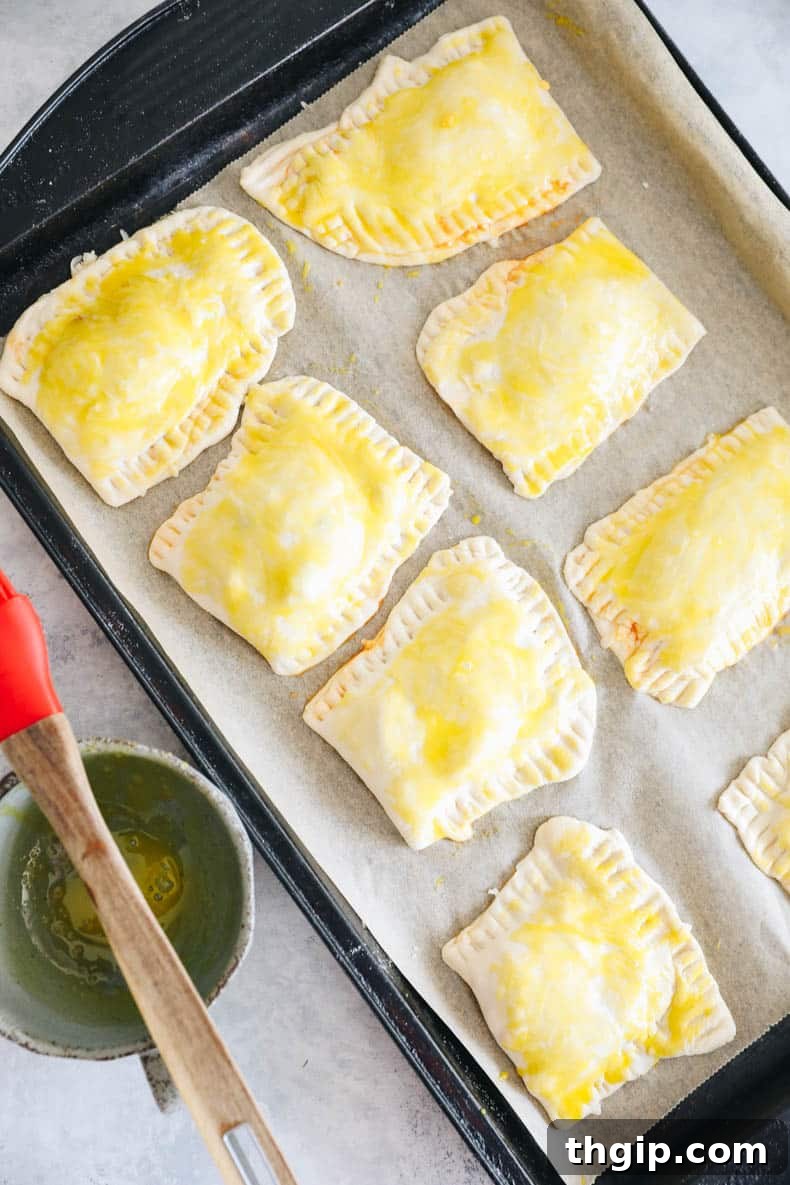
Now for the fun part! Spoon about 1 tablespoon of pizza sauce onto one half of each dough rectangle, leaving a small border around the edges. This helps prevent the sauce from oozing out during baking. Top the sauce with approximately 2 tablespoons of shredded mozzarella cheese and any of your desired extra fillings (refer to the “Creative Pizza Pocket Filling Ideas” section for inspiration!). Remember not to overfill, as this can make sealing difficult. Carefully fold the empty half of the dough rectangle over the stuffed half, creating a pocket. To seal, press firmly along the edges with your fingers, then use the tines of a fork to crimp and create a decorative, secure seal. In a small bowl, whisk together one egg yolk with 1 tablespoon of water to create an egg wash. Lightly brush the tops of each pizza pocket with this mixture; it will give them a beautiful golden-brown, shiny finish when baked.
STEP 4: BAKE TO GOLDEN PERFECTION
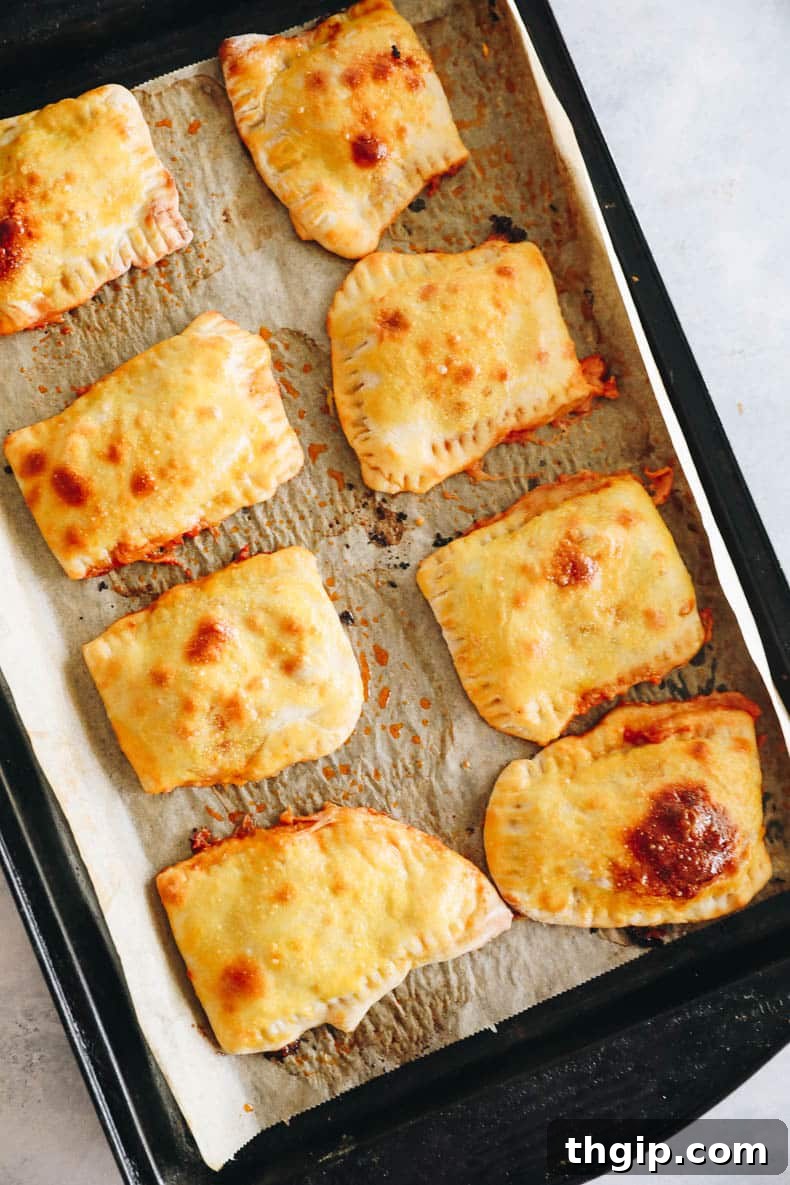
Transfer your perfectly stuffed and sealed pizza pockets back to the parchment-lined baking sheet, ensuring they have enough space between them for even cooking. Bake in your preheated oven at 425 degrees F for 12-17 minutes, or until the crust is beautifully golden brown and the cheese is bubbling and melted inside. Keep an eye on them, as oven temperatures can vary. Once baked, remove the baking sheet from the oven and let the pizza pockets rest for a few minutes. They will be extremely hot, and this resting period allows the cheese to set slightly, preventing burns and ensuring a more enjoyable eating experience. Serve warm and enjoy!
Homemade Pizza Pocket FAQs
Absolutely! You can assemble these pizza pockets up to 3 days in advance and store them unbaked in an airtight container in the fridge. However, for the best taste and texture, I highly recommend baking them just before you plan to eat them. This ensures a fresh, crispy crust and perfectly melted cheese.
Yes, unequivocally! This recipe is incredibly freezer-friendly, and I highly encourage making a double or triple batch specifically for freezing. Freezing homemade pizza pockets is a fantastic way to have quick, delicious meals ready whenever hunger strikes. Find more detailed freezer tips below!
Not at all! While I personally enjoy the process and flavor of homemade pizza dough, store-bought or premade dough works just as wonderfully and saves a significant amount of time. The most important thing is to choose a dough that can be easily rolled out and is not pre-baked. Check your local grocery store’s refrigerated section for fresh dough balls.
Please do! I enthusiastically encourage doubling or even tripling this recipe. It’s perfect for meal prepping and stocking your freezer. My toddler often loves to “help” me stuff them, making it a fun family activity that yields plenty of delicious leftovers for busy weeks!
No, the egg wash is completely optional. Its primary purpose is to give the pizza pockets that beautiful, shiny, golden-brown color and a slightly crispier exterior. If you omit it, your pockets will still taste fantastic and bake up just fine, though they might appear a little paler. You can also brush with a little milk or olive oil for a similar effect.
Bursting usually happens from overfilling or not sealing the edges thoroughly enough. To prevent this, ensure you don’t use too much filling, leaving adequate space around the edges. Also, make sure to crimp the edges firmly with a fork, pressing down well to create a strong seal. Sometimes making a small slit on top of the pocket before baking can also help steam escape and prevent bursting.
Absolutely! Many grocery stores now offer excellent gluten-free pizza dough options that you can easily roll out. For a dairy-free version, simply substitute the mozzarella with your favorite dairy-free shredded cheese alternative. Ensure your pizza sauce is also dairy-free.
Storage and Reheating Tips
To keep your homemade pizza pockets fresh and delicious, proper storage is key. Once baked and cooled completely, place them in an airtight container. They will keep well in the refrigerator for up to 3 days. When you’re ready to enjoy them again, reheating is simple:
- Microwave: For a quick reheat, place a pizza pocket on a microwave-safe plate and heat for 60-90 seconds, or until heated through. Be cautious as the filling can get very hot.
- Oven: For a crispier crust, reheat in a preheated oven at 350 degrees F (175 degrees C) for 5-10 minutes, or until warmed through and the crust has regained some crispness. This is my preferred method for the best texture.
- Air Fryer: An air fryer can also provide excellent results, giving a crispy exterior. Heat at 350°F (175°C) for 3-5 minutes, checking frequently.
Freezing Pizza Pockets for Later
Freezing these pizza pockets is a fantastic meal prep hack! Here’s how to do it effectively and reheat them for maximum enjoyment:
- For Unbaked Pockets: After assembling and sealing the pockets, place them on a parchment-lined baking sheet and flash freeze for about 1-2 hours until solid. Once frozen, wrap each pocket individually in aluminum foil, then transfer them to a freezer-safe Ziploc bag or container. This prevents them from sticking together and protects them from freezer burn. When ready to bake, place them directly from the freezer onto a parchment-lined baking sheet and bake at 400 degrees F (200 degrees C) for 20-25 minutes, or until golden brown. You might need to add a few extra minutes compared to fresh.
- For Baked Pockets: Allow your freshly baked pizza pockets to cool completely before freezing. Once cooled, wrap each one individually in aluminum foil. This individual wrapping helps maintain freshness and prevents freezer burn. Place the wrapped pockets into a large freezer-safe bag or container, removing as much air as possible before sealing. They can be stored in the freezer for up to 3 months.
Reheating Frozen Baked Pizza Pockets:
- Microwave: Remove the pocket from the foil. Place on a microwave-safe plate and heat for approximately 2-3 minutes, or until thoroughly heated. Microwave reheating is fast but may result in a softer crust.
- Oven: For the best texture, remove the pocket from the foil and place it directly on a baking sheet. Reheat in a preheated oven at 350 degrees F (175 degrees C) for roughly 20-25 minutes, or until hot and the crust is crispy again. No need to thaw beforehand!
- Air Fryer: A fantastic option for a crispy finish! Place the unwrapped frozen pocket in the air fryer basket and cook at 350°F (175°C) for 8-12 minutes, flipping halfway through, until heated through and crisp.
More Irresistible Pizza Recipes:
If you love pizza as much as we do, be sure to check out these other fantastic pizza creations!
- Homemade Pizza Dough + Simple Margherita Pizza Recipe
- Quick & Easy Tortilla Pizzas
- Delicious Zucchini + Ricotta White Pizza
- Gourmet Mushroom + Asparagus Pizza (with Gluten-Free Crust Option)
Homemade Pizza Pockets

Make your own customizable pizza pockets using homemade or store-bought pizza dough and stuffed with your favorite pizza toppings. A kid-approved recipe that’s ready in just 20 minutes! Freezer and meal-prep friendly too!
- Author: Davida Lederle
- Prep Time: 10 minutes
- Cook Time: 20 minutes
- Total Time: 30 minutes
- Yield: 8 pizza pockets
- Category: Dinner
- Method: Bake
- Cuisine: American
- Diet: Vegetarian
Ingredients
- 16 oz ball fresh pizza dough (homemade or store-bought)
- 1 cup pizza sauce (homemade or store-bought)
- 2 cups shredded mozzarella cheese
- 1 egg yolk, whipped with 1 tbsp water in a small bowl for egg wash
- Salt + pepper, to taste
- Optional: All-Purpose Flour, for rolling out dough
Instructions
- Preheat oven to 425 degrees F (220°C). Line a baking sheet with parchment paper.
- Place pizza dough on a lightly floured surface and using a rolling pin, roll out dough to a 1/4 inch thick rectangle.
- Using a sharp knife or pizza cutter, slice your pizza dough into 8 evenly sized rectangles.
- Roll out rectangles again until they are about 8 inches long. Place onto the parchment-lined baking sheet with half of each rectangle hanging over the side.
- Using a spoon, spread 1 tablespoon of pizza sauce to one end of each rectangle, leaving a small border.
- Top with 2 tablespoons shredded mozzarella cheese and any desired toppings.
- Fold the empty half of the rectangle over the stuffed half and seal the edges firmly with a fork.
- Brush each pizza pocket with the prepared egg wash.
- Place pizza pockets on the parchment paper lined baking sheet and bake for 12-17 minutes or until golden brown.
- Let rest for a few minutes as they will be hot right out of the oven.
- Refer to the “Storage Instructions” and “Freezer Tips” sections above for guidance on keeping them fresh.