
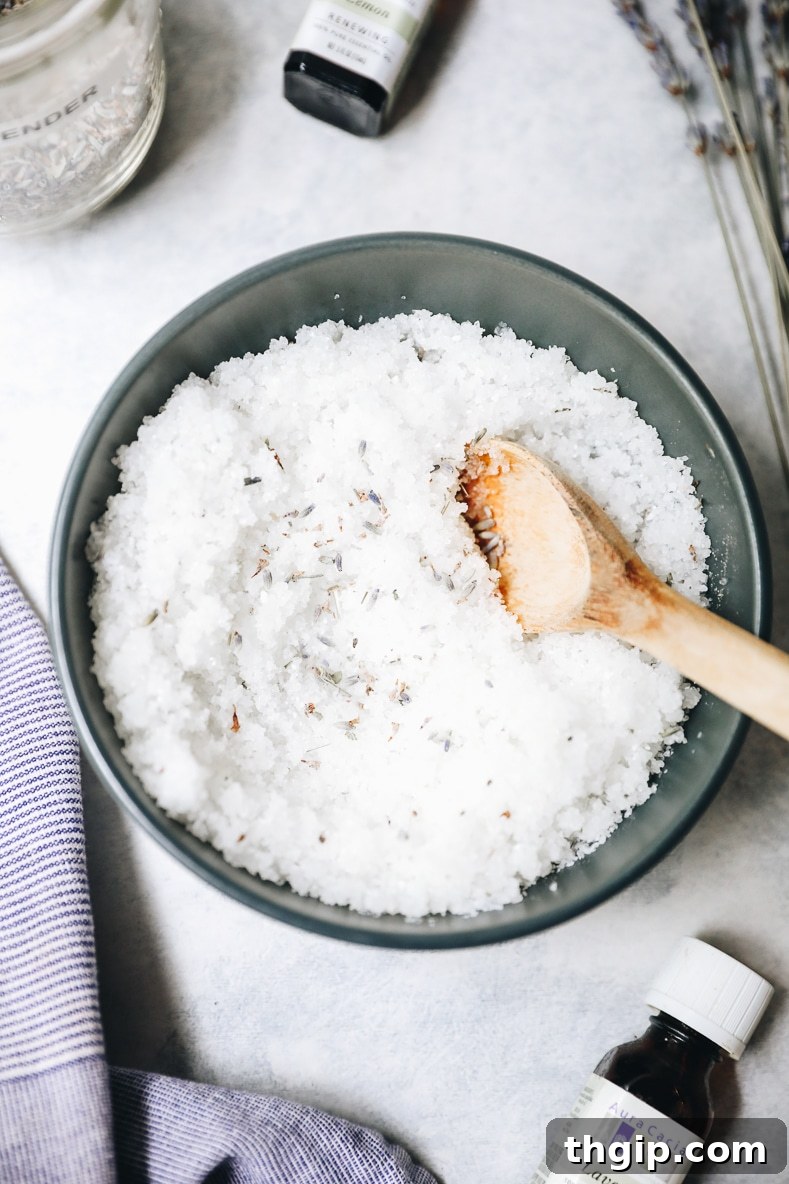
Transform your skin and elevate your self-care routine with this ultimate guide on how to make a revitalizing salt scrub recipe. This basic DIY body scrub recipe is designed for easy customization, allowing you to tailor it to your unique preferences and maximize its incredible detoxifying and therapeutic benefits.
Forget expensive spa treatments and harsh chemical-laden products. With simple, natural ingredients and step-by-step instructions, you’ll learn how to craft a luxurious salt scrub from scratch, right in your own kitchen. Prepare to uncover smoother, softer, and more radiant skin while indulging in a truly therapeutic experience. Keep reading to discover more!
Table of Contents
- The Transformative Benefits of a Salt Scrub
- Salt Scrub vs. Sugar Scrub: Which is Right for You?
- Choosing the Perfect Salt for Your Body Scrub
- Mastering the Basic Salt Scrub Recipe
- Step-by-Step: How to Make Your DIY Body Scrub
- How to Effectively Use Your Homemade Salt Scrub
- How Long Does a Homemade Salt Scrub Last?
- Expand Your DIY Skincare Routine: More Body Care Recipes You’ll Love
- Homemade Salt Scrub Recipe Card
For many, the idea of a spa day brings to mind serene environments, soothing scents, and the promise of relaxation. While monthly spa visits might be a luxurious treat, replicating that rejuvenating experience at home is surprisingly simple and incredibly rewarding. I, for one, cherish the moments of tranquility a good spa session provides, particularly the invigorating salt scrubs offered in steam rooms.
The sensation of scooping out a small amount of a fragrant salt scrub, gently massaging it onto the skin amidst a cloud of warm steam, and then rinsing it away to reveal incredibly soft, smooth skin is truly unparalleled. It’s a ritual that detoxifies the body and calms the mind, leaving you feeling utterly refreshed. Since regular spa trips might not always be feasible, I’ve perfected my own at-home spa circuit, which often involves a hot, steamy shower and a generous application of this fantastic DIY body scrub.
Creating your own salt scrub isn’t just about saving money; it’s about having complete control over the ingredients you put on your body. You can ensure they are natural, nourishing, and free from any unwanted additives. This article will not only share my go-to salt scrub recipe but also equip you with all the essential tips and knowledge to make and use your own personalized body scrub effectively. Let’s dive into the world of natural skincare and unlock a radiant, healthier you.
The Transformative Benefits of a Salt Scrub
When we talk about skincare, exfoliation for the face often takes center stage. We’re well aware that shedding dead skin cells can prevent clogged pores, reduce breakouts, and promote a clear complexion. However, the skin on our bodies, which is our largest organ, also accumulates dead cells, becoming dull, dry, and less vibrant if left unexfoliated. Body scrubs, especially salt scrubs, are a fantastic way to address this, offering a myriad of benefits that go beyond just surface-level smoothness.
A high-quality salt scrub acts as a potent physical exfoliant, gently yet effectively buffing away old, tired skin cells to reveal the fresh, healthy skin beneath. This process doesn’t just make your skin feel incredibly soft and smooth; it also stimulates cell turnover, encouraging the regeneration of new skin cells. Regular exfoliation can significantly improve skin texture, tone, and appearance, reducing the visibility of bumps, dry patches, and even ingrown hairs. It also enhances the absorption of subsequent moisturizers and body oils, allowing them to penetrate deeper and work more effectively.
Beyond exfoliation, one of the most remarkable benefits of a salt scrub is its ability to encourage detoxification. The act of scrubbing in circular motions stimulates the lymphatic system, a crucial part of our immune system responsible for flushing toxins and waste products from the body. By boosting lymphatic circulation, a salt scrub aids our body’s natural detoxification efforts, helping to eliminate stagnant toxins and reduce fluid retention. Furthermore, the minerals naturally present in sea salts are readily absorbed through the skin, replenishing vital nutrients and contributing to overall skin health and well-being. This creates a holistic approach to skincare, where beauty is enhanced from the inside out.
Salt Scrub vs. Sugar Scrub: Which is Right for You?
Many people are familiar with sugar scrubs, so it’s natural to wonder about the distinctions between a salt scrub and a sugar scrub. Both offer excellent exfoliation, but they each bring unique properties to the table, making them suitable for different skin types and preferences.
Salt scrubs are generally more abrasive than sugar scrubs. The crystalline structure of salt tends to be sharper, providing a more vigorous exfoliation. This makes salt scrubs particularly effective for targeting tougher areas of the body, such as the elbows, knees, heels, and feet, where skin tends to be thicker and rougher. If you desire a deeply invigorating scrub that really polishes the skin and stimulates circulation, a salt scrub is an excellent choice. However, due to its abrasive nature, individuals with very sensitive skin or those prone to irritation might find salt scrubs too intense. For these skin types, or for use on more delicate areas like the face, a gentler alternative such as a sugar scrub is often recommended (I love this homemade brown sugar scrub for its moisturizing properties).
A key advantage of salt scrubs, particularly those made with high-quality sea salts, lies in their rich mineral content. Sea salts are packed with beneficial minerals like magnesium, calcium, potassium, and bromide, which are essential for healthy skin function. When absorbed through the skin, these minerals can help to balance pH, reduce inflammation, promote healing, and replenish the skin’s natural moisture barrier. Sugar, while a good humectant (meaning it draws moisture into the skin), does not offer the same extensive mineral profile as sea salt. Therefore, if you’re looking for a scrub that not only exfoliates but also nourishes and revitalizes your skin with vital minerals, a salt scrub is the superior option.
Note: Some individuals also use coffee grounds as an exfoliant, prized for their caffeine content which can temporarily tighten skin and boost circulation. However, I find coffee grounds to be quite abrasive, and they can sometimes leave a residue, so consider your skin type before opting for a coffee-based scrub.
Choosing the Perfect Salt for Your Body Scrub
The type of salt you choose for your homemade body scrub can significantly impact its therapeutic properties and overall experience. The world of natural salts offers a diverse range of options, each with unique mineral compositions and benefits. While you have many choices, it’s crucial to avoid regular table salt, which is highly processed, stripped of most of its natural minerals, and often contains anti-caking agents. For a truly beneficial scrub, always opt for natural, unrefined sea salts.
Another important consideration is the grain size of the salt. Finely ground salts are generally suitable for most body areas, providing gentle yet effective exfoliation. Coarser sea salts, while excellent for deep exfoliation, are best reserved for tougher skin areas like the knees, elbows, and feet, as they can be too intense for more sensitive parts of the body.
Dead Sea Salt
Hailing from the mineral-rich Dead Sea region, this salt is truly exceptional. Unlike traditional oceanic salts, Dead Sea salt boasts an incredibly high concentration of trace minerals, including magnesium, calcium, potassium, bromide, and sulfur. Magnesium, in particular, is renowned for its ability to soothe sore muscles, reduce inflammation, and calm irritated skin. Potassium helps balance moisture levels, while bromide offers natural antiseptic and anti-inflammatory properties. This unique mineral profile makes Dead Sea salt my top personal preference for a homemade body scrub, providing unparalleled therapeutic benefits that are readily absorbed through the skin, promoting profound relaxation and skin healing.
Himalayan Sea Salt
Believed to be one of the oldest and purest salts on the planet, Himalayan sea salt is a beautiful, rosy-pink mineral powerhouse, rich in up to 84 trace minerals. Its distinctive pink hue comes from the tiny amounts of iron oxide present within its crystals. Like Dead Sea salt, Himalayan salt is incredibly beneficial for whole-body detoxification. Its balanced mineral composition helps to restore the skin’s natural pH, draws out impurities, and remineralizes skin cells, promoting a healthy, vibrant glow. It’s an excellent choice for a rejuvenating and purifying scrub.
Epsom Salt
While commonly referred to as a salt, Epsom salt is actually a naturally occurring mineral compound of magnesium sulfate. It has been used for centuries for its profound muscle-soothing and stress-relieving properties, particularly in baths. In a body scrub, Epsom salt provides gentle exfoliation while delivering magnesium directly to the skin, which can help reduce muscle aches, ease tension, and diminish swelling. It’s particularly good for those seeking relief from tired muscles or for individuals with certain skin conditions due to its anti-inflammatory effects, and it’s also effective for those tougher areas requiring extra scrubbing, such as knees and elbows.
Black Sea Salt
Often found in regions with high volcanic activity, such as Hawaii, Iceland, and Cyprus, black lava sea salt is a fascinating and potent ingredient for a body scrub. Its striking black color is derived from trace amounts of activated charcoal, which naturally infuses the salt during the evaporation process. Activated charcoal is highly prized in skincare for its incredible ability to absorb toxins and impurities from the skin, deeply cleansing pores and providing a detoxifying effect. Beyond its purifying capabilities, black sea salt offers a unique visual appeal and a distinct, subtly earthy aroma that can add an exotic touch to your homemade scrub. It’s an invigorating choice for a truly deep cleanse.
Mastering the Basic Salt Scrub Recipe
The beauty of this DIY body scrub lies in its simplicity and versatility. While there are countless ways to customize it, the foundational recipe is incredibly straightforward. As long as you maintain the correct ratios of salt to oil, you’re guaranteed a perfect, effective scrub every time. Feel free to experiment with different essential oils and add-ins to create a scrub that perfectly suits your mood and skin needs.
- 1 cup of high-quality sea salt: Carefully select your preferred salt from the options listed above. My personal favorite for its rich mineral content is Dead Sea salt, but Himalayan, Epsom, or Black Sea salt all offer wonderful benefits. Remember to choose a finely ground variety unless you specifically intend it for very rough areas.
- 1/4 cup of nourishing carrier oil: This oil acts as a base, dissolving the salt and providing deep hydration and essential nutrients to your skin. I particularly love jojoba oil because it closely mimics the skin’s natural sebum, making it suitable for all skin types, including oily or acne-prone. Other excellent choices include antioxidant-rich olive oil, deeply moisturizing avocado oil, lightweight grapeseed oil (great for oily skin), and gentle sweet almond oil (ideal for sensitive skin). You can also use melted or fractionated coconut oil, though I find it can sometimes make the mixture a bit too thick, especially in cooler temperatures.
- 10-20 drops of your favorite essential oil: This is where you infuse your scrub with aromatherapy benefits and a personalized scent. The possibilities are endless! For a luxurious, spa-like experience that also supports respiratory health, I highly recommend eucalyptus oil. For an uplifting, brightening effect, consider lemon or other citrus essential oils like grapefruit (just be mindful of sun exposure after using citrus oils). For ultimate relaxation and skin-soothing properties, lavender essential oil is a classic choice. Other ideas include invigorating peppermint, purifying tea tree, or balancing geranium.
- 1 tbsp optional add-ins: Enhance your scrub with these thoughtful additions:
- Coffee grounds: For an extra boost of circulation and a potential anti-cellulite effect.
- Almond meal or finely ground oatmeal: Provides a gentler exfoliation and soothing properties, especially good for sensitive skin.
- Dried herbs: Chamomile and lavender buds add a beautiful visual appeal and subtle aromatic benefits.
- Vitamin E oil: A powerful antioxidant that nourishes the skin and can act as a natural preservative, extending the scrub’s shelf life.
- Citrus zest: Fresh lemon or orange zest can provide an additional burst of natural fragrance and brightening compounds (again, use caution with sun exposure).
Step-by-Step: How to Make Your DIY Body Scrub
Crafting your own salt scrub is an incredibly simple process that takes just minutes. Follow these straightforward steps to create your personalized, luxurious body treatment:
- Combine Salt and Carrier Oil: In a clean, medium-sized glass bowl, add your chosen sea salt and carrier oil. Using a spoon or spatula, stir them together thoroughly until the salt is evenly coated and the mixture forms a consistent, moist paste. Ensure there are no dry patches of salt.
- Infuse with Essential Oils and Optional Add-ins: Once the salt and oil are well combined, add your preferred essential oils (10-20 drops, depending on desired strength) and any optional add-ins you’ve selected. Stir everything again until the essential oils are fully incorporated and the scent is evenly distributed throughout the scrub.
- Store Properly: Transfer your freshly made salt scrub into a clean, airtight glass jar. Mason jars are ideal for this purpose, as they seal tightly and prevent moisture from entering. Store the jar in a cool, dry place away from direct sunlight. Proper storage will help maintain the scrub’s freshness and efficacy.
How to Effectively Use Your Homemade Salt Scrub
To truly maximize the benefits of your homemade salt scrub and recreate that luxurious spa experience at home, proper application is key. Follow these steps for an invigorating and nourishing treatment:
- Prepare Your Skin with Steam: Before applying your body scrub, step into your shower and turn on the warm water. Close the door or shower curtain to allow steam to build up. This warm, humid environment will help to open your pores, soften your skin, and relax your muscles, making the exfoliation process more effective and enjoyable. Alternatively, you can take a warm bath and let your body soak for a few minutes; however, some find it easier to maneuver and scrub in a shower environment.
- Application Technique: Once your skin is damp and warm, step away from the direct spray of water. Reach into your jar and scoop out a small amount of the salt scrub. Begin to gently yet firmly scrub a section of your body using circular motions. Work your way across your entire body, adding more scrub as needed. Pay special attention to areas that tend to be rougher, such as your elbows, knees, heels, and shins. The circular motion not only exfoliates but also stimulates blood flow and lymphatic drainage. While this salt scrub is generally too abrasive for the delicate skin on your face, if you choose to use it, apply it with extreme gentleness.
- Rinse Thoroughly: After you’ve massaged the scrub all over your body, step back under the warm water and allow it to rinse away completely. Ensure no salt granules or oily residue are left on your skin. You’ll immediately notice how incredibly soft and smooth your skin feels.
- Moisturize for Lasting Softness: Following exfoliation, your skin is primed to absorb moisture. I highly recommend moisturizing immediately after your scrub to lock in hydration and nutrients. A nourishing body oil, rich lotion, or body butter works wonderfully. Apply generously while your skin is still slightly damp to seal in the moisture.
- Consistency is Key: For the best and most consistent results, aim to use your salt scrub 2-3 times per week. Adjust the frequency based on your skin’s sensitivity and needs. Listen to your body and find a routine that works best for you.
A helpful note: Over time, the oil in your homemade scrub may naturally separate from the salt. This is perfectly normal! Simply give the mixture a quick stir with a clean spoon before each use to re-combine the ingredients and ensure an even consistency.
How Long Does a Homemade Salt Scrub Last?
One of the great advantages of making your own body care products is knowing exactly what goes into them. When properly stored, your homemade salt scrub can last for a surprisingly long time. You can safely store your body scrub recipe for up to 6 months if kept in a cool, dry, and dark place. The natural oils and salts have a good shelf life, especially when protected from heat and light.
However, it’s rare that a batch lasts that long, as each mason jar typically provides 2-3 uses, making it a regular and enjoyable part of your self-care routine. To ensure longevity and prevent bacterial contamination, always use a clean, dry spoon or spatula to scoop out the scrub, rather than dipping wet hands directly into the jar. Introducing water into the mixture can encourage microbial growth, reducing its shelf life.
If you plan on crafting these beautiful scrubs as thoughtful, personalized gifts, rest assured that you can make them well in advance. Store them in airtight containers in a cool pantry or cabinet until you’re ready to share them with friends and family. A small tag with usage instructions and storage tips will make your gift even more special.
Expand Your DIY Skincare Routine: More Body Care Recipes You’ll Love
If you enjoyed making and using this salt scrub, you’ll love exploring other natural and effective DIY body care recipes. Creating your own products is a rewarding way to ensure you’re using only the best ingredients for your skin. Here are a few more homemade recipes to inspire your natural beauty journey:
- How to Make Luxurious Bath Salts
- Simple Homemade Rosewater for Face and Body
- Effective DIY Natural Deodorant That Actually Works
- Craft Your Own Nourishing Homemade Bar Soap
- Revitalizing DIY Lip Scrub Recipe for Soft Lips
- Gentle Homemade Sugar Scrub Recipe for Sensitive Skin
Homemade Salt Scrub Recipe Card
Learn how to create a simple yet effective salt scrub recipe at home. This customizable DIY body scrub helps exfoliate, detoxify, and leave your skin feeling incredibly soft and smooth, offering a therapeutic spa experience in your own bathroom.
- Author: Davida Lederle
- Prep Time: 2 minutes
- Cook Time: 0 minutes
- Total Time: 2 minutes
- Yield: 2–3 uses
Ingredients
- 1 cup sea salt (refer to “Types of Salt to Use” section for options)
- 1/4 cup carrier oil (jojoba, olive, avocado, grapeseed, or sweet almond oil all work wonderfully)
- 10–20 drops of your preferred essential oil(s) for scent and therapeutic benefits
- Optional: 1 tbsp add-ins such as coffee grounds, almond meal, dried herbs, or Vitamin E oil
Instructions
- In a large bowl, combine the sea salt and carrier oil. Stir thoroughly until the ingredients are well mixed and the salt is evenly coated.
- Add your chosen essential oils (10-20 drops) and any optional add-ins. Stir again until all ingredients are fully incorporated and the desired scent is achieved.
- Transfer the finished salt scrub into a clean, airtight glass jar. Store it in a cool, dry place away from direct sunlight until you’re ready to use.
- When ready to use: In a steamy shower or bath, scoop out a desired amount of the scrub with a clean spoon and gently massage it onto clean, damp skin in circular motions. Focus on rough areas.
- Rinse your body completely under warm water, ensuring all salt and oil residue is washed away. Follow with your favorite body oil or moisturizer for best results.
- For optimally smooth and detoxified skin, use this homemade salt scrub 2-3 times a week consistently.