
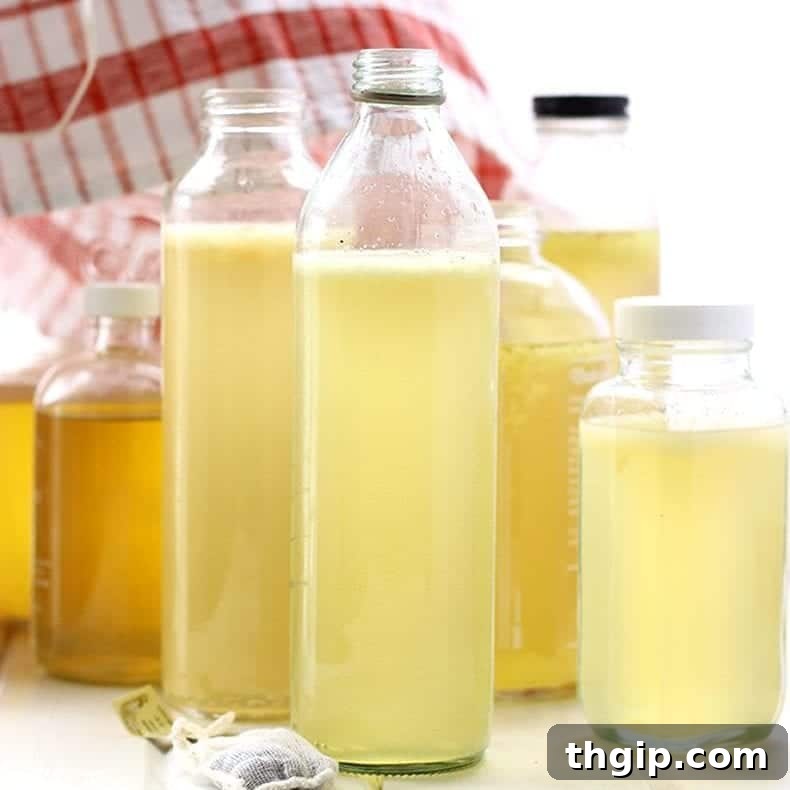
Have you ever considered the incredibly satisfying journey of crafting your own kombucha at home? Forget expensive store-bought bottles; with this comprehensive guide and easy-to-follow kombucha recipe, you’ll unlock the secrets to brewing delicious, budget-friendly, and gut-healthy kombucha right in your kitchen. Your wallet and digestive system will undoubtedly thank you for embarking on this rewarding adventure.
Table of Contents
- Why Incorporate Kombucha Into Your Diet?
- Essential Supplies and Ingredients for Homemade Kombucha
- Understanding the SCOBY: Your Kombucha’s Living Heart
- Mastering the Brew: Pro Tips for Your Kombucha Recipe
- Exciting Kombucha Flavor Combinations
- Proper Storage Instructions for Your Homemade Brew
- Detailed Kombucha Recipe
The idea of brewing your own kombucha can often feel daunting, conjuring images of complex scientific experiments. However, I assure you, it’s a remarkably straightforward and enjoyable process! My aim with this guide is to provide you with a fully comprehensive resource, demystifying the art of homebrewing. We’ll explore the myriad health benefits of drinking kombucha, walk you through the precise steps to make your own, share expert tips for mastering the fermentation process, and even inspire you with creative flavor combinations to personalize your brew. Here’s a detailed look at what we’ll cover:
This isn’t my inaugural foray into the world of kombucha brewing. Several years ago, I enthusiastically enrolled in a fermentation course, where I delighted in learning to craft kombucha, alongside other fermented delights like sauerkraut and kimchi. I even shared an early homemade kombucha recipe way back in 2013!
Over time, the convenience of buying kombucha from stores led me to drift away from homebrewing. But at an average cost of $3-$4 per bottle, the expenses quickly accumulate. While my gut certainly felt fantastic, my budget was less enthusiastic. Recognizing the financial and personal benefits, I decided it was time to rekindle my passion for brewing. This time, I’m excited to bring you two new, invigorating kombucha flavors: grapefruit and ginger, which have become my absolute favorites. I’ll guide you through making these, and empower you to create your own unique concoctions.
But before we dive into the brewing specifics, let’s take a moment to truly appreciate what makes kombucha such an exceptional beverage.
Why Incorporate Kombucha Into Your Diet?
For those who might have gotten a little lost at the mention of “SCOBY” (we’ll explain that below!), let’s start with a clear, concise definition of what kombucha is and why it deserves a place in your daily routine.
Kombucha is a subtly effervescent, fermented tea beverage. It’s produced by fermenting sweetened tea using a symbiotic culture of bacteria and yeast (SCOBY). This fermentation process imbues kombucha with a rich profile of beneficial probiotics, amino acids, and essential vitamins. These components work synergistically to support a balanced and thriving digestive system by populating your gut with a diverse array of healthy bacteria. The resulting taste is typically a delightful blend of sweet and tangy, often with a pleasant, natural fizz, which can be customized further with added flavors. Traditional kombucha is always made with caffeinated green, black, or oolong tea (though herbal teas can be added, they are rarely used exclusively), organic sugar, and a vibrant SCOBY. The sugar is not just for sweetness; it is a vital food source for the SCOBY, enabling it to perform the fermentation that yields all its impressive health-promoting byproducts.
In essence, kombucha is an extraordinary, natural source of probiotics, vital for nurturing a healthy gut microbiome. A robust and balanced gut contributes directly to a stronger immune system, which in turn fosters overall human health and well-being. Regular consumption of homemade kombucha can lead to improved digestion, increased energy levels, and a greater sense of vitality, making it much more than just a refreshing drink.
Essential Supplies and Ingredients for Homemade Kombucha
You might be pleasantly surprised to learn that brewing your own kombucha doesn’t require an extensive array of specialized equipment or hard-to-find ingredients. In fact, many of the items you need are likely already in your kitchen. Let’s outline the core components required, starting with the consumables and then moving to the necessary tools.
For this Homemade Kombucha Recipe, you will need the following key ingredients:
- **A Healthy SCOBY:** This is the living culture that transforms sweetened tea into kombucha. We’ll delve deeper into what a SCOBY is and how to acquire one in the next section.
- **Quality Tea Bags:** Opt for organic green, black, or oolong tea. These teas provide the necessary nutrients and caffeine for the SCOBY to thrive. Avoid flavored teas, as their oils can harm the SCOBY.
- **Organic Cane Sugar:** Crucial for the fermentation process. The SCOBY consumes this sugar, so don’t attempt to substitute it with artificial sweeteners.
- **Filtered Water:** Tap water often contains chlorine and other chemicals that can inhibit the SCOBY’s activity. Filtered water ensures a clean and healthy brewing environment.
- **1 Cup of Already Brewed Kombucha:** This is often referred to as “starter tea.” It lowers the pH of your new brew, creating an acidic environment that prevents undesirable mold growth and kickstarts the fermentation. It can be a plain, unflavored store-bought kombucha or a portion saved from a previous homemade batch.
Your Kombucha Brewing Supplies and Tools should include:
- **1 Large Glass Jar (1-gallon or more):** Glass is imperative for kombucha brewing because it’s non-reactive and easy to sterilize. Plastic can leach chemicals and is harder to keep truly clean. I personally recommend this type of jar, but any large, food-grade glass jar will work perfectly.
- **1 Clean Dish Towel or Coffee Filter:** This serves as a breathable cover for your brewing jar. It allows air circulation, which is essential for fermentation, while keeping out dust, fruit flies, and other contaminants.
- **1 Elastic Band or Piece of Strong String:** To securely fasten the dish towel or coffee filter over the mouth of your brewing jar, ensuring a tight seal against pests.
- **Empty Glass Mason Jars or Bottles with Airtight Lids:** These are essential for bottling your finished kombucha, especially if you plan on adding flavors for a second fermentation. Reusing old kombucha bottles or investing in swing-top bottles is a great option for achieving optimal carbonation. Make sure they are thoroughly cleaned and sterilized.
Understanding the SCOBY: Your Kombucha’s Living Heart
If you’ve ever delved into the world of kombucha brewing, you’ll know that the cornerstone of the entire fermentation process is the use of a **SCOBY**, an acronym for **Symbiotic Culture of Bacteria and Yeasts**. Far from being just an odd-looking disc, the SCOBY is a complex, living ecosystem responsible for transforming sweetened tea into the probiotic-rich beverage we cherish. Its primary function is to consume the sugar and caffeine present in the tea. Through this metabolic process, it produces a wealth of beneficial compounds, including various organic acids, vitamins (like B vitamins), and, most importantly, the gut-friendly probiotics that contribute to kombucha’s impressive health benefits.
Despite its remarkable health properties, the SCOBY’s appearance can be a bit… unconventional. It often resembles a translucent, rubbery disc, sometimes compared to a “plastic mushroom” or, as I’ve playfully noted, a “deflated silicone boob.” Its texture can vary, from smooth and gelatinous to slightly fibrous, and its color might range from creamy white to brownish, depending on the tea used in its cultivation. Rest assured, these variations are typically normal indicators of a healthy, active culture.
A common question I receive is, “Can you eat the SCOBY?” While technically edible, consuming the SCOBY itself isn’t generally recommended for taste or texture reasons. It’s primarily the liquid kombucha that provides the desired benefits. However, don’t discard your spent SCOBY! It’s an excellent addition to your compost pile or garden, enriching the soil with beneficial microbes. If you’re finished with kombucha making, or simply need to prune an overgrown SCOBY, feel free to give it back to nature.
Another crucial query is, “Where can I get a SCOBY?” There are several reliable avenues for acquiring this essential culture:
- **Ask Around:** The most economical and community-friendly method is to ask friends or local brewing enthusiasts. Anyone actively brewing kombucha will likely have a “mother” SCOBY that continuously grows layers, and they can easily share a piece with you. This gifted piece will become your very own SCOBY, continuing to grow and thrive with each successive brew.
- **Purchase Online:** If local options aren’t available, you can readily order a healthy, dehydrated, or live SCOBY online from reputable suppliers. You can find excellent options such as here.
- **Grow Your Own:** For the truly adventurous, it’s possible to cultivate your own SCOBY from a bottle of unflavored, raw, store-bought kombucha. This method takes a bit longer but is incredibly rewarding. You can follow detailed instructions like this tutorial to guide you.
Ensuring you start with a healthy, vibrant SCOBY is the first critical step towards a successful and delicious homemade kombucha brew.
Mastering the Brew: Pro Tips for Your Kombucha Recipe
While the basic steps for brewing kombucha are straightforward, a few key insights and practices can elevate your homemade brew from good to truly exceptional. These “pro tips” address common concerns and provide guidance for consistent success:
1. **The Indispensable Role of Sugar:** This is perhaps the most critical, and sometimes misunderstood, aspect of kombucha brewing. Let’s be clear: **YOU MUST USE SUGAR.** There’s no getting around it, and it’s not simply for taste. The sugar serves as the primary food source for your SCOBY. Without it, the bacteria and yeast cannot perform the vital fermentation process that produces all the fantastic health benefits, acids, and flavors we desire. Please, under no circumstances, attempt to substitute it with other sweeteners like honey (which has antibacterial properties that can harm the SCOBY), maple syrup, or, gasp, artificial sugar-free sweeteners. If brewed correctly, the SCOBY will consume the vast majority of the sugar, leaving you with a tangy, fizzy, probiotic-rich drink, not a sugary one. The residual sugar content in a finished, well-fermented kombucha is minimal.
2. **Uphold Impeccable Cleanliness:** When working with fermentation, hygiene is paramount. Think of yourself as a meticulous scientist. Ensure your brewing vessel (the large glass jar), all utensils, and your hands are spotlessly clean before you begin. Sterilize your jar with hot, soapy water, followed by a thorough rinse, or even a diluted vinegar solution. Any lingering “bad” bacteria or molds can contaminate your brew, leading to spoilage and potentially an unsafe product. While boiling water is often used for tea, ensure your equipment is dry and cool before introducing the SCOBY.
3. **Embrace Patience and a Positive Mindset (“Just Relax”):** My fermentation teacher (yes, that’s a real profession!) always imparted the wisdom to “just relax” when brewing. It might sound mystical, but there’s truth to it. Over-worrying, constantly checking, or excessively handling your brew can disrupt the delicate ecosystem. Kombucha brewing is an organic process, and a little faith goes a long way. Provide the right environment, and the SCOBY will do its work. Trust the process, maintain good “juju,” and you will be rewarded with a delicious, vibrant brew.
4. **Kombucha Brewing as a Continuous Process:** A homemade kombucha recipe is typically designed for continuous brewing. This means that as soon as you complete your first batch and bottle your finished kombucha, you immediately set up your next batch using a portion of the previous brew (the starter tea) and often the original SCOBY, which will have grown new layers. If, for any reason, you decide to pause your brewing, you can keep your SCOBY alive and dormant. Store it in its vessel with enough reserved kombucha (starter tea) and a small amount of sugar to keep it fully submerged and coated. This “SCOBY hotel” should be kept in the fridge, where the cold temperature slows down fermentation. You’ll need to “feed” it a tablespoon or two of sugar every few weeks or once a month to sustain it. Neglecting to feed your SCOBY will lead to its demise, and you’ll need to acquire a new one to resume brewing.
By adhering to these fundamental principles, you’ll not only achieve consistent, high-quality kombucha but also develop a deeper appreciation for this ancient, living beverage.
Exciting Kombucha Flavor Combinations
Once your initial fermentation (known as the First Fermentation or F1) is complete, the real fun begins: introducing flavors through a process called Second Fermentation (F2). This is where you transform your plain kombucha into a sparkling, custom-flavored delight. Here’s how to do it and some fantastic ideas to get you started:
To embark on the F2 process, simply add your chosen flavorings to a clean, airtight bottle. Then, carefully pour your freshly brewed kombucha over the flavorings, ensuring you leave at least one inch of headspace between the kombucha and the lid. This space is crucial for carbonation to build safely. Secure the lid tightly and place the bottles in a cool, dark place for an additional 1-3 days. The exact duration depends on the ambient temperature and your desired level of fizziness. Once fermented to your liking, you’ll want to strain the kombucha to remove any fruit pulp or ginger pieces, then store your beautifully flavored bottles in the fridge. Chilling stops the fermentation and preserves the carbonation.
- Grapefruit: For a zesty and slightly bitter tang, add ¼ cup of freshly squeezed grapefruit juice per 16-ounce bottle. The natural sugars in the juice will fuel excellent carbonation.
- Ginger: A classic for a reason, ginger adds a spicy kick and aids digestion. Use 1 teaspoon of freshly grated ginger per 16-ounce bottle for a vibrant flavor.
- Lemon Ginger: Combine the brightness of lemon with the warmth of ginger. Add 1 teaspoon of freshly grated ginger and 2 tablespoons of freshly squeezed lemon juice per 16-ounce bottle.
- Peach Mint: A refreshing and aromatic blend. Muddle 1 ripe peach (chopped) and two sprigs of fresh mint per bottle. The sweetness of peach pairs perfectly with cooling mint.
- Blueberry: For a burst of fruity goodness, add ½ cup of mashed blueberries per bottle. Blueberries provide a beautiful color and a sweet-tart flavor profile.
- Mint Lime: A tropical, invigorating choice. Combine two sprigs of fresh mint and the juice of 1-2 limes (depending on size and tartness preference) per bottle.
- Mango: Indulge in the sweetness of the tropics with 1 ripe mango, finely chopped or pureed, per bottle. Mango creates a wonderfully thick and fruity kombucha.
- Pineapple Basil: An unexpectedly delightful combination. Add ½ cup of chopped pineapple with ¼ cup of finely chopped fresh basil leaves per bottle for a sweet, herbaceous, and complex flavor.
- Raspberry, Lemon, Ginger: A powerhouse trio of flavor and health. Combine ½ cup of fresh or frozen raspberries (mashed), the juice of 1 lemon, and 1 inch of freshly grated ginger per bottle.
Remember, the goal is to experiment and find what you love! Adjust quantities to your taste, and always remember to strain your flavored kombucha before storing it in the fridge or serving, unless you prefer pulp in your drink.
Proper Storage Instructions for Your Homemade Brew
Once your kombucha has completed its first fermentation (F1) and any subsequent second fermentation (F2) for flavoring and carbonation, proper storage is key to maintaining its quality, flavor, and fizz. With careful handling and good hygiene, your homemade kombucha can last for a considerable period.
After bottling, especially for flavored kombucha, it’s crucial to refrigerate your bottles promptly. The cold temperature in the refrigerator significantly slows down the fermentation process, preventing over-carbonation (which can lead to explosive bottles) and preserving the delicate balance of flavors you’ve achieved. Provided you’ve thoroughly sterilized your bottles prior to filling, your homemade kombucha will comfortably last in the fridge for up to 3 months. Always ensure bottles are tightly sealed to retain carbonation and prevent spoilage.
For your SCOBY, if you’re continuously brewing, you’ll simply reserve it along with some starter tea for your next batch. However, if you need a break from brewing, your SCOBY can be stored in a “SCOBY hotel” in the refrigerator. Place your SCOBY (or multiple SCOBYs, as they multiply) in a clean glass jar with enough brewed kombucha (starter tea) to cover them completely, and add a small amount of sugar (about a tablespoon per cup of liquid). This allows the SCOBY to remain viable in a dormant state for several weeks, or even a couple of months, before you’re ready to start another batch. Remember to feed your SCOBY hotel with a small amount of fresh sugar every few weeks to keep it nourished and healthy.
Proper storage ensures you can enjoy your delicious and healthful homemade kombucha whenever the craving strikes, maximizing the effort you put into brewing.
Kombucha Recipe

No reviews
Brewing your own kombucha is a deeply satisfying and surprisingly simple process! This comprehensive tutorial will guide you through every step of how to make kombucha from scratch and empower you to customize it with an array of delicious flavors.
- Author: Davida Lederle
- Prep Time: 1 hour
- Total Time: 2 weeks
- Yield: 24 cups 1x
- Category: Drinks
- Method: Ferment
- Diet: Vegan
Ingredients
- 1 SCOBY*
- 24 cups of filtered water
- 1 1/4 cups organic cane sugar
- 6 organic and natural tea bags (green, black or oolong work great – I used green)
- 1 cup already brewed kombucha (starter tea, can be storebought or homemade)
Supplies:
- 1 large GLASS jar (only use glass – I used this one but any large mason jar will work)
- 1 dish towel or coffee filter
- 1 elastic band or piece of string
- Empty glass bottles (amount will depend on size of bottles, swing-top bottles are ideal for carbonation)
Instructions
- Thoroughly clean and sterilize your large glass container to eliminate any possibility of residual bacteria or contaminants.
- In a large pot, bring 24 cups of filtered water to a rolling boil. Once boiling, remove the pot from the heat and immediately add the 6 tea bags.
- Allow the tea to steep in the hot water until the mixture has completely cooled down to room temperature. This is crucial as hot temperatures can harm your SCOBY.
- Remove the tea bags from the cooled tea. Carefully pour the steeped tea into your sterilized glass jar. Then, gently add the SCOBY, the 1 cup of already brewed kombucha (starter tea), and the 1 1/4 cups of organic cane sugar to the jar. Stir gently until the sugar is fully dissolved.
- Cover the mouth of the jar with a clean dish towel or coffee filter. Secure it firmly in place with an elastic band or a piece of string. This allows for essential airflow while protecting your brew from pests and airborne contaminants.
- Store your brewing jar in a cool, dark place away from direct sunlight for approximately 7-14 days. During this First Fermentation (F1) phase, avoid disturbing the jar. A kitchen cupboard or pantry shelf is often an ideal location.
- After 7-14 days, begin tasting your kombucha. It should have a pleasant tangy, slightly sweet flavor. Once it reaches your preferred taste, carefully remove the SCOBY (reserving it for your next batch) and divide the kombucha liquid among your clean bottling jars or bottles, leaving about 1 inch of headspace in each.
- Your unflavored kombucha is now ready to drink! You can cap the bottles and store them in the fridge for several months, where the cold temperature will significantly slow down further fermentation.
- If you desire to flavor your kombucha and achieve carbonation, you can proceed with a Second Fermentation (F2). Here are two popular options:
Grapefruit Flavor (Second Fermentation):
- To a medium-sized, airtight glass bottle, add 1/4 cup of freshly squeezed grapefruit juice.
- Carefully top with your unflavored kombucha, leaving 1 inch of space between the liquid and the lid. Secure the lid tightly.
- Let the bottle sit in a cool, dark place for 1-3 days to build carbonation. “Burp” the bottle daily (briefly open and re-seal) to release excess pressure. Once carbonated to your liking, store in the fridge until ready to drink.
Ginger Flavor (Second Fermentation):
- To a medium-sized, airtight glass bottle, add 1 teaspoon of freshly grated ginger.
- Top with your unflavored kombucha, again leaving 1 inch of headspace. Secure the lid tightly.
- Allow to ferment in a cool, dark place for 1-3 days, burping daily. Refrigerate once desired carbonation is achieved.
*In order to acquire a SCOBY, you have several convenient options: you can ask a friend or local brewer who might have extra layers, order a healthy culture online from a reputable vendor, or even cultivate your own from a bottle of raw kombucha following a comprehensive guide like this tutorial.