
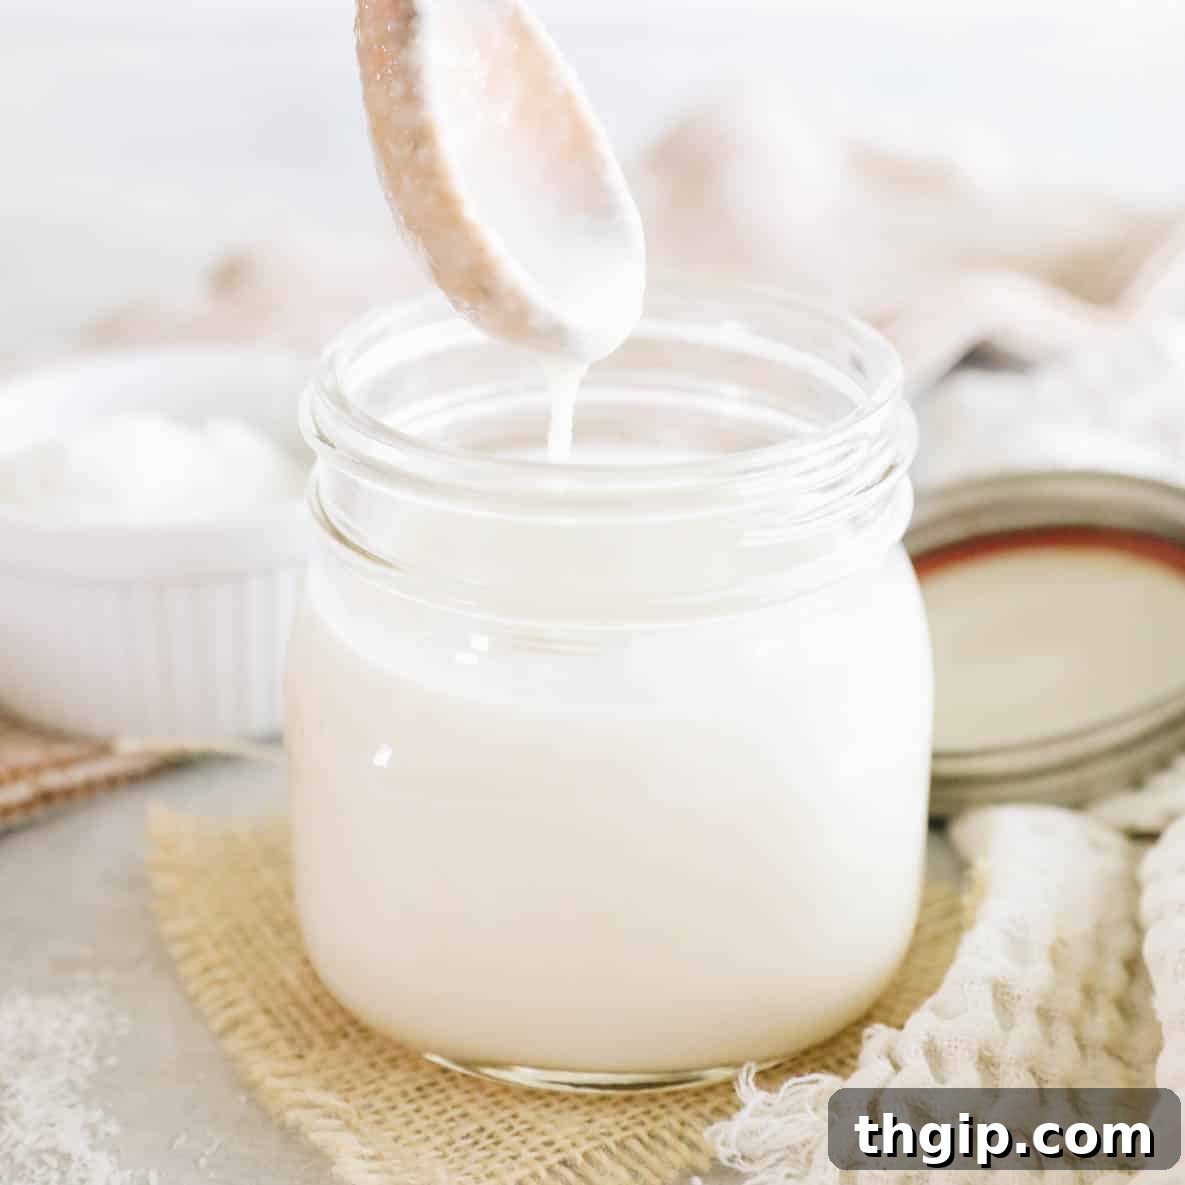
Craving a luscious, creamy, and naturally sweet spread? Look no further! This ultimate guide reveals how to make delicious, drippy homemade coconut butter with just one simple ingredient and about ten minutes of your time. Forget expensive store-bought versions filled with added sweeteners and questionable ingredients. Our homemade coconut butter recipe is pure, wholesome, incredibly versatile, and exceptionally cost-effective. Get ready to transform humble shredded coconut into a pantry staple you’ll wonder how you ever lived without!
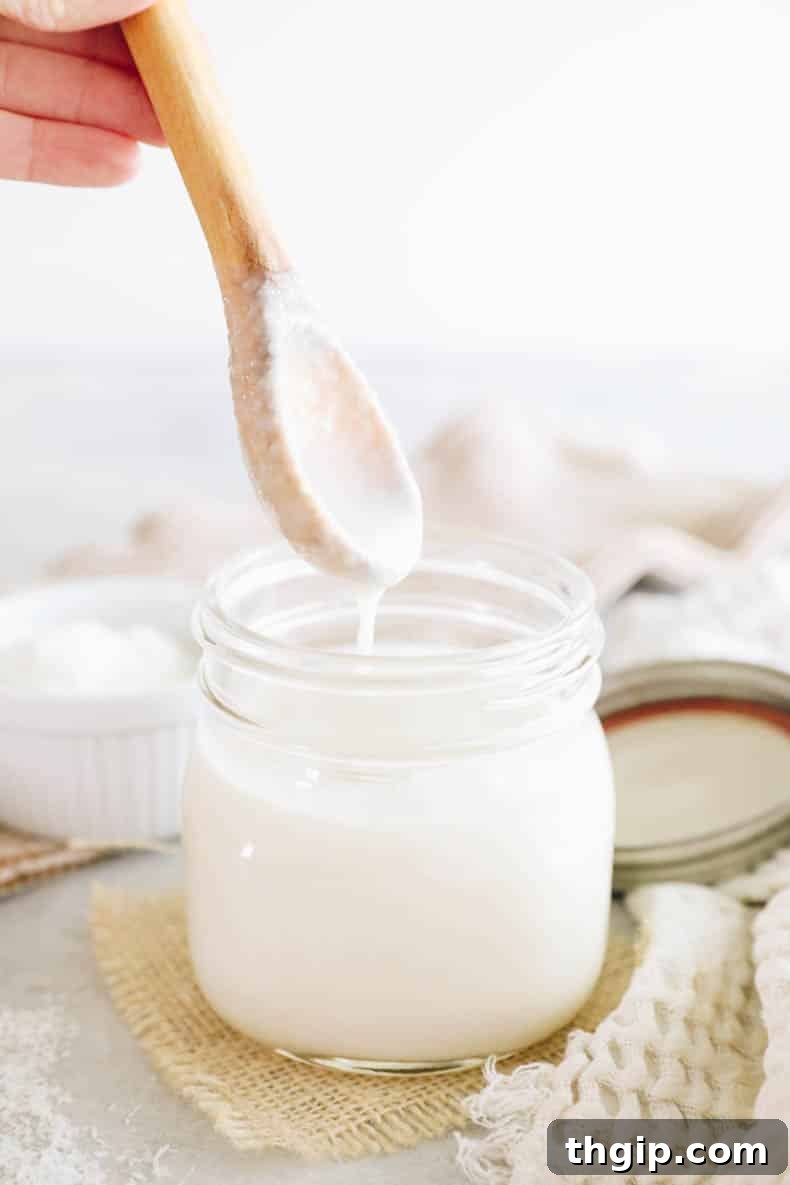
Table of Contents
- Unlock the Secret to Homemade Coconut Butter!
- Why Make Your Own Coconut Butter? The Economic & Health Benefits
- The Simple Ingredient You’ll Need
- Essential Equipment: Food Processor vs. Blender
- Step-by-Step Guide: Making Coconut Butter
- Tips for Perfect Coconut Butter Every Time
- Frequently Asked Questions About Coconut Butter
- Storage Instructions for Fresh Coconut Butter
- Creative Ways to Enjoy Your Homemade Coconut Butter
- Easy Homemade Coconut Butter Recipe Card
Unlock the Secret to Homemade Coconut Butter!
Over the years, our kitchen has become a hub for crafting healthy alternatives to store-bought staples. From homemade nut milks to DIY spice blends, empowering you to create wholesome ingredients at home has always been our mission. And when it comes to healthy spreads, coconut butter stands out as a true gem. Its rich, tropical flavor and silky-smooth texture make it an irresistible addition to countless dishes. However, there’s one significant drawback to commercially produced coconut butter: its often exorbitant price tag. This comprehensive guide is dedicated to showing you how to bypass those high costs and whip up your own batch of pure, unadulterated coconut butter right in your own kitchen.
Why Make Your Own Coconut Butter? The Economic & Health Benefits
The primary motivation for many home cooks to start making their own coconut butter is undoubtedly the financial savings. A single jar of premium store-bought coconut butter can set you back almost $12 or more, depending on the brand and location. Compare this to the cost of two bags of quality unsweetened shredded coconut – typically around $7 – which is usually enough to produce an equivalent amount of this creamy delight. That’s a substantial saving, allowing you to enjoy this versatile ingredient more frequently without breaking the bank or compromising on quality.
Beyond the impressive cost savings, crafting your own coconut butter offers several compelling health advantages, giving you complete control over what goes into your body:
- Purity and Control: When you make it yourself, you control every single ingredient. This recipe calls for only one: pure coconut. This means no hidden sugars, no unhealthy hydrogenated oils, no artificial flavors, and no preservatives often found in many processed foods. You get clean, unadulterated goodness.
- Naturally Gluten-Free: Made purely from the meat of the coconut, this butter is inherently gluten-free, making it a perfect and safe option for those with gluten sensitivities, celiac disease, or who are following a gluten-free lifestyle.
- Vegan-Friendly: As a 100% plant-based product, homemade coconut butter is a fantastic vegan spread and ingredient. It offers a rich, creamy, and satisfying dairy-free alternative that can be used in a myriad of plant-based recipes.
- Rich in Beneficial Nutrients: Coconuts are a nutritional powerhouse. They are a good source of essential vitamins and minerals, including manganese, copper, selenium, and iron, which play vital roles in various bodily functions. They also contain medium-chain triglycerides (MCTs), a type of easily digestible fatty acid that can provide a quick source of energy and support brain health. Furthermore, coconut butter is a good source of dietary fiber, promoting healthy digestion and contributing to a feeling of fullness.
- Unbeatable Freshness: Enjoy your coconut butter at its peak freshness, knowing exactly when and how it was made, ensuring the highest quality and flavor.
The Simple Ingredient You’ll Need
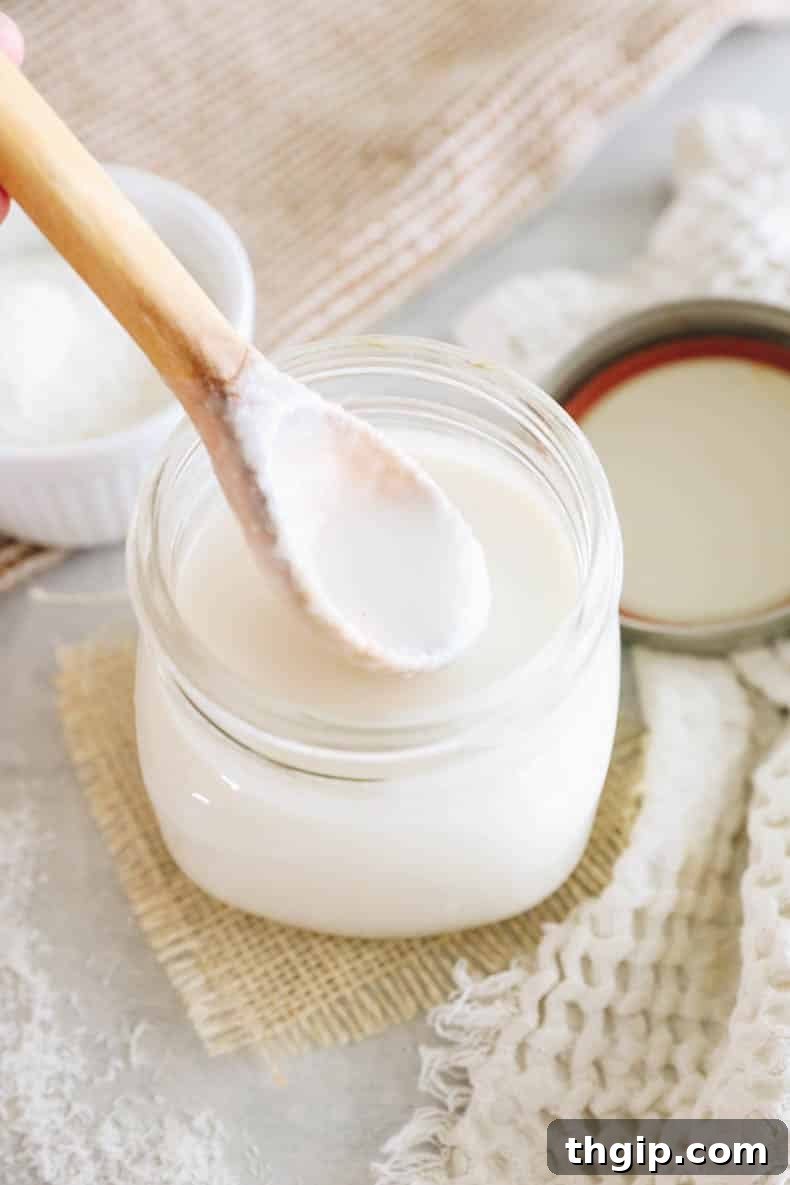
This recipe truly embodies simplicity, requiring just one core ingredient to achieve its magical transformation: unsweetened shredded coconut. The importance of “unsweetened” cannot be overstated. Any form of added sugar will interfere with the coconut’s ability to break down and release its natural oils, leading to a clumpy, seized texture rather than a smooth, drippy butter. Always double-check your packaging to ensure your coconut product has no added sweeteners, sulfites, or other undesirable ingredients.
You have a few excellent options for the type of unsweetened coconut, and all will work beautifully, though they may slightly impact the total processing time:
- Unsweetened Shredded Coconut: This is the most common and often recommended type for making coconut butter. Its finely shredded texture helps it break down relatively quickly and consistently in a food processor, yielding a smooth result.
- Unsweetened Flaked Coconut: Consisting of larger, broader flakes of coconut meat, this variety will also work perfectly. Be aware that it might require a few extra minutes in the food processor compared to shredded coconut to achieve that desired silky smoothness due to its larger initial particle size.
- Unsweetened Desiccated Coconut: This type is very finely ground and thoroughly dried coconut meat. Because it’s already in such small particles, desiccated coconut often processes the fastest, making it an excellent choice for expediting your coconut butter creation.
Regardless of the form you choose, the paramount factor is ensuring that your coconut contains absolutely no sugar, no added oils, or any other additional ingredients. Pure, unadulterated coconut is the sole requirement for this wondrous culinary alchemy.
Essential Equipment: Food Processor vs. Blender
To successfully transform dry coconut into luscious, creamy coconut butter, you’ll need one essential piece of kitchen equipment: a powerful food processor. While the idea of using a high-speed blender might cross your mind, a food processor is generally the superior choice for several compelling reasons:
- Optimal Consistency: Food processors are meticulously designed with a wider base and a broad S-blade, which are ideal for handling thicker, drier mixtures like coconut. This design allows for more effective and even processing, ultimately creating a smoother, more consistent butter texture that’s hard to achieve with most blenders.
- Enhanced Efficiency: In the majority of cases, a robust food processor will achieve the desired drippy, smooth consistency much faster than even a high-powered blender. This means less processing time for you and a quicker path to enjoying your homemade spread.
- Reduced Overheating Risk: Processing dry, fibrous ingredients like coconut for extended periods generates significant heat. Standard blenders, particularly those not specifically engineered for nut or seed butters, can be prone to overheating, which can lead to motor strain or damage. Food processors, with their broader bowls and typically more robust motors for sustained grinding, are generally better equipped to handle the heat generated during this intensive process.
- Ease of Scraping: The wide, shallow bowl of a food processor makes it significantly easier to stop, scrape down the sides, and push the coconut back towards the blades. This crucial step is more cumbersome and less efficient in the narrower, taller pitcher of a blender.
I personally use and highly recommend a Cuisinart 14-cup food processor for its exceptional power, generous capacity, and reliability, which makes quick and effortless work of this recipe. If a blender is your only available option, ensure it is a high-powered, professional-grade model like a Vitamix. You will likely need to employ the tamper frequently to push the coconut down into the blades and should anticipate longer processing times and more stops to manage overheating.
Step-by-Step Guide: Making Coconut Butter
Creating your own coconut butter at home is an incredibly rewarding process, but it requires a bit of patience and attention. The transformation from dry, unassuming flakes to a rich, creamy butter is fascinating to observe. Follow these steps for perfect results:
- Prepare Your Coconut: Begin by adding your unsweetened shredded, flaked, or desiccated coconut directly into the bowl of your powerful food processor. For optimal performance and to help the blades work efficiently, ensure you’re using at least 3-4 cups of coconut. Confirm that your food processor bowl and blades are thoroughly clean and completely dry before you start.
- Initial Processing – The Transformation Begins: Secure the lid of your food processor and begin processing continuously. The coconut will undergo several distinct stages of transformation. It’s crucial to understand these stages so you don’t get discouraged and stop too early:
- Stage 1: Fluffy Meal (0-2 minutes): Initially, the coconut will simply break down into a finer, fluffy meal. It will resemble coconut flour at this point, dry and granular.
- Stage 2: Clumpy & Moist (2-5 minutes): As processing continues, the natural oils within the coconut meat will start to be released due to the friction and pressure. The coconut meal will begin to clump together, sticking to the sides of the bowl and sometimes accumulating on the blades.
- Stage 3: Thick Paste (5-8 minutes): The clumps will gradually consolidate into a thicker, denser paste. At this stage, it might look quite thick and stubborn, giving the impression that it won’t ever become smooth. This is where patience is key – keep going!
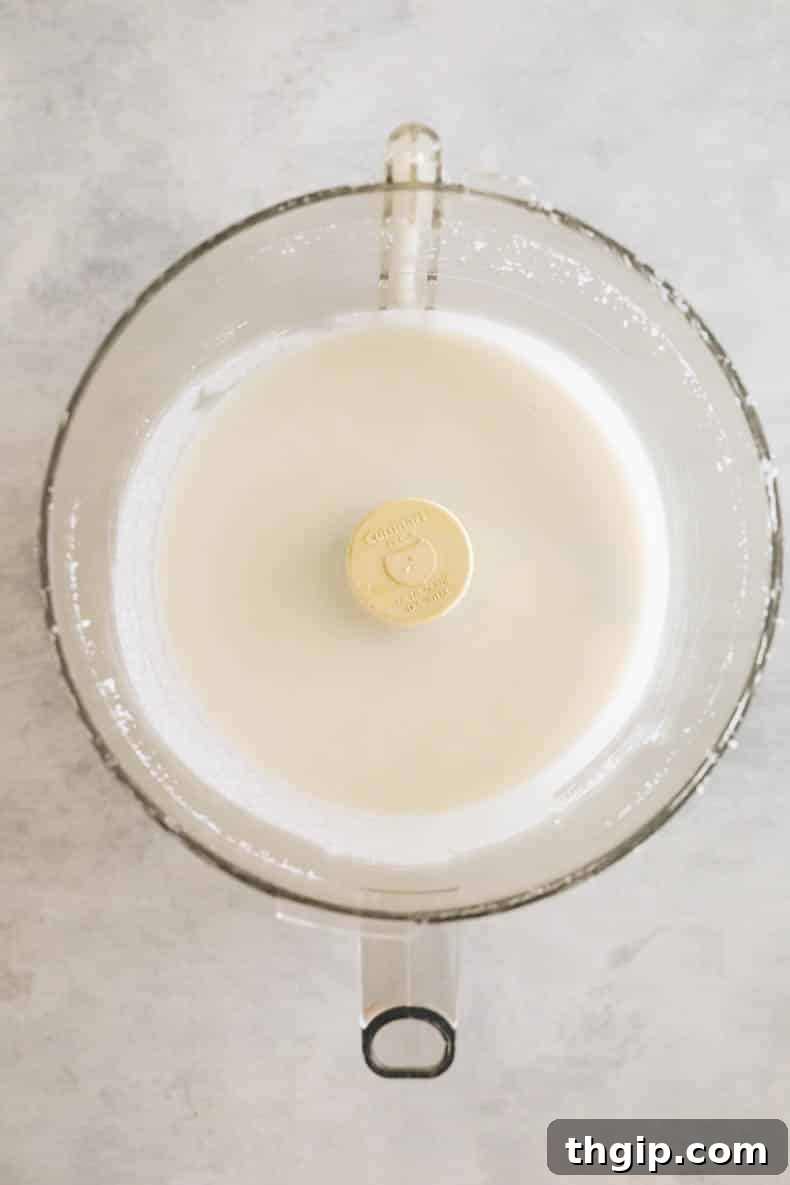
- Stage 4: Smooth & Drippy Butter (8-15+ minutes): Finally, with continued processing, the paste will smooth out significantly. It will become warm, glossy, and beautifully drippy, flowing freely like a thick liquid. This glorious consistency is your homemade coconut butter!
- Scrape Down the Bowl Regularly: Throughout the entire processing time, you’ll need to stop the food processor every 1-2 minutes. Use a spatula to scrape down the sides of the bowl, loosen any coconut clinging to the blades, and push all the coconut back down towards the bottom where the blades can reach it effectively. This is a critical step; it ensures all the coconut is evenly processed, prevents dry pockets, and helps maintain a consistent texture.
- Monitor Consistency and Adjust: The total processing time can vary significantly, ranging from 5 to 15 minutes, depending on the power of your food processor, the specific type and size of coconut you’re using, and the quantity. Keep a close eye on the consistency; you are aiming for that smooth, flowing, slightly warm, and utterly irresistible texture. Once it reaches this point, you’re done!
Tips for Perfect Coconut Butter Every Time
Making homemade coconut butter is simple, but a few expert tips can ensure your success and help you achieve that perfectly creamy, drippy consistency every time:
- Use a Sufficient Quantity of Coconut: While it might be tempting to make a tiny batch, using enough coconut (ideally at least 3-4 cups for a standard food processor) is crucial. A larger volume ensures the blades have ample material to work with, creating enough friction and momentum to release the oils efficiently and speed up the processing time. Too little coconut can cause the blades to spin idly without properly grinding the flakes.
- Patience and Persistence are Key: The transformation from dry flakes to creamy butter takes time, and there will be stages where it looks like a stubborn, clumpy paste. Do not get discouraged and stop too early! The natural oils need time to fully release. Just keep scraping down the sides and processing; it will eventually turn smooth.
- Prevent Food Processor Overheating: Continuous processing can generate a lot of heat. If your food processor starts to feel very warm to the touch, makes struggling noises, or emits a burning smell, turn it off immediately. Let it rest for 5-10 minutes to cool down before resuming. This prevents damage to your machine’s motor.
- Strictly Use Unsweetened Coconut: This tip is worth repeating as it’s the most common pitfall. Sweetened coconut contains added sugars that prevent the coconut meat from releasing its natural oils and achieving a smooth, buttery consistency. Always read the labels carefully to ensure your coconut is 100% unsweetened.
- Consider Warming Your Coconut (Optional but Recommended): If you live in a cooler environment or want to expedite the process, you can gently warm your unsweetened shredded coconut before processing. Spread it on a dry baking sheet and place it in a very low oven (around 200°F / 95°C) for 5-10 minutes, or gently toast it in a dry pan over low heat for a few minutes. This helps to soften the fats and kickstart the oil release. Be extremely careful not to burn it; you’re only aiming for warmth, not extensive toasting unless you desire a toasted flavor.
- Add Flavorings After Processing: If you plan to incorporate additional flavorings, such as spices (like cinnamon or ginger) or extracts (like vanilla), it’s best to do so *after* the coconut butter has reached its perfectly smooth and drippy consistency. Adding them too early can sometimes interfere with the initial breakdown of the coconut flakes. Blend for an additional 30 seconds to a minute after adding flavorings to ensure they are fully incorporated.
Frequently Asked Questions About Coconut Butter
When stored properly in a clean, tightly sealed, airtight container or glass jar at cool room temperature (ideally between 68-75°F or 20-24°C), your freshly made coconut butter can last remarkably long, typically for up to 6 months. It’s crucial to keep it away from direct sunlight, extreme heat, or excessive humidity, as these conditions can accelerate spoilage or negatively affect its texture. While it can be stored for an even longer duration in the refrigerator, be aware that chilling will cause it to solidify into a very firm, almost rock-hard block. This makes it less convenient for immediate use as a drippy spread. For tips on how to easily re-melt hardened coconut butter, refer to our comprehensive storage instructions below.
This is a common concern for first-time makers, but it’s usually easily remedied! First and foremost, rigorously double-check that you used only unsweetened coconut. If your coconut product contained any form of added sugar (even a small amount), it will prevent the natural oils from fully releasing and will result in a grainy, clumpy, or paste-like texture that will never become truly drippy. If you’ve confirmed that your coconut was indeed unsweetened, the most probable cause is simply insufficient processing time. You must exercise patience and allow the food processor to run for a sustained period. Even if it appears to be a thick, unmoving paste or seems to have stalled, continue to diligently scrape down the sides of the bowl and process for several more minutes. High-quality unsweetened coconut, given enough time and friction, will invariably yield creamy, perfectly drippy coconut butter. Sometimes, slightly warming the coconut flakes beforehand can also help initiate the oil release and speed up the process.
While a high-powered blender can *technically* be used as an alternative, it’s generally not the optimal choice for making coconut butter, and a food processor is strongly recommended. Food processors are specifically engineered with wider bowls and robust S-blades that are far more efficient at processing thicker, drier, and more fibrous ingredients like coconut flakes into a smooth butter. If you opt for a blender, especially a standard kitchen blender, you will likely find that it takes significantly longer for the coconut flakes to break down and completely release their oils. You will also need to stop the blender much more frequently to push the mixture down with a tamper or spatula, and your blender may be more prone to overheating due to the sustained effort required. If a blender is your only available appliance, ensure it is a very powerful, high-performance model (such as a Vitamix or Blendtec) to maximize your chances of success.
Absolutely! This homemade coconut butter recipe truly epitomizes healthy eating, as it contains only one pure, unadulterated ingredient: whole coconuts. Coconuts are highly regarded for being an excellent natural source of medium-chain triglycerides (MCTs), a unique type of saturated fat that the body can readily convert into energy, making it a favorite among those seeking quick, sustained energy. While MCTs offer various health benefits, it’s always wise to consume coconut butter in moderation due to its inherent caloric density. Beyond its healthy fat profile, coconut butter is also an exceptional source of dietary fiber, which is crucial for promoting healthy digestion and contributing to a feeling of satiety. Furthermore, it provides essential micronutrients, including manganese, copper, and iron, which play vital roles in overall bodily function. It’s a fantastic whole-food ingredient that aligns seamlessly with many healthy eating plans, including vegan, paleo, and keto diets (source).
Unfortunately, no, you emphatically cannot make coconut butter from coconut oil. This is a very common point of confusion, but coconut oil and coconut butter are fundamentally different products. Coconut oil is the pure, extracted fat from the coconut meat, devoid of any fiber or other solids. In contrast, coconut butter is the entire coconut meat – including all its natural oils, fiber, and protein – ground into a smooth, creamy paste. Attempting to process coconut oil in a food processor will not yield coconut butter; it will simply be melted coconut oil. They are distinct ingredients with different textures, culinary applications, and nutritional compositions, so it’s important not to confuse the two.
Yes, absolutely! Toasting your unsweetened coconut flakes beforehand is an excellent way to impart a wonderful, deeper, and distinctly nuttier flavor to your homemade coconut butter. This simple step adds an extra layer of complexity and richness that many find irresistible. To do this, spread your unsweetened coconut flakes in a single, even layer on a baking sheet. Place them in a preheated oven at roughly 350°F (175°C) for approximately 5 to 7 minutes, or until they achieve a beautiful light golden brown color and release a fragrant, toasty aroma. It is crucial to keep a very close eye on them, as coconut can burn quickly and easily. Once toasted, allow the flakes to cool slightly before transferring them to your food processor and proceeding with the butter-making recipe as directed. This small extra step can significantly enhance the final taste of your homemade spread.
Indeed! Once your homemade coconut butter has achieved its perfectly smooth and drippy consistency, you can unleash your creativity and experiment with various flavorings. It’s generally best to stir these additions in *after* the main processing is complete, as this ensures the coconut breaks down properly without any interference from other ingredients. Wonderful and popular additions include:
- Warm Spices: A generous pinch of ground cinnamon, ginger, cardamom, nutmeg, or a fragrant blend of pumpkin pie spice can add comforting warmth and aromatic depth.
- Vanilla Extract: A few drops of pure vanilla extract or the scraped seeds from half a vanilla bean will elevate the natural sweetness and add a sophisticated aroma.
- Natural Sweeteners (Optional): While this recipe champions the natural purity of unsweetened coconut butter, if you prefer a hint of sweetness, a small amount of maple syrup, agave nectar, date syrup, or a few drops of liquid stevia can be blended in. Adjust to your personal taste.
- Chocolate Infusion: For an utterly decadent treat, you can stir in some melted dark chocolate or a tablespoon or two of unsweetened cocoa powder to create a rich, homemade chocolate coconut butter spread.
- Citrus Zest: A touch of finely grated orange or lemon zest can add a bright, fresh note.
Always start with a small quantity of any flavoring and gradually add more, tasting as you go, until you achieve your desired flavor profile.
Adding a tiny pinch of fine sea salt (approximately 1/4 teaspoon per 4 cups of coconut) can significantly enhance the natural flavors of the coconut and provide a beautiful balance, much like how salt is used to amplify the taste of many other nut and seed butters. It helps to bring out the subtle sweetness and depth of the coconut. This step is entirely optional and depends purely on your personal preference. If you choose to add salt, do so at the very end of the processing cycle, once the butter is already smooth and drippy. Blend for an additional 30 seconds to ensure the salt is thoroughly and evenly incorporated.
While homemade coconut butter boasts an impressively long shelf life, it is a natural product and can eventually spoil. It’s important to know the signs of spoilage to ensure you’re consuming a fresh and safe product. Key indicators that your coconut butter may have gone bad include an off, sour, or rancid smell (it should naturally smell fresh and distinctly coconut-y). You might also observe visible mold growth on the surface or around the edges of the jar. Additionally, a significantly altered color that isn’t due to natural temperature changes (e.g., turning yellowish or grayish, or developing dark spots) or a texture that has permanently changed (such as being gritty or overly separated into layers that do not easily recombine even after warming and stirring) could be a sign. If you notice any of these distinct signs, it is always best to err on the side of caution and discard the batch.
Storage Instructions for Fresh Coconut Butter
Proper storage is paramount to maintaining the freshness, quality, and desired consistency of your delicious homemade coconut butter. Because it’s a natural product, its texture will naturally fluctuate with temperature, but these changes are completely normal and easily manageable.
- Room Temperature Storage for Optimal Creaminess: For the most desirable drippy or spreadable consistency, store your coconut butter at a stable room temperature, ideally between 68-75°F (20-24°C). Transfer the fresh butter into a clean, dry, and tightly sealed glass jar or an airtight container. Stored in this manner, your homemade coconut butter will remain fresh and flavorful for an impressive period of up to 6 months. In cooler environments, particularly below 72°F (22°C), it may naturally solidify due to the coconut oil content hardening.
- Refrigeration for Extended Shelf Life: If you need to store your coconut butter for a duration longer than 6 months, or if you reside in a very warm or humid climate, you can extend its shelf life by keeping it in the refrigerator. However, it’s crucial to be aware that refrigeration will cause the coconut butter to harden significantly, transforming it into a very firm, almost solid block, much like cold butter or chocolate. This is a natural consequence of the coconut oil solidifying at colder temperatures.
- Effortless Re-melting of Hardened Coconut Butter: To bring refrigerated or solidified room-temperature coconut butter back to its beautifully drippy, creamy state, you have a few simple and effective options:
- Warm Water Bath Method: This is arguably the easiest and gentlest method. Simply place the sealed jar of coconut butter directly into a bowl of warm (not boiling) water. Allow it to sit for 10-20 minutes, stirring occasionally with a clean spoon, until it softens and returns to its luscious, creamy consistency.
- Low Heat on Stovetop: Scoop the desired amount of hardened coconut butter into a small saucepan. Gently warm it over very low heat on your stovetop, stirring constantly. This method requires careful attention to prevent scorching the butter.
- Microwave (Use with Extreme Caution): You can microwave small amounts of coconut butter in a microwave-safe bowl. Heat it in short bursts of 15-second intervals, stirring thoroughly between each interval, until it reaches your desired melted consistency. Be exceptionally cautious, as coconut butter can burn very quickly in the microwave if overheated.
- Natural Separation: Just like natural peanut or almond butter, you might observe some natural oil separation occurring over time, where a layer of coconut oil forms on top. This is perfectly normal and a sign of a natural product. Simply give your coconut butter a good stir with a clean utensil to reincorporate the oils before each use.
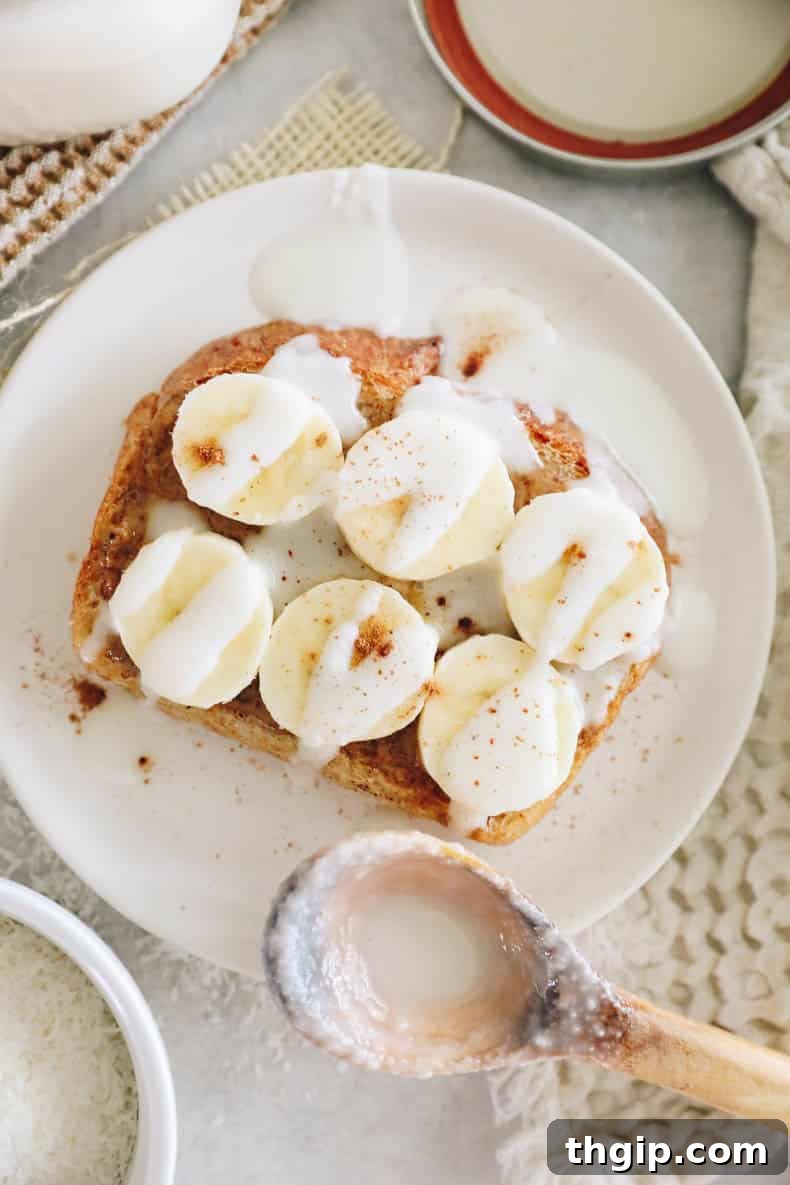
Creative Ways to Enjoy Your Homemade Coconut Butter
Now that you’ve mastered the art of making your own delicious, pure coconut butter, it’s time to unleash its incredible versatility in your kitchen! Its rich, tropical flavor, satisfying texture, and inherent natural sweetness make it a fantastic addition to both sweet and savory dishes. And yes, eating it straight from the jar with a spoon absolutely counts – it’s that undeniably good!
Here are some of our favorite and most creative ways to incorporate this creamy, wholesome delight into your daily meals, snacks, and desserts:
- As a Wholesome Spread: Move over, traditional butter and nut butters! Spread a generous, thick layer of warmed coconut butter onto warm toast, gluten-free crackers, rice cakes, bagels, or even fresh slices of apple or banana for a nourishing, flavorful, and incredibly satisfying snack. It’s an excellent alternative for those with nut allergies.
- Elevate Your Breakfast Routine:
- Oatmeal & Porridge: Drizzle warm, melted coconut butter over a comforting bowl of classic oatmeal, steel-cut oats, quinoa porridge, or chia seed pudding for an added layer of creaminess, healthy fats, and a subtle hint of tropical sweetness.
- Pancakes & Waffles: Take your breakfast stack to an entirely new level! Generously spoon or drizzle coconut butter onto freshly made fluffy pancakes, protein-packed waffles, or golden French toast. It melts beautifully into the warm surface, creating a luscious glaze.
- Yogurt & Granola: Swirl it into your favorite yogurt (dairy or non-dairy plant-based yogurt) along with some crunchy granola and fresh berries or fruit for a perfectly balanced, satisfying, and energizing start to your day.
- Boost Your Smoothies & Smoothie Bowls:
- Blend In: Add a tablespoon or two of coconut butter directly into your favorite smoothies. It lends an incredible creamy texture, provides a boost of healthy fats (MCTs), and imparts a delicate coconut flavor without overpowering other ingredients.
- As a Topping: Use it as a beautiful, aesthetically pleasing drizzle over vibrant smoothie bowls, adding both visual appeal and a rich, creamy finishing touch. It hardens slightly on cold surfaces, creating a delightful contrast.
- Dessert Decadence and Healthy Treats:
- On Ice Cream: Melted coconut butter, when drizzled over cold ice cream (dairy or non-dairy), creates a delightful “magic shell”-like coating that hardens slightly upon contact with the frozen treat. It’s absolutely divine on this chocolate peanut butter banana soft serve.
- Baked Goods Enhancer: Elevate your homemade baked goods! Drizzle warm coconut butter over freshly baked grain-free brownies, chocolate zucchini muffins, or oat flour banana bread for added moisture, richness, and an irresistible coconut aroma. You can also incorporate it directly into your cookie or muffin batters.
- Energy Bites & Raw Desserts: Utilize coconut butter as a fantastic binder in no-bake energy balls, protein bars, or raw dessert recipes. It contributes healthy fats, a delightful texture, and natural sweetness.
- Fudge or Fat Bombs: It’s a key ingredient in many homemade fudge recipes and keto “fat bombs,” providing a solid base and rich flavor.
- Surprising Savory Applications: Don’t limit the magic of coconut butter to just sweet dishes! It can be a secret weapon in savory cooking too:
- Curries & Soups: Stir a spoonful into your favorite Thai or Indian-inspired curry, a hearty stew, or a creamy vegetable soup for an added layer of richness, subtle sweetness, and a luxurious texture. It beautifully thickens and enriches broth-based dishes.
- Sauces & Dressings: Emulsify a dollop of melted coconut butter into homemade salad dressings, marinades, or savory sauces for a unique, creamy, and dairy-free base.
- Roasting Vegetables: Toss cubed root vegetables, sweet potatoes, or Brussels sprouts with a bit of melted coconut butter before roasting. It imparts a delicious, slightly caramelized finish and a unique flavor profile.
- Grains: Stir into cooked rice or quinoa for extra flavor and richness.
The culinary possibilities are truly endless once you have this fantastic, pure, and versatile homemade ingredient at your fingertips. We encourage you to experiment boldly and discover all your favorite, creative ways to enjoy its creamy, tropical goodness!
Easy Homemade Coconut Butter Recipe
No reviews yet – Be the first to rate!
This incredibly simple, 1-ingredient recipe guides you to make luscious, creamy, and perfectly drippy coconut butter from scratch in under 15 minutes. It’s the ideal solution for a healthier, purer, and significantly more cost-effective alternative to expensive store-bought spreads. Embrace its natural sweetness and discover its versatile uses in an endless array of delicious dishes, from breakfast delights to decadent desserts.
- Author: Davida Lederle
- Prep Time: 10 minutes
- Cook Time: 0 minutes
- Total Time: 10 minutes
- Yield: Approximately 2 cups
- Category: Nut Butter, Spread, Vegan
- Method: Blend, Food Processor
- Diet: Vegan, Gluten-Free, Paleo, Keto-Friendly
Ingredients
- 4 cups unsweetened shredded, flaked, or desiccated coconut (ensure no added sugar or sulfites!)
Instructions
- Prepare Coconut: Add 4 cups of unsweetened shredded coconut (or flakes/desiccated coconut) to a powerful food processor. It is paramount that the coconut is entirely unsweetened to achieve the correct consistency. For optimal and quicker processing, you have the option to lightly warm the coconut in a dry pan over low heat or in a very low oven for a few minutes (this step is optional but recommended).
- Process Continuously: Secure the lid of your food processor and begin processing continuously. The coconut will undergo several stages: initially forming a fluffy meal, then clumping together, then consolidating into a thick paste, and finally, after roughly 5-15 minutes of dedicated processing, it will magically transform into a warm, smooth, and beautifully drippy butter.
- Scrape Down Regularly: During the entire processing period, it is essential to stop the food processor every 1-2 minutes. Use a clean spatula to meticulously scrape down the sides of the bowl and push any coconut clinging to the blades back down towards the base. This crucial step ensures all the coconut is evenly processed and helps prevent the machine from overheating. Continue this until the desired smooth, creamy, and drippy consistency is fully achieved.
- Add Flavorings (Optional): If you wish to incorporate any flavorings, such as a pinch of cinnamon, a few drops of vanilla extract, or a tiny pinch of salt, stir them in now, once the butter is smooth. Process for an additional 30 seconds to thoroughly combine these additions.
- Store Properly: Carefully transfer your freshly made homemade coconut butter into a clean, dry, and airtight glass jar or container. For optimal creamy consistency, store it at room temperature, where it will remain fresh for up to 6 months. For significantly longer storage or in very warm climates, refrigeration is an option, but please note that the coconut butter will harden considerably when chilled. Refer to the “Storage Instructions” section above for detailed tips on how to easily re-melt hardened coconut butter.
Recipe Notes & Success Tips
- Patience is Your Best Ingredient: The transformation from flakes to butter takes time, sometimes up to 15 minutes or more. Don’t be tempted to give up when it looks like a thick paste; keep scraping and blending, and you will be rewarded!
- Food Processor for Best Results: While powerful blenders *can* work, a good quality food processor is generally more efficient and effective for achieving the perfect smooth consistency due to its wider bowl and blade design.
- Always Use Unsweetened Coconut: This is the most critical tip. Sweetened coconut contains added sugars that will prevent the natural oils from releasing, resulting in a sticky, clumpy texture that won’t become butter.
- Mind the Quantity: Using at least 3-4 cups of coconut helps the food processor blades work more effectively, speeding up the process.
- Yield: This recipe typically yields approximately 2 cups of rich, homemade coconut butter.
Enjoy Your Homemade Coconut Butter!
Making your own coconut butter at home is a wonderfully rewarding experience that offers a healthier, more economical, and incredibly versatile product compared to store-bought alternatives. Once you try this simple, pure, and delicious recipe, you’ll likely never want to go back to the expensive commercial versions. Embrace its rich, tropical goodness and explore its endless uses in all your favorite dishes, from invigorating breakfasts and satisfying snacks to indulgent desserts and even surprising savory meals. Happy blending, and enjoy the pure delight of your homemade creation!