
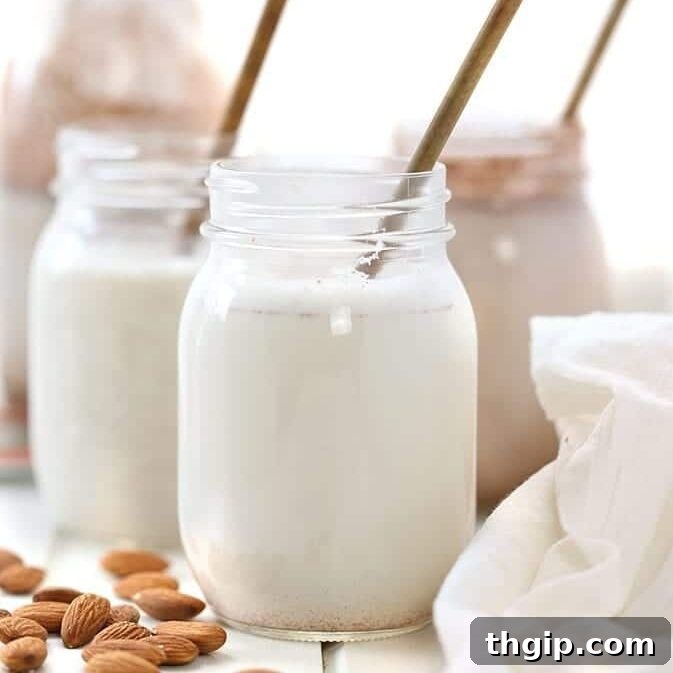
Transform your daily routine with the freshest, creamiest almond milk you’ll ever taste! This comprehensive guide reveals how to craft homemade almond milk in three delightful variations: classic vanilla, invigorating chai, and rich chocolate. Forget store-bought options – our step-by-step tutorial empowers you to create superior plant-based milk right in your kitchen.
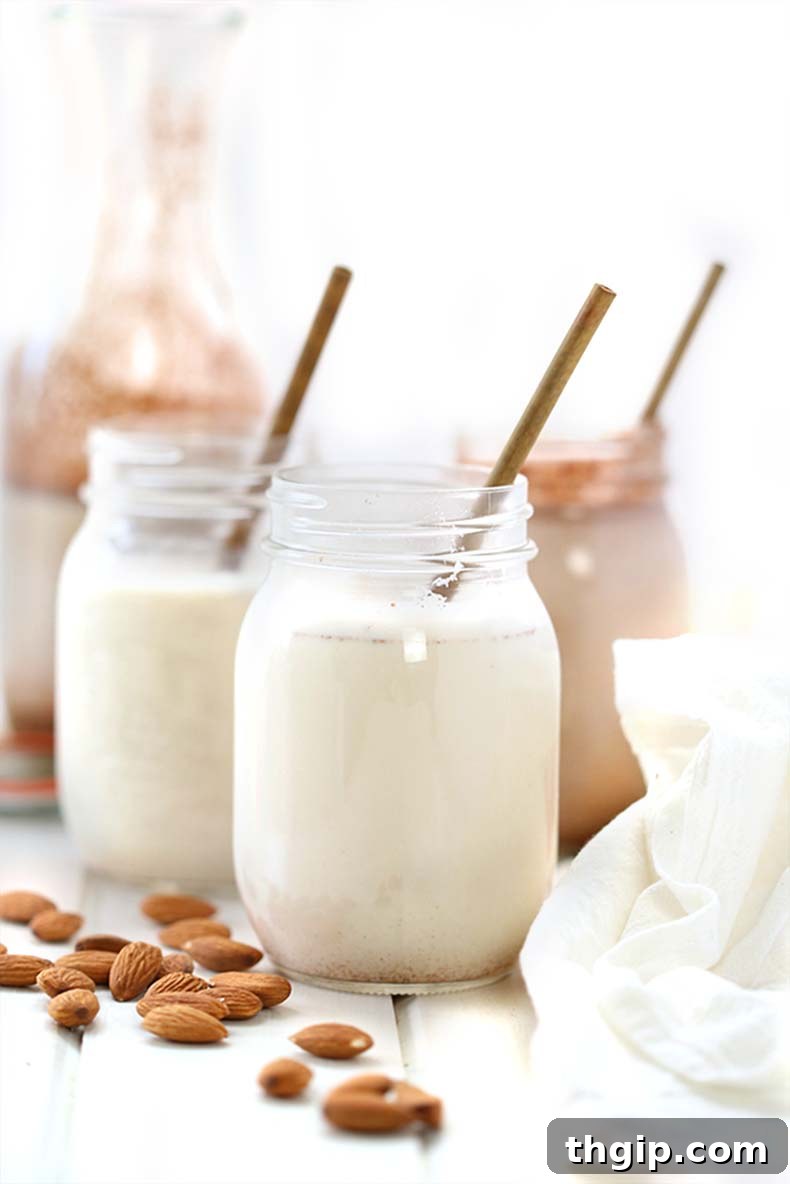
Table of Contents
- Introduction: The Magic of Homemade Almond Milk
- Why Choose Homemade Almond Milk?
- Health Benefits: Beyond the Store Shelf
- Cost-Effectiveness: A Smart Choice
- Environmental Considerations: Sustainable Sips
- Essential Ingredients for Perfect Almond Milk
- Raw Almonds: The Foundation
- Water: Quality Matters
- Sweeteners: Your Natural Touch
- Step-by-Step Guide to Making Almond Milk
- Step 1: The Art of Soaking
- Step 2: Blend to Perfection
- Step 3: Strain for Smoothness (and Save the Pulp!)
- Step 4: Sweeten and Flavor Your Creation
- Unlock a World of Flavors
- Classic Vanilla Almond Milk
- Decadent Chocolate Almond Milk
- Spiced Chai Almond Milk
- Endless Customization Options
- Storing Your Homemade Almond Milk
- Creative Ways to Enjoy Your Almond Milk
- Smoothie Sensations
- Perfect Pairings for Breakfast
- Elevating Your Coffee & Tea
- Beyond Beverages: Cooking & Baking
- Troubleshooting Common Homemade Almond Milk Issues
- Homemade Almond Milk Recipe
Introduction: The Magic of Homemade Almond Milk
There’s a distinct difference between store-bought almond milk and a batch made fresh in your kitchen. The first time I experienced homemade almond milk, I was genuinely amazed. The richness, the unparalleled creaminess, and the pure, unadulterated flavor left me wondering why I hadn’t tried it sooner. It’s not just a substitute; it’s an upgrade. And the best part? It’s incredibly simple to make!
Today, I’m thrilled to share my foundational homemade almond milk recipe, complete with three incredible variations to infuse it with exciting flavors. Whether you’re seeking a creamy addition to your coffee, a nutritious base for smoothies, or a delightful drink on its own, this guide has you covered. If you have a lactose intolerance, follow a dairy-free diet, or simply wish to explore a healthier, more flavorful plant-based milk alternative, you’ve come to the right place. Let’s unlock the secrets to perfect homemade almond milk!
Why Choose Homemade Almond Milk?
The rise of plant-based milks has been remarkable, but not all options are created equal. Opting for homemade almond milk offers significant advantages that extend beyond just taste.
Health Benefits: Beyond the Store Shelf
The primary benefit of making your own almond milk is complete control over the ingredients. Most conventional almond milk brands often contain a lengthy list of additives: stabilizers like carrageenan, emulsifiers, synthetic vitamins, and, most commonly, added sugars or artificial sweeteners. While these ingredients might prolong shelf life or enhance texture, they detract from the natural purity and health benefits of almonds.
Our base recipe uses just three simple ingredients: raw almonds, water, and a touch of maple syrup for sweetness. This ensures you’re consuming a clean product free from unnecessary chemicals and excessive sugars. Almonds themselves are packed with healthy fats, vitamin E, magnesium, and antioxidants. By making your own, you maximize these benefits without the unwanted extras, making it a truly healthy choice for your body.
Cost-Effectiveness: A Smart Choice
Is homemade almond milk cheaper? This is a common and excellent question. The answer often depends on what kind of store-bought almond milk you typically purchase. If you frequently buy premium, organic, additive-free almond milk brands, then making your own will likely be comparable in price, if not slightly cheaper. These high-quality commercial options tend to be more expensive due to their superior ingredients and processing methods.
However, if you usually opt for budget-friendly, store-brand almond milk, it might initially seem that making your own is slightly pricier. The main cost factor is the almonds themselves. Nevertheless, the difference is usually marginal, especially considering the superior quality and taste of your homemade batch. To keep costs down, I highly recommend buying raw almonds in bulk from your local grocery store or a health food market. A single cup of almonds yields a substantial amount of milk, making it a very economical and rewarding endeavor in the long run.
Environmental Considerations: Sustainable Sips
Beyond health and cost, making your own almond milk also has environmental perks. By using reusable glass bottles or jars for storage, you significantly reduce your consumption of single-use cartons and plastic containers. This small change contributes to less waste in landfills and a reduced carbon footprint associated with manufacturing and transporting packaged goods. Additionally, you gain a valuable byproduct – almond pulp – which can be repurposed, further minimizing food waste. Embracing DIY almond milk is a delicious step towards a more sustainable lifestyle.
Essential Ingredients for Perfect Almond Milk
Crafting exquisite homemade almond milk requires just a few key components. The quality of these ingredients directly impacts the flavor and texture of your final product.
- Raw Almonds: The Foundation – Always opt for raw, unsalted almonds. Roasted almonds will impart a different, sometimes overpowering, flavor to your milk. Unsalted is crucial to avoid a savory or overly salty beverage. Raw almonds also retain more of their natural enzymes and nutrients, which contributes to a creamier texture when blended after soaking.
- Water: Quality Matters – You’ll need 4 cups of water. Using filtered water is highly recommended. The purity of your water can significantly affect the taste of your almond milk, so always use the best quality water you have available to ensure a clean, crisp flavor.
- Sweeteners: Your Natural Touch – For a touch of sweetness, maple syrup is my preferred choice due to its rich, subtle flavor profile that complements almonds beautifully. However, you can easily substitute it with honey or agave nectar based on your dietary preferences or what you have on hand. Adjust the amount to your taste, starting with a little and adding more if desired.
Step-by-Step Guide to Making Almond Milk
Making almond milk is a straightforward process that yields incredibly rewarding results. Follow these simple steps for a perfect batch every time.
STEP 1: THE ART OF SOAKING
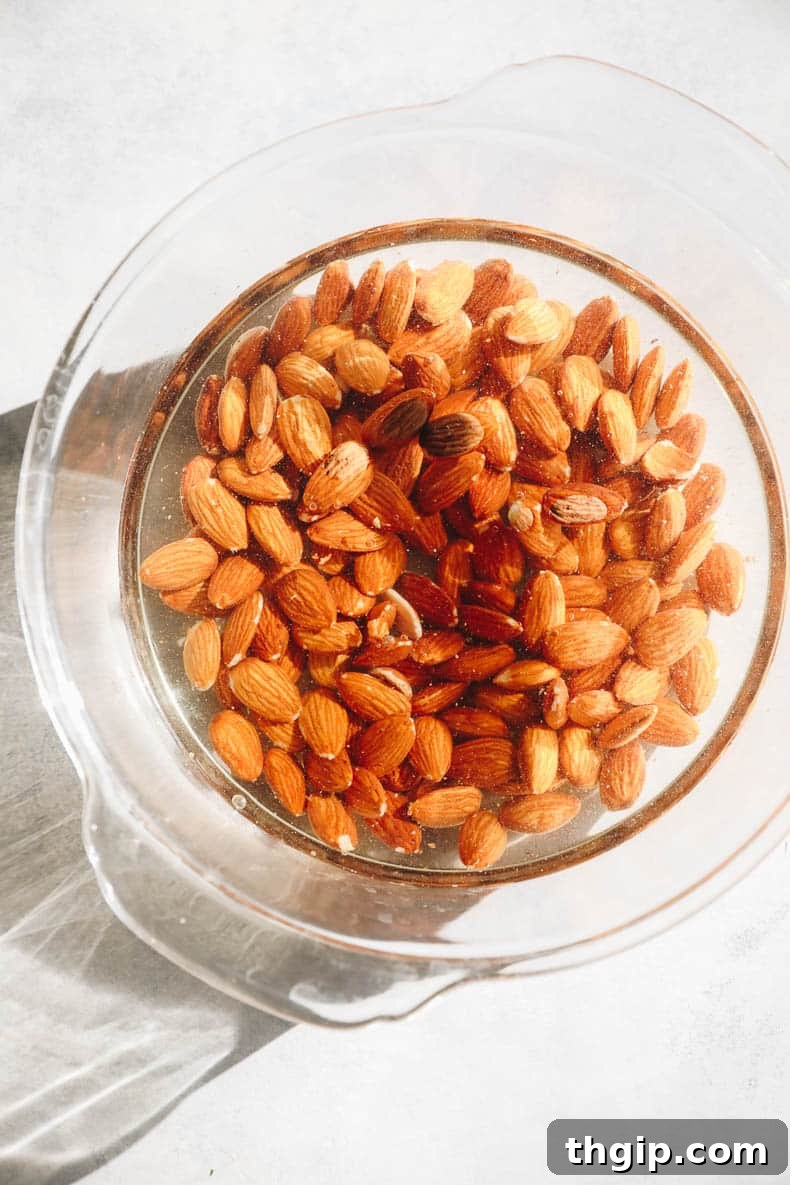
The first and most crucial step is soaking your raw almonds. Place 1 cup of almonds in a bowl and cover them generously with water. Let the almonds and water sit at room temperature overnight, or for a minimum of 6-8 hours. Soaking softens the almonds, making them easier to blend into a smooth, creamy milk. It also aids in digestion and nutrient absorption by breaking down enzyme inhibitors. After soaking, you’ll notice the almonds have plumped up considerably.
STEP 2: BLEND TO PERFECTION
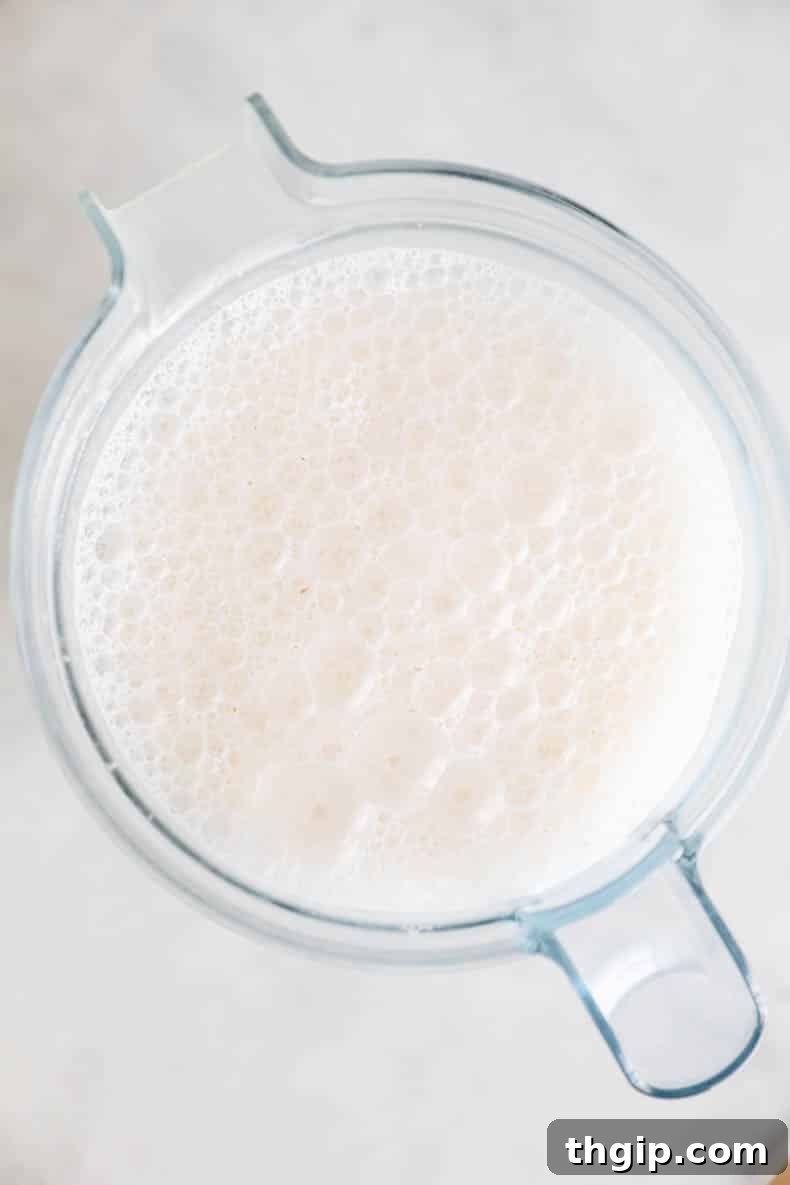
Once your almonds are thoroughly soaked, drain them completely and rinse them under cool, running water. Transfer the soaked almonds to a high-speed blender. Add 4 cups of fresh filtered water to the blender. Secure the lid and blend on high speed until the mixture is completely smooth and creamy. This usually takes about 45 seconds to 1 minute, depending on the power of your blender. You’re aiming for a frothy, uniform liquid with no visible chunks of almond.
STEP 3: STRAIN FOR SMOOTHNESS (AND SAVE THE PULP!)
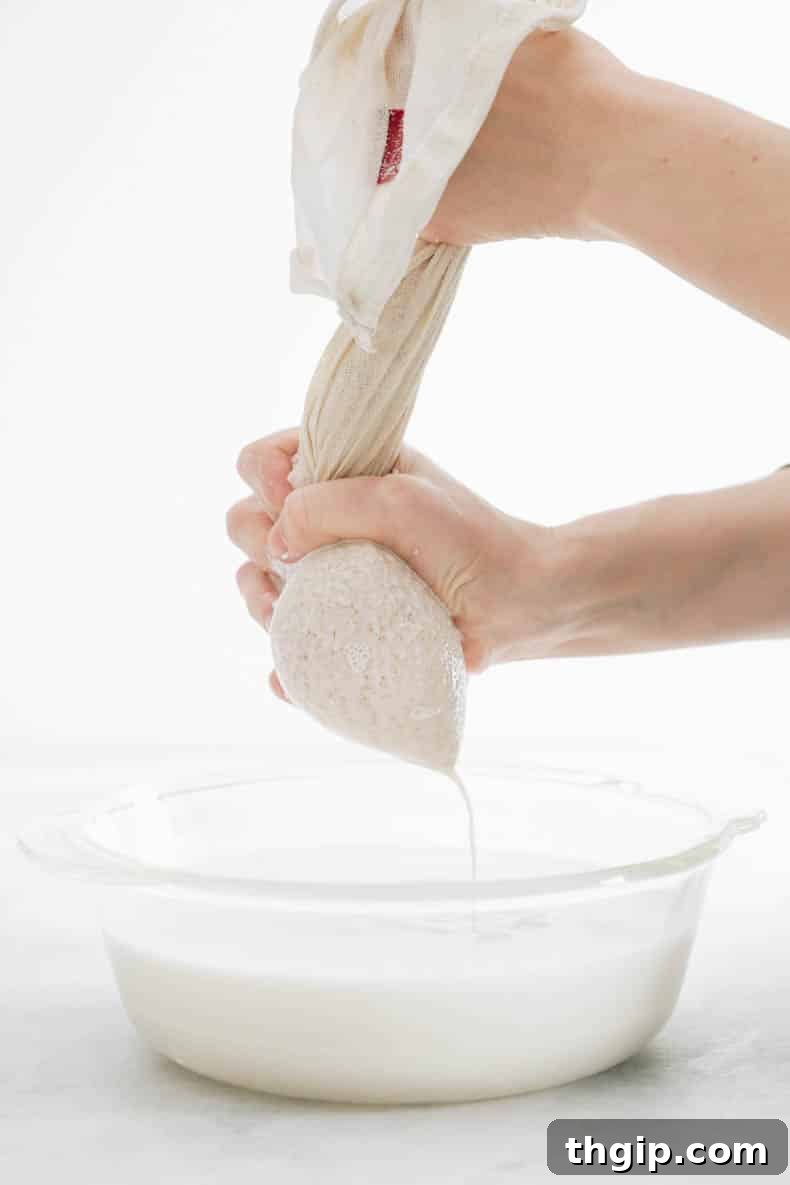
This step separates the liquid gold from the almond solids. Place a clean nut milk bag (which is ideal for a super smooth result) or several layers of fine cheesecloth over a large bowl or pitcher. Carefully pour the blended almond mixture into the nut milk bag or cheesecloth. Gently gather the edges of the bag or cloth and squeeze firmly until all the liquid has been extracted into the bowl. What you’re left with in the bag is leftover almond pulp, which can be saved and repurposed for baking or other recipes – don’t discard it! This process ensures your almond milk is silky smooth and free of any gritty texture.
STEP 4: SWEETEN AND FLAVOR YOUR CREATION
Now comes the fun part: customizing your almond milk! To the strained almond milk, add your desired amount of maple syrup (or other sweetener) and any flavorings you choose. Stir well to combine. Taste and adjust for sweetness and flavor intensity. That’s it – your homemade almond milk is ready to enjoy! Store it in an airtight container in the refrigerator.
Unlock a World of Flavors
While plain almond milk is delicious on its own, adding flavorings can elevate it to a gourmet beverage. Here are three popular combinations to get you started, along with tips for customization.
- Vanilla Almond Milk – For a comforting and classic flavor, simply add 1/2 teaspoon of high-quality vanilla extract to your base almond milk. For a more intense and aromatic vanilla experience, you can scrape the seeds from half a fresh vanilla bean and add them directly to the blender with the almonds and water. This will infuse the milk with a natural, sophisticated vanilla essence.
- Decadent Chocolate Almond Milk – Indulge your sweet tooth with this rich variation. To your vanilla almond milk, incorporate 1 tablespoon of unsweetened cocoa powder or raw cacao powder. You’ll likely need to add an additional 1-2 tablespoons of maple syrup (or your preferred sweetener) to balance the bitterness of the cocoa and achieve a perfectly decadent chocolate flavor. Adjust to your desired level of sweetness.
- Spiced Chai Almond Milk – For a warm, aromatic, and slightly spicy kick, turn your almond milk into a chai delight. Start with the vanilla extract, then add a blend of warming spices. A good starting point is 1/4 teaspoon dried ginger, 1/8 teaspoon dried cinnamon, and a tiny pinch each of cardamom, allspice, and cloves. These spices create a complex and invigorating flavor profile, perfect for a cozy morning or an afternoon treat.
Endless Customization Options
Don’t stop at these three! Homemade almond milk is incredibly versatile. Consider adding a pinch of sea salt to enhance the natural sweetness, a dash of turmeric and black pepper for a “golden milk”, or a spoonful of matcha powder for a vibrant green tea latte base. You can also experiment with different sweeteners like dates (blend them with the almonds) for a caramel-like sweetness, or a touch of rose water for a delicate floral note. The possibilities are truly endless, allowing you to tailor your almond milk to any craving or occasion.
Storing Your Homemade Almond Milk
One of the beauties of homemade almond milk is its freshness. To maintain its quality, proper storage is key. Store your almond milk in a clean, airtight container or jar in the refrigerator. When stored correctly, it will typically last for 3-5 days. I’ve found it helpful to make a fresh batch every Sunday or Monday, ensuring I have delicious, wholesome almond milk to enjoy throughout the week.
It’s completely normal for homemade almond milk to separate in the fridge. This is a natural occurrence, as there are no emulsifiers or stabilizers present to keep the fat and water mixed. Simply give the container a good shake before each use to recombine the ingredients and restore its creamy consistency. For optimal freshness, avoid leaving it at room temperature for extended periods.
Creative Ways to Enjoy Your Almond Milk
Homemade almond milk is incredibly versatile and can be used in countless ways, replacing both store-bought almond milk and traditional dairy milk in almost any recipe. Here are some of my favorite applications:
- Smoothie Sensations – Elevate your daily smoothies! Use homemade almond milk as the creamy base for any smoothie recipe. Its neutral or subtly flavored profile makes it perfect for fruit smoothies, green smoothies, or protein shakes. I highly recommend trying it with this delightful smoothie bowl or a classic banana peanut butter smoothie for an extra boost of flavor and nutrition.
- Perfect Pairings for Breakfast – Say goodbye to soggy cereal! Homemade almond milk is fantastic with both store-bought cereals and homemade granola. Its fresh taste perfectly complements crunchy oats and nuts. For an irresistibly flavorful breakfast, pair it with this aromatic apple cinnamon granola. It’s also an ideal liquid for making creamy oatmeal. Explore 5 easy ways to make overnight oats or use it in your favorite steel cut oats recipe for a hearty and healthy start to your day.
- Elevating Your Coffee & Tea – Experience coffee and tea like never before. Homemade almond milk makes for luscious lattes and cappuccinos. Its smooth texture froths beautifully, creating a café-quality drink at home. It’s also wonderful simply poured into your morning brew or a cup of your favorite tea.
- Beyond Beverages: Cooking & Baking – Don’t limit your almond milk to drinks! It’s an excellent dairy-free alternative for cooking and baking. Use it in pancakes, muffins, sauces, soups, or even creamy curries. The subtle nuttiness adds depth without overpowering other flavors, making it a versatile ingredient for both sweet and savory dishes.
Truly, the sky is the limit! Experiment and discover all the wonderful ways homemade almond milk can enrich your culinary creations.
Troubleshooting Common Homemade Almond Milk Issues
While making almond milk is generally straightforward, you might encounter a few common issues. Here’s how to address them:
- Gritty Texture: If your almond milk feels gritty, it’s usually due to insufficient blending or straining. Ensure you blend for the full recommended time (45 seconds to 1 minute) until truly smooth. When straining, use a fine-mesh nut milk bag and squeeze vigorously to extract all the liquid and leave behind the pulp. Double-straining through a second layer of cheesecloth can also help.
- Too Watery/Thin: This can happen if you use too much water relative to almonds, or if your almonds weren’t fully hydrated. Always stick to the 1 cup almonds to 4 cups water ratio. Make sure your almonds soak for at least 8 hours to ensure they are plump and ready to release their creamy essence.
- Separation: As mentioned, natural separation is normal! Unlike commercial almond milks, homemade versions lack emulsifiers. A quick shake before serving will re-emulsify the fats and water, returning it to its creamy state.
- Bland Taste: If your milk tastes flat, it might need more sweetener or a pinch of salt to enhance its natural flavors. A tiny pinch of sea salt can work wonders, even in sweet applications, by bringing out the other flavors. Don’t be afraid to adjust seasonings to your personal preference.
- Short Shelf Life: Ensure all your equipment (blender, nut milk bag, storage containers) is impeccably clean. Any lingering bacteria can shorten shelf life. Always store in an airtight container in the coldest part of your refrigerator.
Homemade Almond Milk Recipe
How to Make Almond Milk
5 Stars
4 Stars
3 Stars
2 Stars
1 Star
No reviews yet
An easy video tutorial on how to make creamy, delicious homemade almond milk in 3 different ways! From classic vanilla, to spicy chai and decadent chocolate, this step-by-step tutorial will teach you how to master DIY nut milk.
- Author: Davida Lederle
- Prep Time: 6 hours
- Cook Time: 5 minutes
- Total Time: 6 hours 5 minutes
- Yield: 4 cups
- Category: Drinks, Plant-Based, Dairy-Free
- Method: Blend, Soak, Strain
- Diet: Vegan, Gluten-Free, Paleo
Ingredients
Scale
For the Basic Almond Milk:
- 1 cup raw almonds, unsalted
- 4 cups filtered water
- 1–2 tbsp maple syrup, or preferred sweetener, to taste
For Vanilla Almond Milk:
- 1/2 tsp vanilla extract (or seeds from 1/2 vanilla bean)
For Chai Almond Milk:
- 1/2 tsp vanilla extract
- 1/4 tsp dried ginger
- 1/8 tsp ground cinnamon
- Pinch of cardamom, allspice, and cloves (to taste for a more complex chai flavor)
For Chocolate Almond Milk:
- 1/2 tsp vanilla extract
- 1 tbsp raw cacao or cocoa powder
- Additional maple syrup, if desired, to balance cocoa bitterness
Other Essential Supplies:
- High-powered blender (I use my Blendtec Designer 725)
- Nut milk bag or cheesecloth
- Large bowl or pitcher for straining
Instructions
- Place the raw almonds in a bowl and cover them completely with water.
- Allow the almonds to soak overnight, or for a minimum of 6-8 hours. This softens them for optimal blending.
- Once soaked, drain the almonds and rinse them thoroughly under cold water. Transfer them to a high-powered blender.
- Add 4 cups of fresh filtered water to the blender with the almonds. Blend on high speed until the mixture is completely smooth and frothy, typically for 45 seconds to 1 minute.
- Position a nut milk bag or several layers of cheesecloth over a large bowl or pitcher.
- Pour the contents of the blender through the nut milk bag or cheesecloth. Gently squeeze the bag until all the liquid has been extracted into the bowl, leaving the almond pulp behind.
- Stir in 1-2 tablespoons of maple syrup (or your chosen sweetener) and any desired flavorings, as listed above in the “Unlock a World of Flavors” section. Taste and adjust to your preference.
- Transfer the freshly made almond milk to a sealed container or jar and store it in the refrigerator for up to 5 days.
- Before each use, give the container a good shake, as natural separation is normal for homemade almond milk.
Loved this recipe? You might also enjoy these other homemade beverage guides:
- How to Make Oat Milk
- DIY Cold Brew Iced Coffee
- Oat Milk Lattes – 3 Ways!
- Healthy Hot Chocolate – 5 Ways!
- How to Make Cold Brew Iced Tea