
One of the most unexpected revelations after finally spreading my wings and flying the nest was the undeniable reality of having to cook for myself. While the notion of self-sustenance wasn’t entirely foreign to my 24-year-old self – a full-fledged food blogger, no less – it was a truth I had conveniently compartmentalized, especially after a brief return to the comforts of my childhood home. Having successfully navigated five years of independent living before that interlude, I knew the skills were there, lying dormant. Yet, there’s a curious magic to returning to your parents’ home; it’s a portal back to a simpler time where culinary needs are magically met. This regression, while comforting, certainly didn’t prepare me for the full-time role of head chef when I moved out again, this time with a 6’3″ partner to feed as well.
My passion, as many of you know, has always been baking. The sheer volume of baked goods I used to share on this blog was often a testament to my parents taking care of the main meals. And by “taking care of meals,” I mean my incredible Mom’s home cooking and my Dad’s expert chauffeur services to our beloved local eateries – Burger Shack, Tabbouleh, or Churassco (oh, how I miss those days!). But adulting in my own space meant a significant shift in priorities. It wasn’t just about feeding myself anymore; it was about nourishing two adults, discovering the intricacies of meal planning, grocery shopping, and, most importantly, actual cooking. This new chapter forced me into the kitchen more consistently, and to my delightful surprise, I found myself genuinely enjoying the process. It’s a fair division of labor too: I handle the cooking, and my partner, C, takes care of virtually everything else around the apartment. A good deal, wouldn’t you agree?
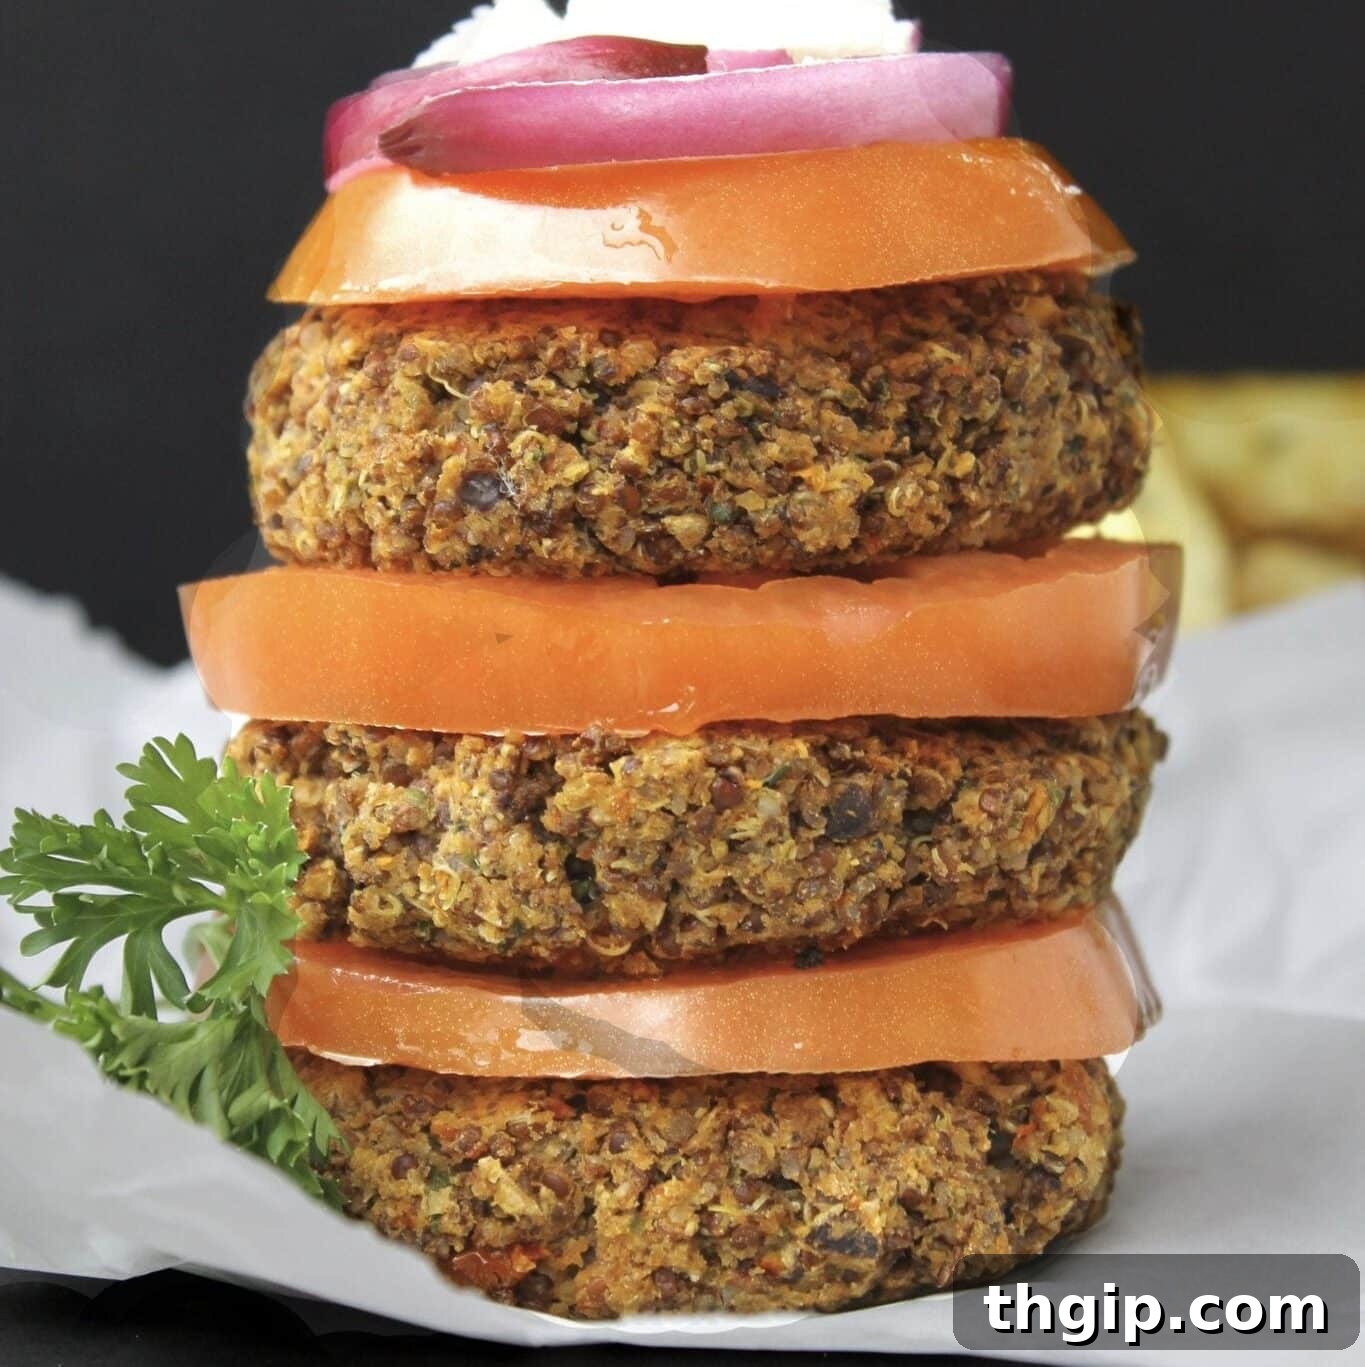
Luckily, C is a patient and understanding partner who embraces my insistence on a diet rich in vegetables and fish. He rarely bats an eye when I gently remind him that a “healthy” cookie, despite being gluten-free, vegan, dairy-free, and refined sugar-free, might still be, well, a cookie. The moral of this culinary journey? If you think you hate cooking, give it another chance! You might just uncover a hidden passion. After all, you can’t live off your parents’ cooking forever (says the blogger whose Mom dropped off a batch of freshly cooked fish at her apartment just yesterday… some habits die hard!). This new rhythm in the kitchen has led to some incredible discoveries, including this stellar recipe for Greek Quinoa Burgers – a dish that perfectly encapsulates healthy, flavorful, and satisfying home cooking.
Print Recipe
Greek Quinoa Burgers
5 Stars
No reviews
- Prep Time: 40 minutes
- Cook Time: 10 minutes
- Total Time: 50 minutes
- Yield: Yields: 10 burgers
Ingredients
- 2 cups cooked quinoa (any colour), cooled completely (1 cup uncooked)
- 1 (15 oz) can chickpeas, drained and rinsed
- 1 medium cucumber, seeded and chopped
- 1 small red onion, diced
- 1/2 cup sun-dried tomatoes, chopped (not in oil)
- 1/2 cup feta cheese, crumbled
- 1/2 cup flat-leaf parsley, chopped
- Juice of 1/2 lemon
- Salt & pepper to taste
Instructions
- Cook quinoa according to package instructions. Place in refrigerator to cool faster.
- Add cucumber to a food processor and process until completely broken up.
- Add in red onion, sun-dried tomatoes, feta cheese and parsley and pulse several times.
- Add in chickpeas and process until it all comes together into a sticky mixture.
- Add quinoa, lemon juice and salt and pepper. Process until mixture can easily be rolled into balls (about 40 seconds).
- Divide and roll into 10 balls.
- Heat a large pan over medium-high heat and add coconut oil or olive oil.
- Place several burgers in pan an flatten slightly with palm.
- Cook on each side for about 3 minutes or until outside is crispy.
- Serve warm on its own or on a bun.
- Will keep for several days in refrigerator.
Why You’ll Love These Healthy Greek Quinoa Burgers
These Greek Quinoa Burgers are a testament to how incredibly flavorful and satisfying healthy eating can be. Far from bland, they burst with vibrant Mediterranean flavors that will transport your taste buds straight to the sunny shores of Greece. Whether you’re a seasoned vegetarian, looking to incorporate more plant-based meals into your diet, or simply craving a fresh and light burger alternative, these quinoa patties are an absolute winner. They are naturally gluten-free (if served without a bun, or on a GF bun), packed with protein and fiber, making them a fantastic option for a nutritious lunch or dinner.
What sets these veggie burgers apart is their incredible texture and versatility. The combination of fluffy quinoa and hearty chickpeas creates a substantial patty that holds together beautifully, while the fresh cucumber, red onion, sun-dried tomatoes, and feta cheese infuse every bite with a delightful zest. These aren’t just for burger buns; they’re excellent crumbled over salads, tucked into pita bread with a dollop of tzatziki, or simply enjoyed on their own as a protein-rich side dish. Plus, they’re surprisingly easy to make, even for novice cooks, and perfect for meal prepping for the week ahead.
Key Ingredients & Their Nutritional Benefits
- Quinoa: A complete protein, meaning it contains all nine essential amino acids. It’s also rich in fiber, magnesium, B vitamins, iron, potassium, calcium, phosphorus, vitamin E, and various beneficial antioxidants. It forms the hearty base of our burgers, providing structure and nutritional density.
- Chickpeas (Garbanzo Beans): An excellent source of plant-based protein and dietary fiber, which aids digestion and helps keep you feeling full. They also contribute a creamy texture when processed, helping the burgers bind together without the need for eggs.
- Cucumber & Red Onion: These fresh vegetables add a delightful crunch and brightness to the burgers. Cucumbers are hydrating and provide vitamins K and C, while red onions offer a pungent kick and beneficial antioxidants.
- Sun-Dried Tomatoes: These concentrated flavor bombs add a sweet, tangy, and intensely umami note, elevating the Mediterranean profile. They’re also rich in antioxidants and vitamins.
- Feta Cheese: Crumbled feta introduces a salty, tangy creaminess that is quintessential to Greek cuisine. It adds depth of flavor and a touch of indulgence. For a vegan version, simply omit the feta or use a plant-based alternative.
- Fresh Flat-Leaf Parsley & Lemon Juice: These ingredients are crucial for that fresh, zesty finish. Parsley adds a herbaceous aroma and a pop of green, while fresh lemon juice brightens all the flavors, making the burgers incredibly refreshing.
Tips for Perfect Greek Quinoa Burgers
Achieving the perfect texture and flavor for these Greek Quinoa Burgers is surprisingly simple with a few key tips:
- Cool Quinoa is Key: Ensure your cooked quinoa is completely cooled before mixing. Warm quinoa will make the mixture too moist and harder to form into patties. Spreading it out on a baking sheet and refrigerating it for about 20-30 minutes can speed up the cooling process.
- Don’t Overprocess: The goal for the chickpea mixture is sticky and combined, not a smooth paste. Pulsing the ingredients in the food processor allows for some texture to remain, which contributes to a more appealing burger. Overprocessing can make the mixture too wet and less cohesive.
- Firm Patty Formation: When rolling the mixture into balls and then flattening them, be sure to press firmly. This helps ensure the patties hold their shape during cooking. If the mixture feels a little sticky, lightly dampen your hands.
- Even Cooking for a Crispy Exterior: Use medium-high heat when pan-frying. This allows the exterior to develop a beautiful golden-brown and crispy crust without burning, while the interior heats through. Don’t overcrowd the pan, as this can lower the temperature and steam the burgers instead of crisping them.
- Adjust Seasoning: Always taste the mixture before forming the patties and adjust salt, pepper, or lemon juice as needed. The flavors should be vibrant and well-balanced.
Serving Suggestions and Creative Variations
The beauty of these Greek Quinoa Burgers lies in their versatility. While they are fantastic served traditionally on a toasted bun with your favorite toppings like lettuce, tomato, and red onion, don’t limit yourself!
- Burger Bar: Create a Mediterranean-inspired burger bar with warm pita bread, creamy tzatziki sauce, fresh cucumber slices, Kalamata olives, hummus, and a vibrant tomato-cucumber salad.
- Salad Bowl: For a lighter meal, serve the warm quinoa patties over a bed of mixed greens with a drizzle of lemon-tahini dressing, cherry tomatoes, and a sprinkle of fresh dill.
- Wraps & Pitas: Crumble the burgers into whole wheat wraps or pita pockets with additional fresh vegetables and a generous smear of hummus or a garlicky yogurt sauce.
- Appetizer Style: Form smaller patties and serve them as appetizers with toothpicks and a dipping sauce like a spicy feta dip or a simple balsamic glaze.
Feeling creative? Here are some easy variations to customize your Greek Quinoa Burgers:
- Add More Veggies: Incorporate finely chopped spinach, bell peppers, or grated zucchini into the mixture for an extra boost of nutrients.
- Herb Swaps: Experiment with different fresh herbs like mint or dill for a slightly different flavor profile.
- Spicy Kick: Add a pinch of red pepper flakes or a dash of hot sauce to the mixture for those who love a bit of heat.
- Make it Vegan: Simply omit the feta cheese, or replace it with a dairy-free feta alternative, to make these burgers completely vegan. They are equally delicious without cheese!
- Different Cheeses: While feta is classic, you could try crumbling in some goat cheese or even a mild provolone for a different twist.
Meal Prep Made Easy
These Greek Quinoa Burgers are an absolute dream for meal prepping! You can prepare the entire batch of patties ahead of time. Store the uncooked patties in an airtight container, separated by parchment paper, in the refrigerator for up to 2-3 days. When you’re ready to eat, simply cook them as directed. You can also cook all the patties in advance and store the cooked burgers in the refrigerator for up to 4-5 days. Reheat gently in a pan or oven until warmed through. They also freeze well: once formed, freeze uncooked patties on a baking sheet until solid, then transfer them to a freezer-safe bag or container for up to 1-2 months. Thaw in the refrigerator before cooking, or cook from frozen on a lower heat setting for a longer duration.
So, do you enjoy cooking or do you find yourself doing it out of necessity? Have you ever experienced the full circle of moving out, then moving back into your parent’s house, only to venture out on your own again with newfound culinary adventures?