Welcome to the wonderful world of DIY candle making! Who doesn’t love the warm glow and soothing aroma of a beautifully scented candle? This comprehensive guide will show you how to craft exquisite, all-natural candles right in your own home. Using simple ingredients and a dash of creativity, you can create the ultimate relaxation gift for loved ones or a perfect treat for yourself, all while repurposing those charming old mason jars you have lying around. Forget generic store-bought options; with homemade candles, you’re in control of every ingredient, ensuring a clean, non-toxic burn and a truly personalized scent experience.
There’s a special charm that comes with a handcrafted gift, something that mass-produced items simply can’t replicate. Whether it’s homemade bath salts, invigorating salt scrubs, or these delightful candles infused with essential oils, a DIY present speaks volumes. I’ve always found immense joy in both giving and receiving gifts made with care and personal touch. This tutorial is designed to make the process of crafting these aromatherapy candles straightforward and enjoyable, allowing you to create customized gifts in large batches and well in advance, perfect for any last-minute celebrations or thoughtful gestures.
Why Craft Your Own Candles at Home?
Beyond the simple pleasure of a flickering flame, there are numerous compelling reasons to embrace the art of homemade candle making. It’s an empowering and rewarding hobby that offers significant advantages over purchasing commercially produced candles.
- Unmatched Ingredient Control: Many store-bought candles contain paraffin wax, artificial fragrances, and wicks that can release harmful chemicals when burned. When you make your own, you choose every component – from the wax to the wick to the scent – ensuring only natural, non-toxic elements are used. This means a cleaner burn and a healthier home environment.
- Cost-Effectiveness: While there’s an initial investment in supplies, making candles in batches is often significantly cheaper than continuously buying high-quality, natural candles from a store. You can produce multiple candles for the price of one premium commercially made candle.
- Limitless Customization: This is where the fun truly begins! You have the freedom to select your preferred wax type, experiment with an endless array of essential oil blends, choose unique containers, and even add natural colorants. Create candles that perfectly match your decor, mood, or the recipient’s personal taste.
- Therapeutic Benefits of Aromatherapy: By using pure essential oils, your homemade candles become powerful tools for aromatherapy. Lavender can promote relaxation, peppermint can invigorate, and citrus oils can uplift your spirits. Each candle becomes a small vessel for well-being.
- Eco-Friendly & Sustainable: Repurpose old glass jars, coffee mugs, or even ceramic containers. Choosing natural waxes like soy, coconut, or beeswax, combined with natural wicks, further reduces your environmental footprint.
- A Rewarding Creative Outlet: The process of melting, mixing, and pouring wax is a calming and meditative experience. It’s a wonderful way to unwind, tap into your creativity, and produce something beautiful and functional with your own hands.
Essential Supplies for Crafting Homemade Candles
Embarking on your candle-making journey requires just a few key ingredients and some basic tools, many of which you might already have in your kitchen. Here’s a breakdown of what you’ll need to create beautiful, naturally scented candles:
- Soy Wax Flakes: Soy wax is an excellent choice for homemade candles. Derived from soybeans, it’s a renewable resource, burns cleaner and slower than paraffin wax, and produces minimal soot. Its lower melting point also allows for a better “scent throw,” meaning the aroma of your essential oils will disperse more effectively. Soy wax is non-toxic and biodegradable, making it an eco-friendly option for your home. You’ll typically need about 6 cups of flakes to make 3-4 small candles.
- Natural Wicks: Opt for wicks made from natural materials like cotton, hemp, or wood. Traditional wicks often contain lead or zinc cores, which can release harmful fumes when burned. Natural wicks ensure a clean, safe burn. Pre-tabbed wicks are usually easiest to use as they have a metal base that helps anchor them at the bottom of your container. Ensure the wick size is appropriate for your chosen container diameter to avoid tunneling or a weak flame.
- Pure Essential Oils: These are the heart of your aromatherapy candles. Essential oils provide natural fragrances without the synthetic chemicals often found in artificial candle scents. The amount you’ll need depends on the strength of the oil and your desired intensity, but expect to use a generous quantity – typically around 80-120 drops (or approximately 10 ml per pound of wax) for a strong, noticeable scent. My personal favorites for a relaxing blend include lavender (calming), grapefruit (uplifting), and eucalyptus (clearing). For more details on essential oils, consider exploring this introductory guide.
You’ll also need these practical supplies:
- Mason Jars or Other Containers: Heat-safe glass jars are ideal for candles. Mason jars are popular due to their durability, classic aesthetic, and availability in various sizes (8-ounce jars are a good starting point). Ensure your containers are clean, dry, and free of cracks.
- Double Boiler Setup: While you can melt wax directly in a pot over low heat, a double boiler is highly recommended. This method prevents the wax from scorching and ensures even melting. You can create one by placing a heat-safe bowl over a pot of simmering water.
- Disposable Stirring Device: Wax can be notoriously sticky and hard to clean. Use an old chopstick, a wooden craft stick, or a dedicated disposable utensil for stirring your wax and essential oils.
- Wick Holders (Chopsticks or Pencils): These are essential for keeping your wicks perfectly centered and upright as the wax cools and solidifies. Simply rest a chopstick or pencil horizontally across the top of your jar and secure the wick to it with tape or a clothespin.
- Heat-Resistant Surface & Newspaper: Always work on a protected surface, as wax spills can be tricky to clean. Lay down old newspapers, cardboard, or a silicone mat to catch any drips.
- (Optional but Recommended) Candy/Wax Thermometer: While not strictly necessary for basic candle making, a thermometer helps ensure you add essential oils at the optimal temperature for the best scent throw and prevent overheating the wax.
Step-by-Step Guide: Crafting Your Natural Candles at Home
Creating your own essential oil candles is a rewarding process that’s simpler than you might imagine. Follow these steps to produce beautifully scented, clean-burning candles that will enhance any space.
Step 1: Prepare Your Workspace and Jars
Before you begin melting wax, ensure your workspace is clean, well-ventilated, and protected from spills. Lay down newspaper or a protective mat. Make sure your chosen containers (mason jars or other heat-safe glass jars) are thoroughly clean and dry. Any moisture can negatively affect your candle’s appearance and burn.
Step 2: Melt the Soy Wax
MELT WAX
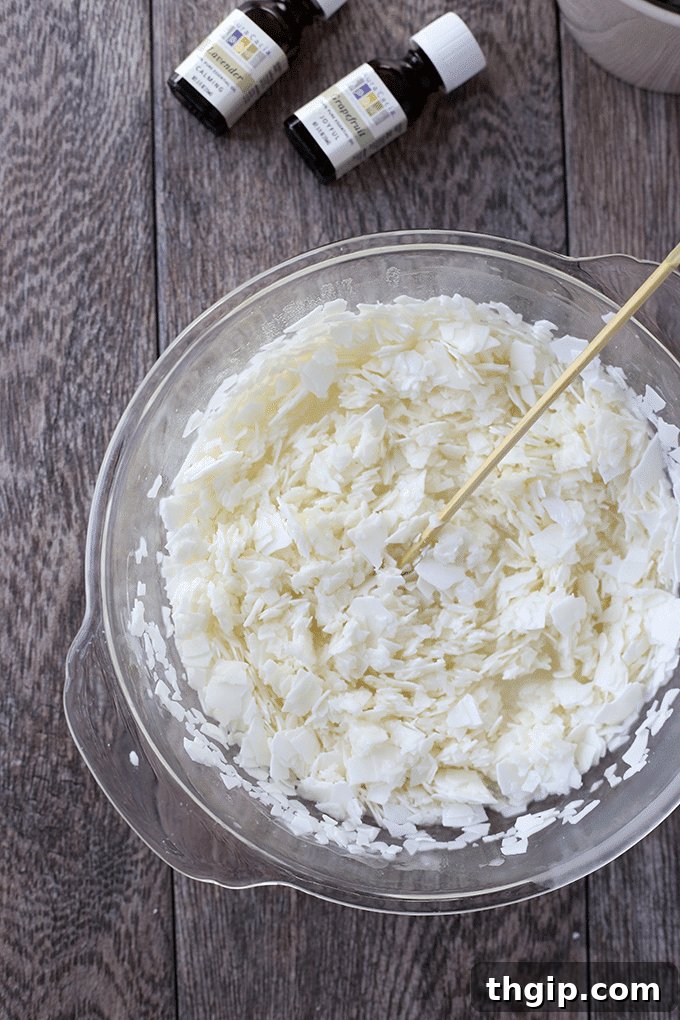
Place your soy wax flakes into a heat-safe container, then set it in a double boiler over low-medium heat. If you don’t have a dedicated double boiler, you can place a smaller pot or a heat-safe glass bowl over a larger pot filled with a few inches of simmering water. The key is to melt the wax indirectly to prevent it from burning or overheating.
Stir the wax occasionally with your disposable stirring device (like a chopstick). Soy wax flakes typically melt fairly easily. Increase the heat slightly if the melting process is taking more than a few minutes, but avoid boiling the water vigorously. You’re aiming for a smooth, liquid consistency. If using a thermometer, heat the wax to approximately 180-185°F (82-85°C). This temperature helps the wax properly absorb the essential oils and creates a good “scent throw.”

Step 3: Add Your Essential Oils
ADD YOUR ESSENTIAL OILS
Once the soy wax is completely melted and has reached the desired temperature (ideally 180-185°F / 82-85°C, then removed from heat and allowed to cool to around 135-140°F / 57-60°C before adding oils), remove it from the heat. This is a crucial step for preserving the integrity and potency of your essential oils. Adding them while the wax is too hot can cause the oils to evaporate rapidly, diminishing your candle’s scent. Now, carefully add 80-120 drops of your favorite essential oils directly into the melted wax. The exact amount may vary based on the type of essential oil you use (some are more potent than others) and how strong you want the fragrance to be. Stir gently but thoroughly for about 1-2 minutes to ensure the oils are well incorporated into the wax. For guidance on creating harmonious essential oil blends, refer to resources like this introductory guide to essential oils.
Step 4: Anchor Wicks and Pour Wax
ANCHOR WICKS + POUR WAX
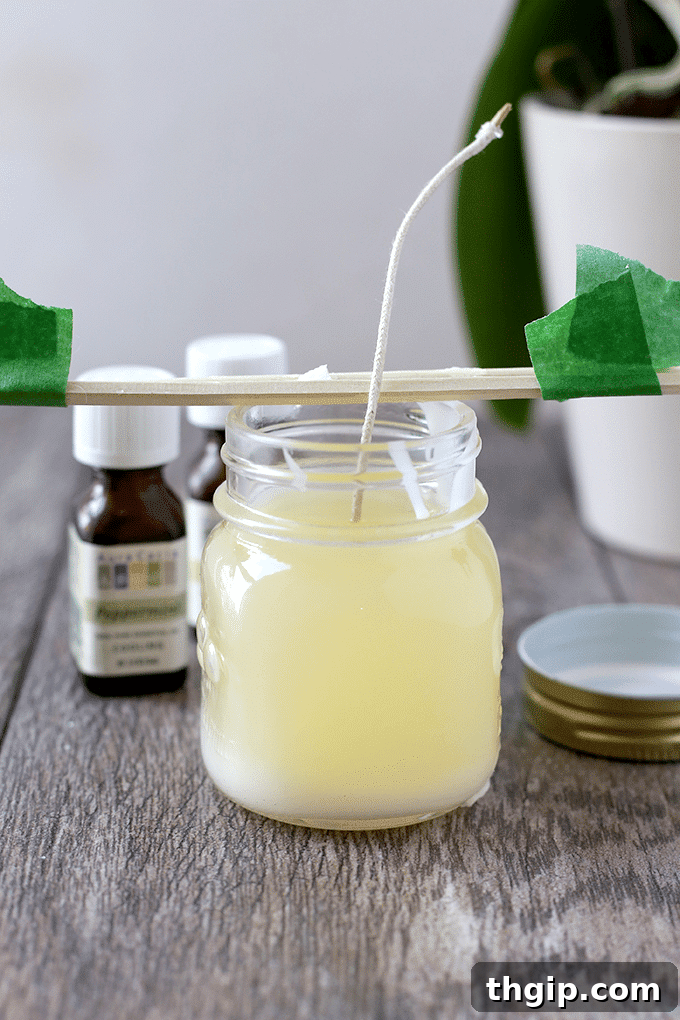
Before pouring the wax, prepare your wicks. If your wicks don’t have pre-attached anchors, you can secure them to the bottom of your mason jars by dipping the metal wick tab into a small amount of melted wax and quickly pressing it onto the center of the jar’s bottom. Allow it to set for a moment. Next, center the wick by taping it upright to a horizontal chopstick, pen, or pencil placed across the rim of your jar. This ensures the wick remains straight and centered as the wax cools, which is vital for an even burn. Carefully and slowly pour the scented wax into each mason jar, filling it to just below the lip. Repeat this process until all your jars are filled. Depending on the size of your jars, you might have some wax leftover, or need to melt more. Allow the candles to stand undisturbed in a cool, stable location until they are completely solid. This usually takes about 1-3 hours, but can be longer for larger candles. Resist the urge to move them while they are setting.
Step 5: Cure and Trim Your Candles
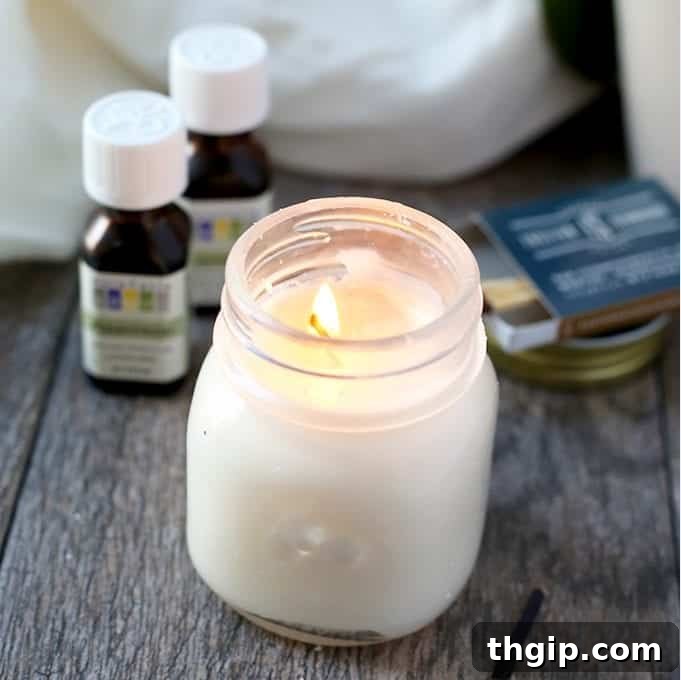
Once your candles have completely solidified, they will need a “curing” period. While you can burn them after just a few hours, allowing soy candles to cure for 24-48 hours, or even up to 1-2 weeks, significantly improves their scent throw and overall burn quality. During this time, the wax and essential oils bind together more effectively, resulting in a stronger and more consistent fragrance when burned.
After curing, trim the wick to a length of about 1/4 inch (approximately 6mm) before burning. A shorter wick helps prevent excessive soot, a large flame, and ensures a cleaner, longer-lasting burn.
Common Mistakes to Avoid for Perfect Homemade Candles
Candle making is an art, and like any art, it has its nuances. Paying attention to these common pitfalls can help ensure your aromatherapy candles turn out beautifully and burn effectively:
- Improper Wick Length: Always cut your wicks so they are longer than the vertical height of your jar *before* pouring the wax. This gives you plenty of wick to anchor and adjust. You will trim them down to the correct 1/4 inch length *after* the wax has set. Too short initially, and it will be difficult to secure; too long after setting, and it can cause a large flame and excessive soot.
- Unsecured Wicks: A wiggly wick can lead to uneven burning and tunneling. Secure your wick to the bottom of the empty jar using a small dab of melted wax or a purchased wick anchor. Then, use a chopstick, pen, or pencil horizontally across the top of the jar to keep the wick perfectly upright and centered during the cooling process. A crooked wick will result in an uneven melt pool and a less efficient burn.
- Adding Essential Oils at the Wrong Temperature: Essential oils are delicate and can evaporate quickly if added to wax that’s too hot. Allow your melted wax to cool slightly, typically to around 135-140°F (57-60°C), before stirring in your essential oils. This optimizes scent retention and ensures a stronger fragrance throw.
- Pouring Wax Hastily: Pour your wax slowly and steadily into the jars. Rapid pouring can create air bubbles and an uneven surface. Ensure your jars are on a protected, level surface to prevent spills and ensure an even set.
- Neglecting Your Workspace: Wax spills are inevitable in candle making. Always pour your candles over a protected surface like old newspaper or cardboard. Trust me, cleaning dried wax off your countertops or stovetop is a chore best avoided!
- Disposing of Leftover Wax Incorrectly: Never, ever pour leftover melted wax down your drain. Wax will solidify in your pipes and cause serious clogs. Allow any excess wax to cool and solidify in its melting pot, then scrape it out and dispose of it in the trash. The pot can then be cleaned more easily.
- Insufficient Curing Time: While it’s tempting to light your candle immediately, soy candles benefit greatly from a curing period of at least 24-48 hours, and ideally 1-2 weeks. This allows the wax and fragrance to properly bind, resulting in a stronger scent throw and a more efficient, longer burn.
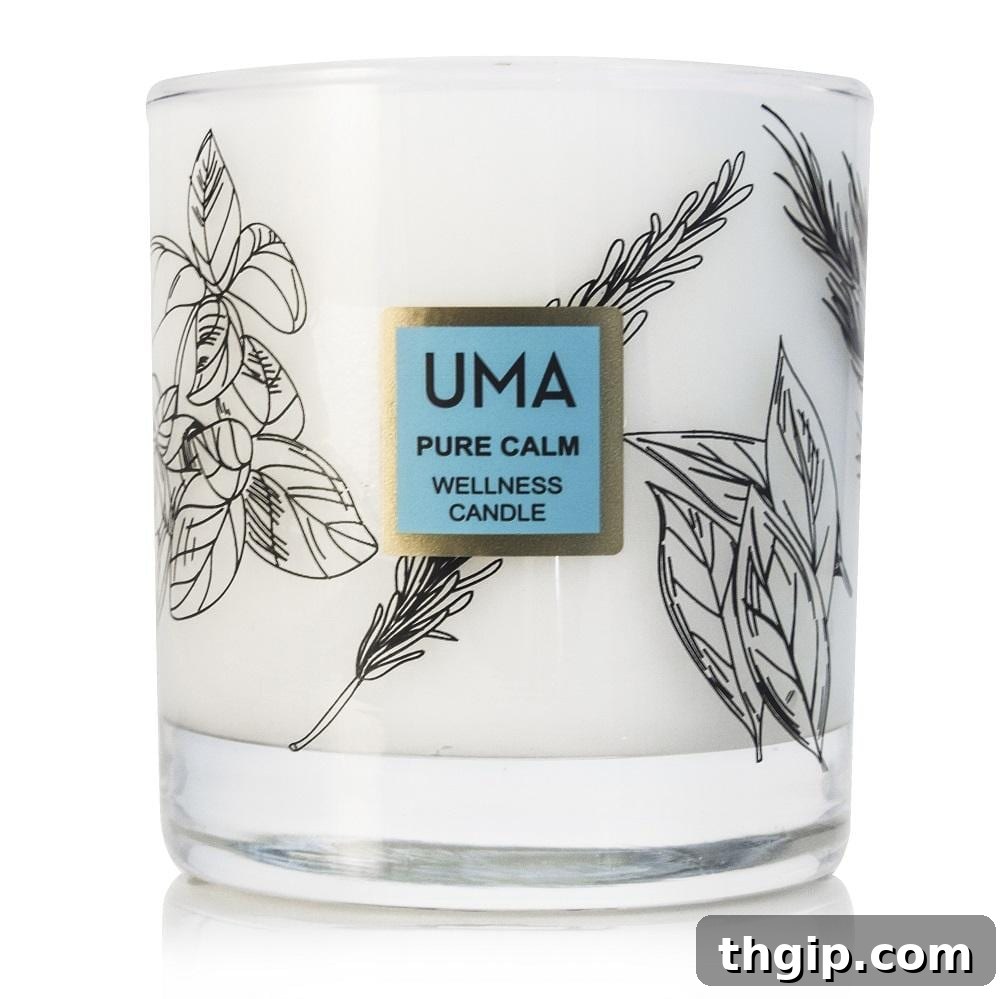
Prefer Store-bought Candles? Here are my favorite Non-Toxic Candle Brands!
Customization Ideas for Your Homemade Candles
One of the most exciting aspects of making your own candles is the endless potential for customization. Here are some ideas to make each candle uniquely yours:
- Essential Oil Blends: Don’t stick to single scents! Create complex and inviting aromas by blending different essential oils.
- Relaxing Blend: Lavender + Chamomile + Cedarwood
- Uplifting Blend: Lemon + Peppermint + Rosemary
- Fall/Winter Blend: Cinnamon + Clove + Sweet Orange
- Fresh & Clean: Eucalyptus + Tea Tree + Lemon
- Romantic Blend: Ylang Ylang + Rose + Sandalwood
- Natural Colorants: While essential oil candles often embrace a natural, creamy white or off-white hue, you can add natural colorants if desired. Use small amounts of mica powder (cosmetic grade) or natural dyes specifically designed for candle making. Add these with your essential oils, stirring until fully dissolved.
- Decorative Elements (with caution): For an extra touch of beauty, you can add dried botanicals like lavender buds, rose petals, or small pieces of dried citrus. However, it’s crucial to place these elements away from the wick. Items too close to the flame can catch fire. Consider scattering them on the wax surface only after the candle has largely set, and ensure they are well away from where the flame will reach.
- Unique Containers: Beyond mason jars, explore other heat-safe containers. Vintage teacups, ceramic bowls, old tin cans (cleaned thoroughly), or even small glass chemistry beakers can make charming and distinctive candle vessels. Always ensure they are sturdy, heat-resistant, and won’t crack under heat.
- Layered Scents: For a truly unique experience, consider pouring layers of different scented wax. Allow each layer to set partially before pouring the next to create distinct bands of color and fragrance that evolve as the candle burns.
Safety Tips for Burning Your Homemade Candles
While homemade candles are generally safe and enjoyable, it’s vital to follow basic fire safety guidelines to prevent accidents:
- Never Leave Unattended: Always supervise a burning candle. Extinguish it before leaving a room or going to sleep.
- Keep Away from Flammables: Place candles on a stable, heat-resistant surface, away from curtains, papers, clothing, or any other combustible materials.
- Trim Wicks Regularly: Before each burn, trim your wick to 1/4 inch. A longer wick can create a larger flame, more soot, and cause the candle to burn too quickly.
- Avoid Drafts: Burning a candle in a drafty area can cause an uneven burn, excessive flickering, and potential fire hazards.
- Don’t Burn for Too Long: Generally, candles should not be burned for more than 3-4 hours at a time. This allows the wax to melt evenly and prevents the container from overheating. Allow the wax to cool and solidify before relighting.
- Stop Burning at 1/2 Inch of Wax: Discontinue use when only about 1/2 inch of wax remains at the bottom of the container. Burning candles down to the very bottom can overheat the container and potentially crack it or damage the surface it’s resting on.
- Keep Out of Reach: Ensure candles are out of reach of children and pets.
Inspired to try more DIY projects? Explore these other homemade creations you might enjoy:
- DIY Gingerbread Body Scrub
- Fall Simmering Spices for a Cozy Home
- DIY Yogurt Face Mask for Radiant Skin
Conclusion: Embrace the Art of Candle Making
Making your own candles at home is more than just a craft; it’s an opportunity to infuse your living space with personalized comfort and natural aromas. By choosing clean-burning soy wax and pure essential oils, you create products that are not only beautiful but also healthier for you and your family. Whether you’re seeking a calming evening ritual, a thoughtful handmade gift, or simply a fun new hobby, this guide provides all the knowledge you need to get started. So gather your supplies, unleash your creativity, and let the soothing glow of your homemade essential oil candles transform your home into a sanctuary of peace and fragrance. Happy candle making!